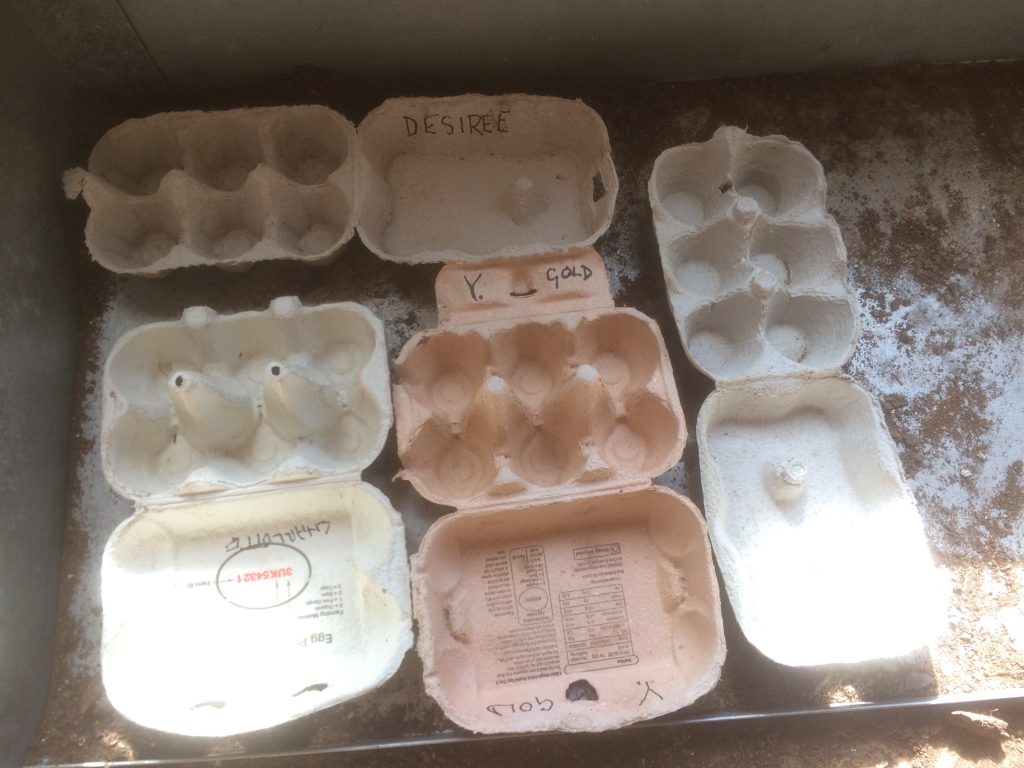
I got a call from a friend who asked me if he could grow seeds in an egg box. I thought about this and recon they could be fantastic for starting off peas. I found four egg boxes at home. First I removed any sticky labels on the lids.
I filled the boxes up with a mix of garden soil and old potting compost. If you don’t have potting compost it doesn’t matter, just use garden soil and be sure to make sure to remove any small stones, weeds and crumble it into as fine a tilth as you can. I then sowed twenty seeds into each box in two rows as you can see. Thiose 80 seeds will be enough to grow a 1 metre row of delicious peas.
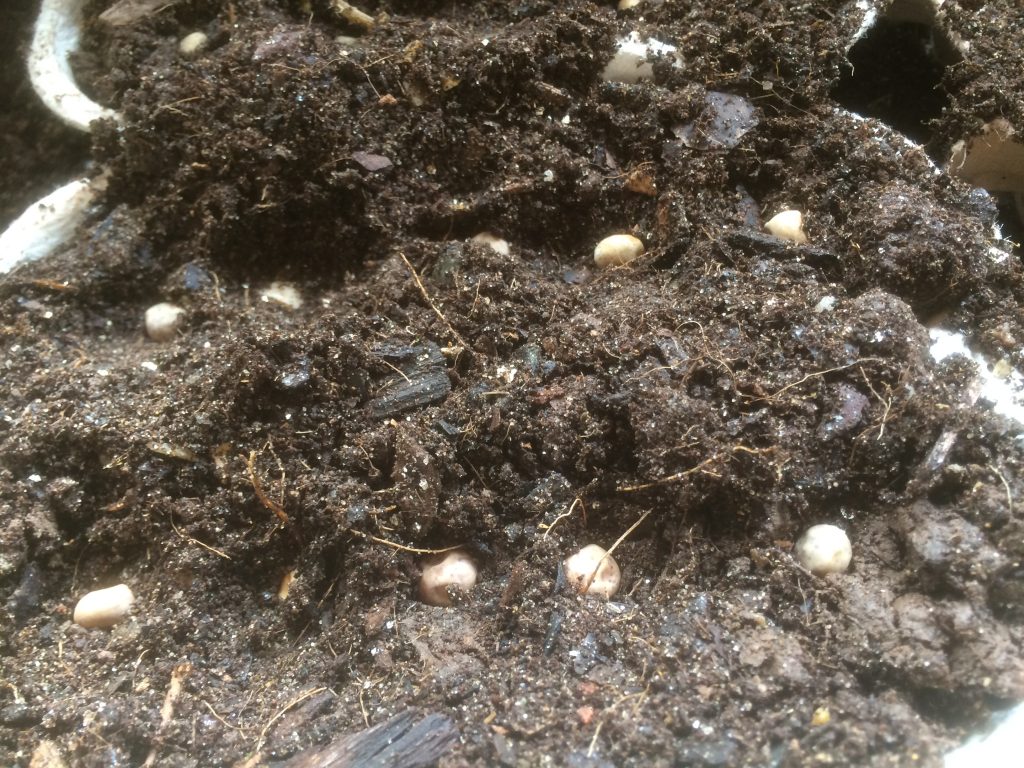
Then I gently pressed the seeds into the soil
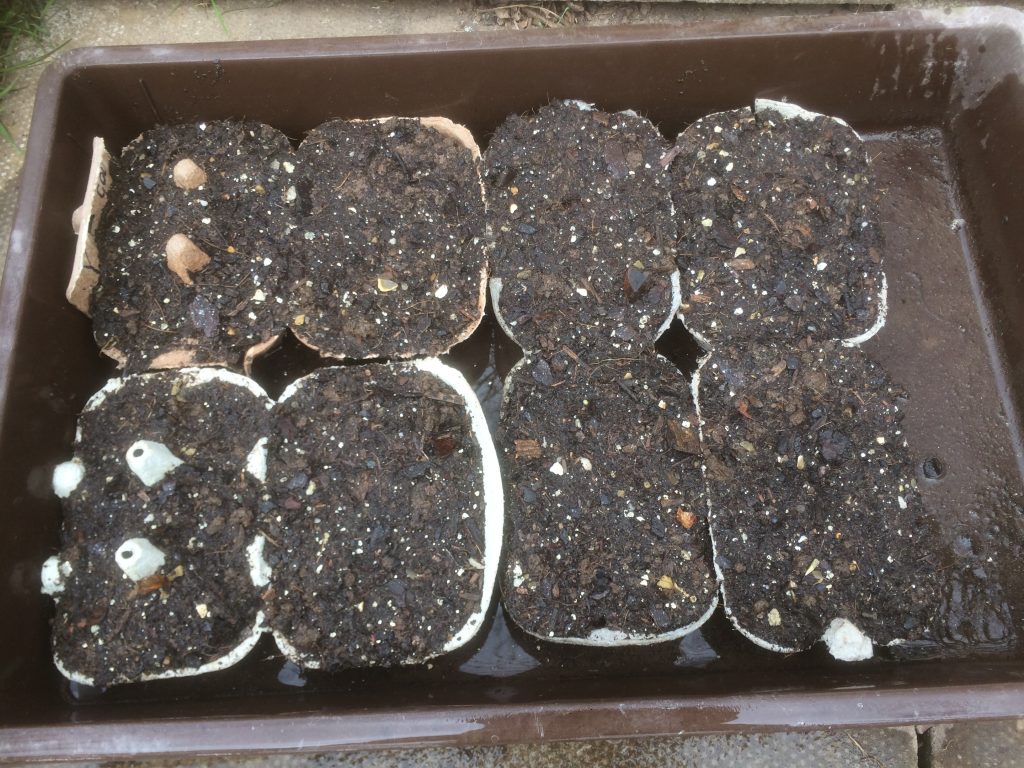
And then covered the seeds with more soil. The peas need to be about 1 cm below the surface. I then put them in a large tray and very gently watered the boxes using a watering can with a fine rose. if you don’t have one of these it doesn’t matter. Water using a small jug. You don’t want to wash the soil out of teh boxes, exposing the seeds.
Now, leave the boxes in a sheltered spot outside. Mice love germinating peas so it is worth putting some cardboard or even a sheet of glass if you have some over the boxes. In a week or so the seeds will germinate and then any cover will need to be removed. Be sure that the soil is kept moist. When the seedlings are about 2 cms high I will plant the boxes straight into the ground where the cardboard will decompose and the peas will happily grow away. I sowed the seeds on 1st April. First emergence was on 11th April and I planted them out on 16th April
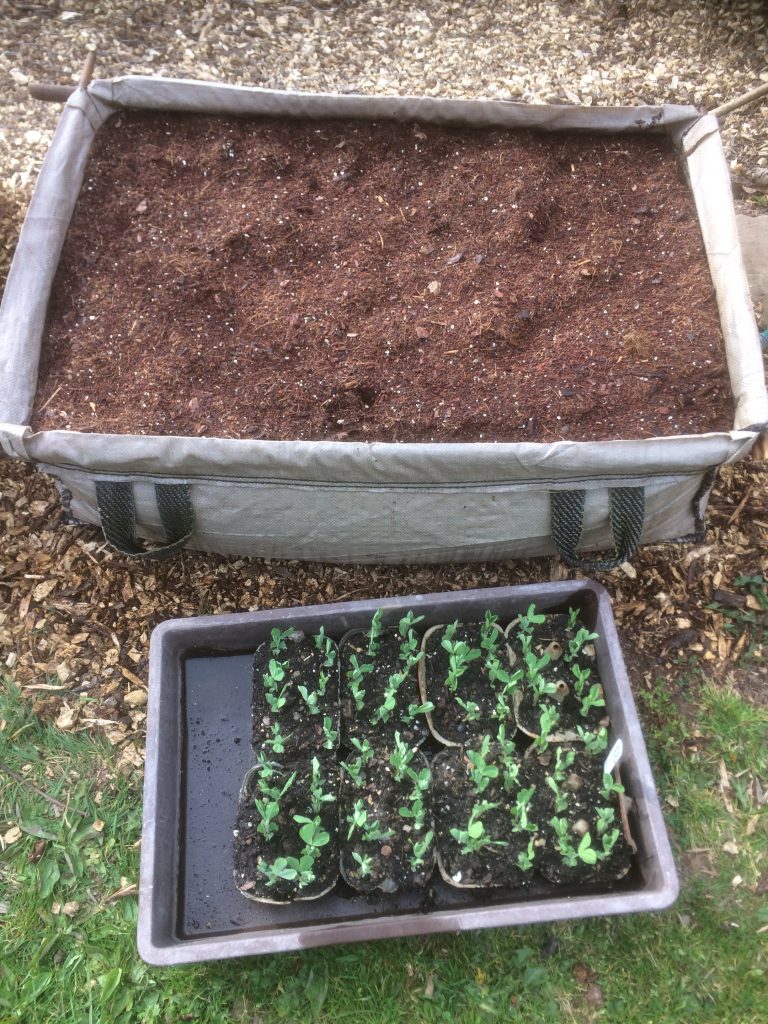
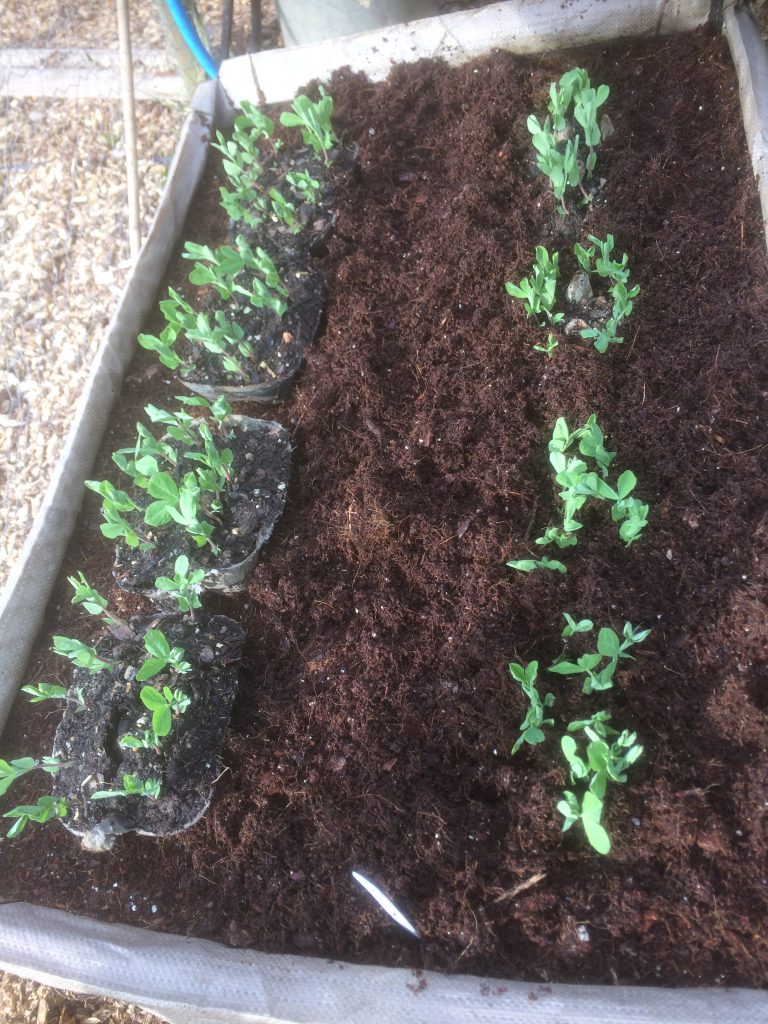
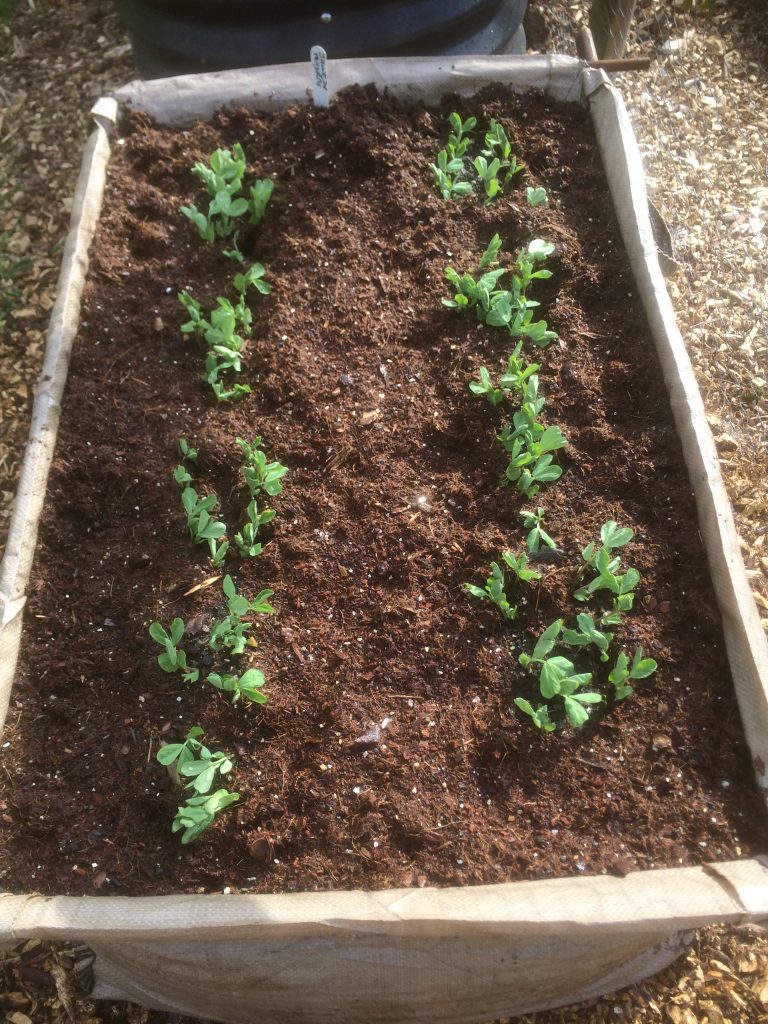
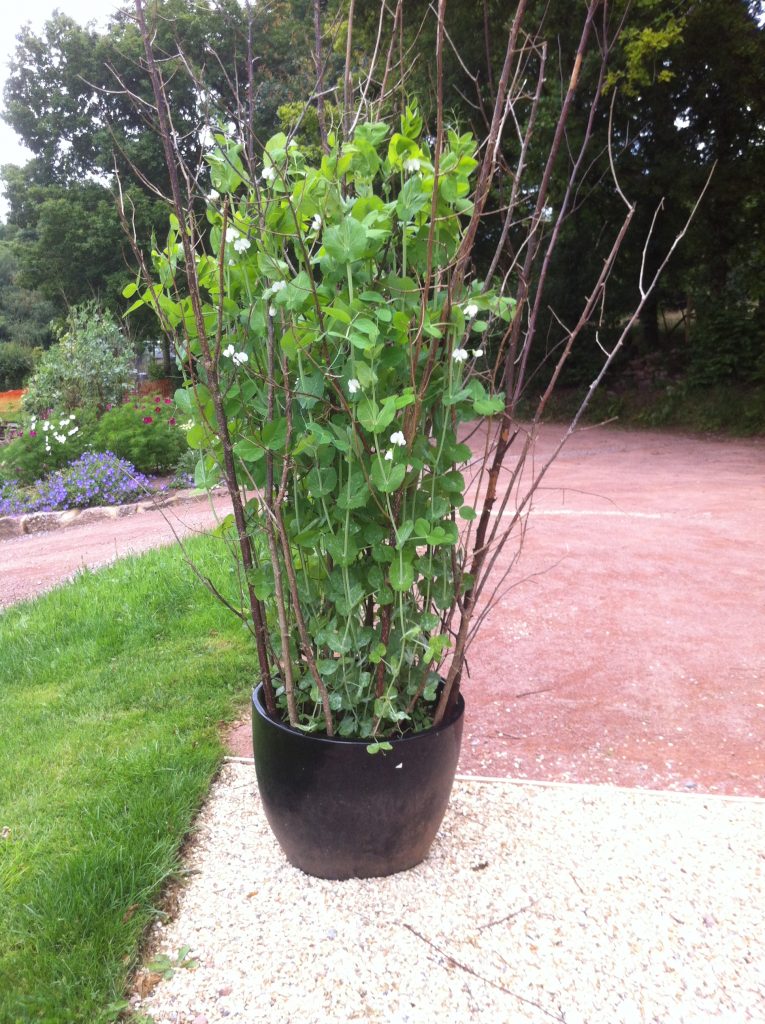
I planted the egg boxes with their seedlings into a large container, although they will grow just as well – probably better – if planted directly into the ground. However, peas grow close together which can mean weeding is quite difficult and peas are not a crop to grow through a mulch like cardboard. If you have some cultivated ground they will do very well
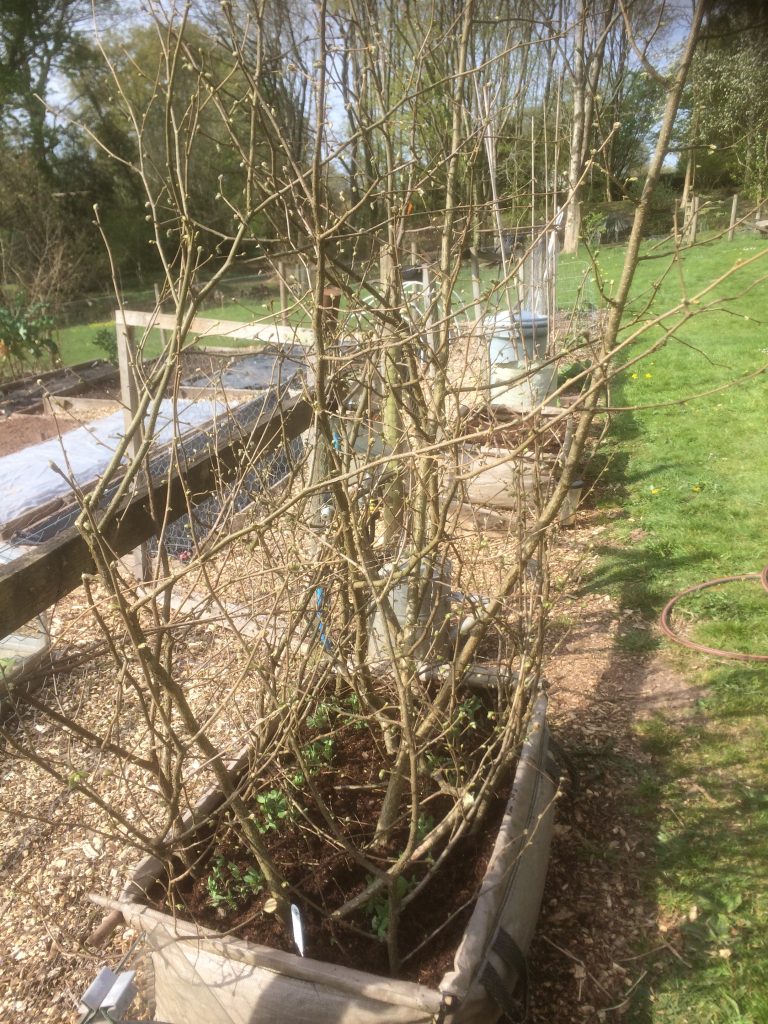
These peas are a heritage mange-tout variety called Jaune de Madras which will grow to about 1.8 to 2 metres, so they need support. There are several ways to do this. As you can see I am using hazel twigs and stems for the peas to grow through. However, you can use canes spaced about 10cms apart with string tied around them to create a type of net for the pea tendrils to attache themselves to. One can also buy pea netting which does the same job and can also be used to support climbing French beans and runner beans.
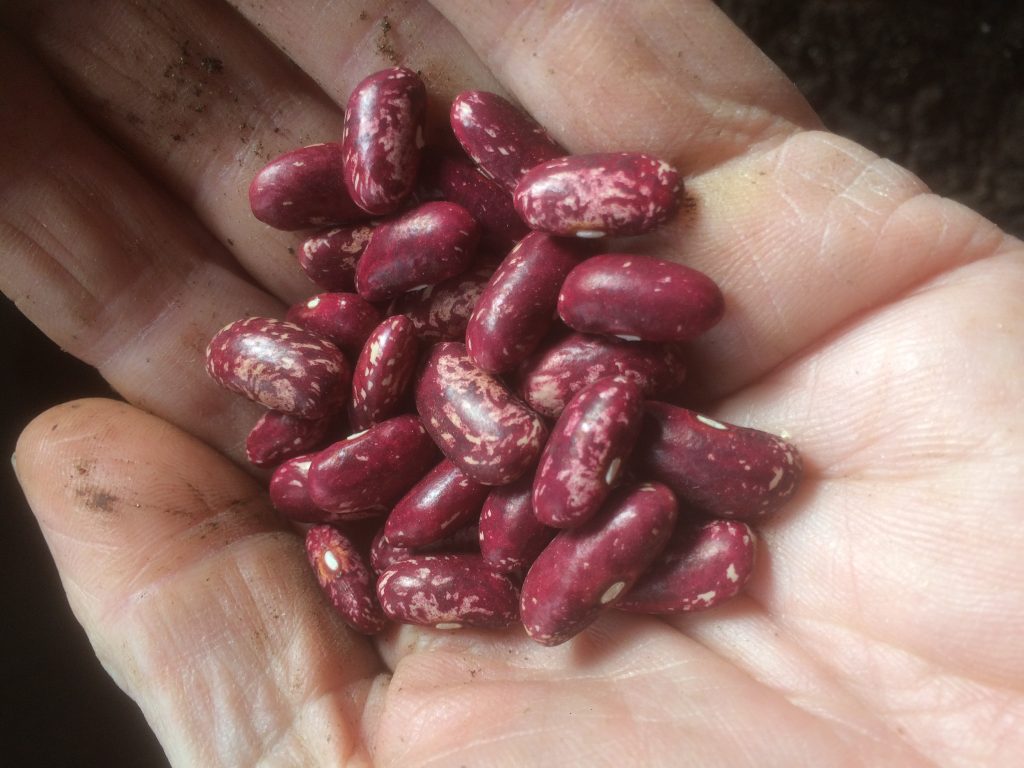
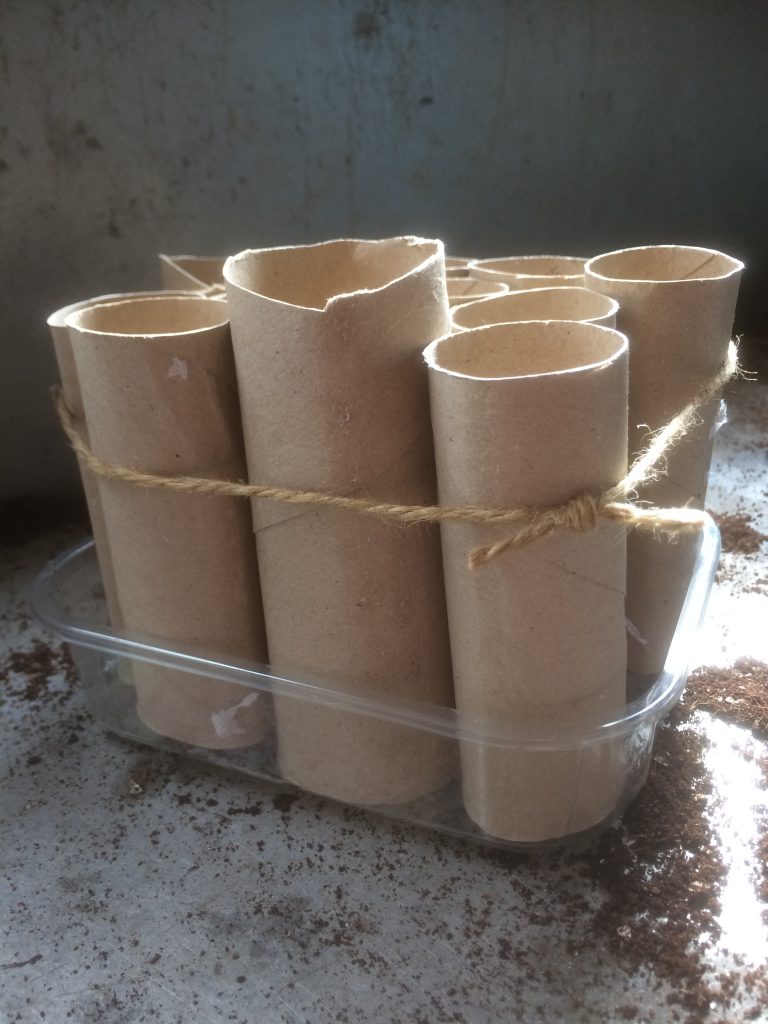
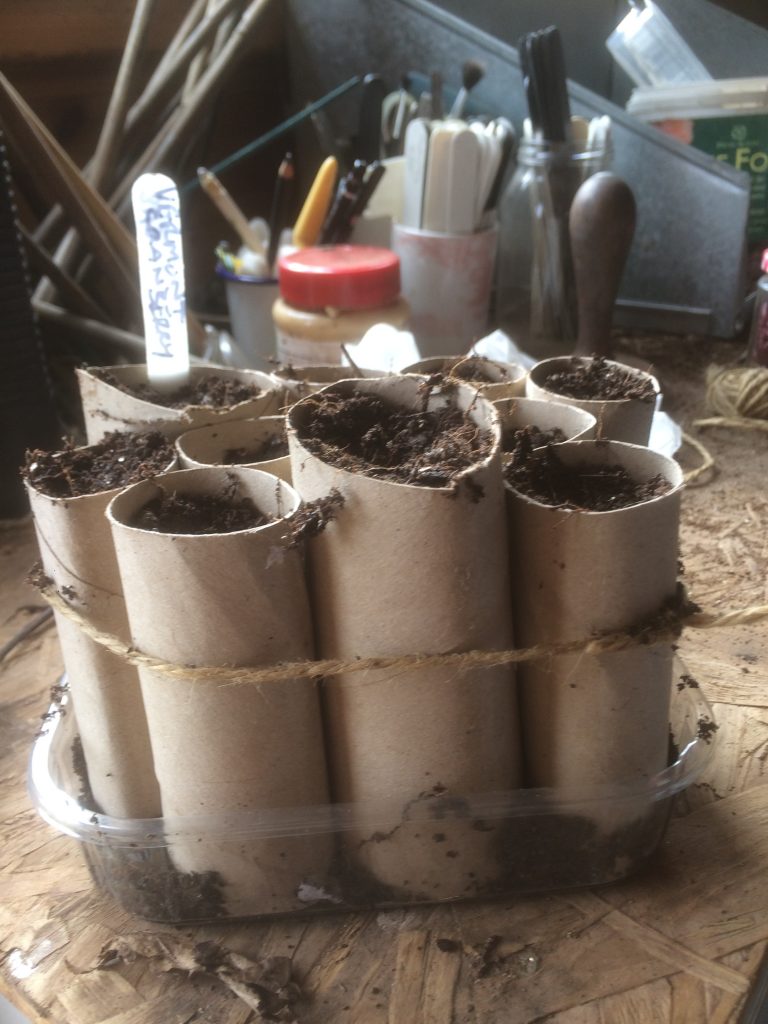
Last week in part one of this series of posts I suggested that all one needs to grow beans in a corner of even the most neglected garden requires no knowledge or expertise. Now is a good time to sow some bean seeds. In this demo I will be sowing a dwarf French bean called Vermont Cranberry. It is a delicious American heirloom that is held by the Heritage Seed Library. However, any variety of bean you can find will do except the dry beans you might have in your store cupboards which won’t grow into tasty green beans. If you have a few bamboo canes or sticks about 2 metres long you could instead sow climbing French beans or runner beans. It isn’t too late to sow broad beans either and for those you don’t need any canes. All you need are receptacles to sow the seeds into and something contain them. Loo rolls are ideal, as are used yoghurt or cream pots which you have made some drainage holes in. In this case I am using a mix of loo-roll centres and slightly larger kitchen-towel centres cut in half. I have put them into a plastic container that once held tomatoes bought from my local supermarket. If using this type be sure that it has some drainage holes in the bottom. A piece of string tied around the top will stop them falling over or out!
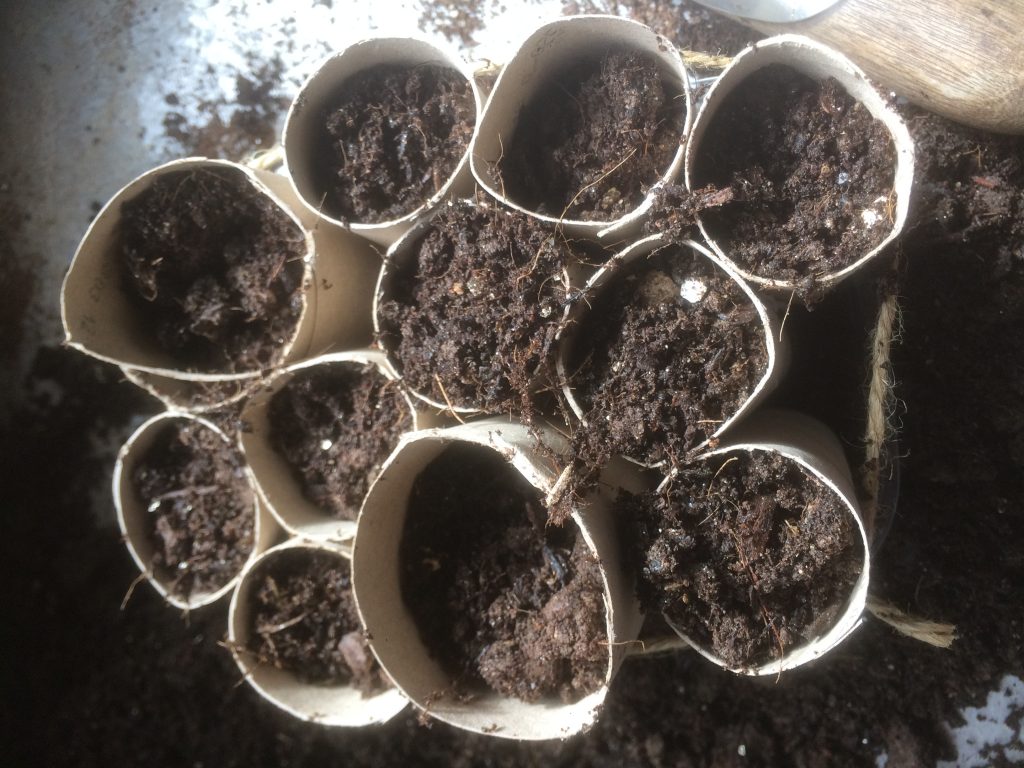
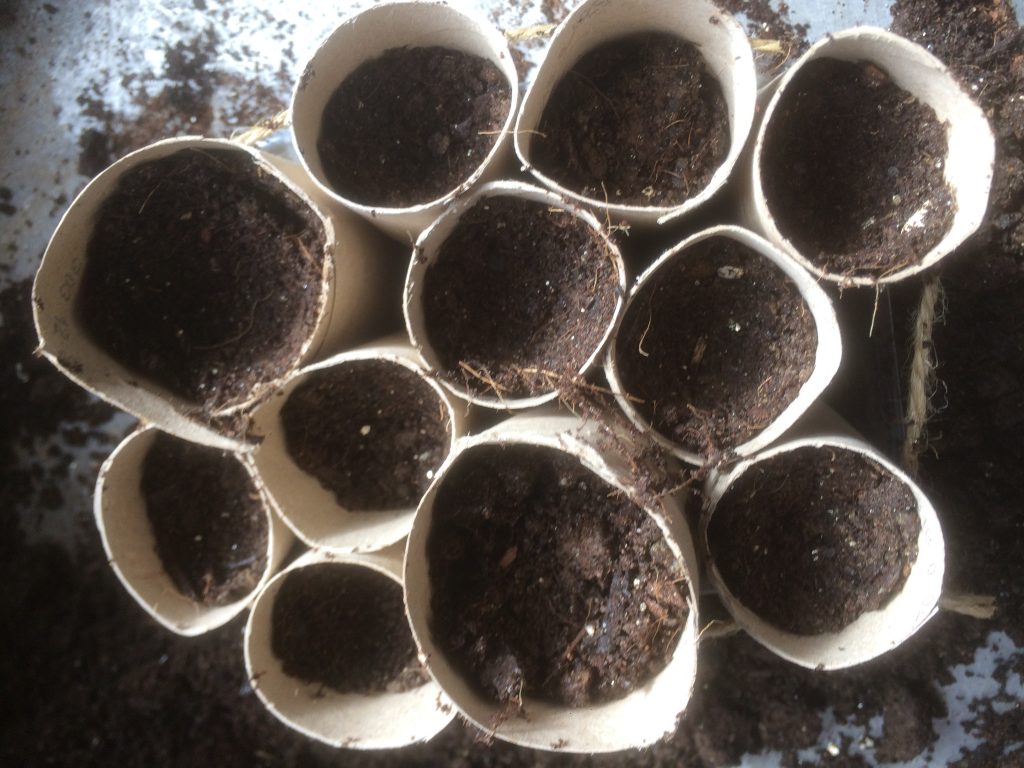
Next thing is to fill the loo rolls up with soil. As with lettuce and all seeds you want to sow in this way, you need the soil to be well sifted, free from stones and lumps. If you have any old, used compost it will do the job just as well because seeds do not need fertile soil in which to germinate. I fill the loo rolls to the top and then give them a gentle tap and firm the soil a little so that it looks like this.
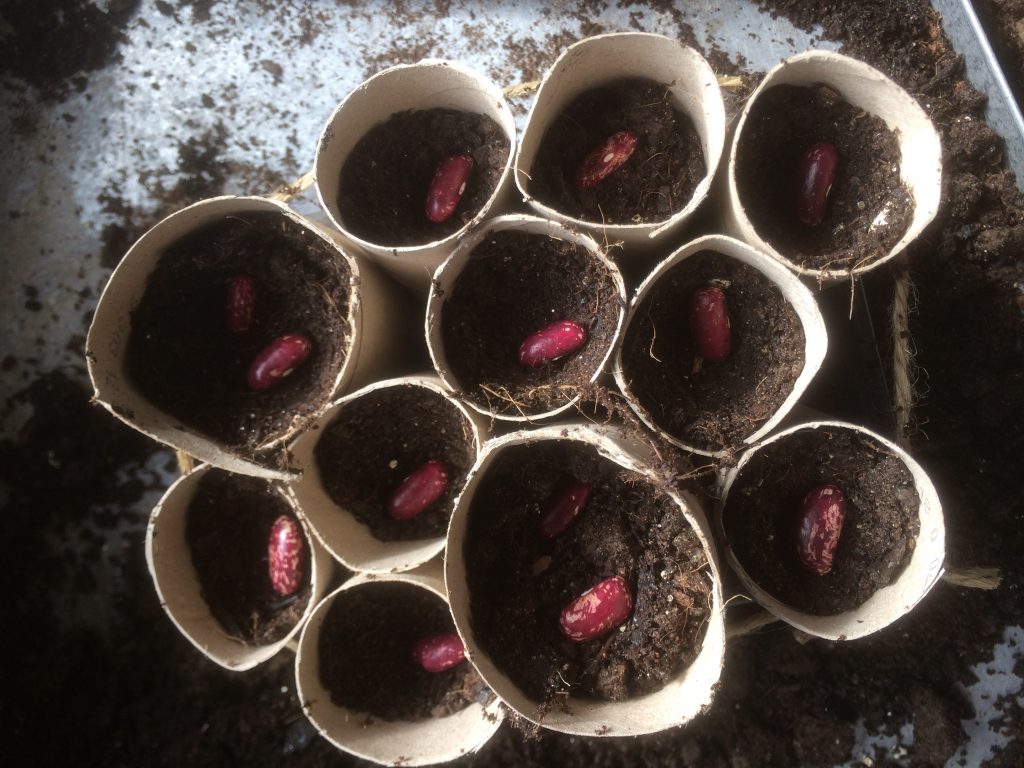
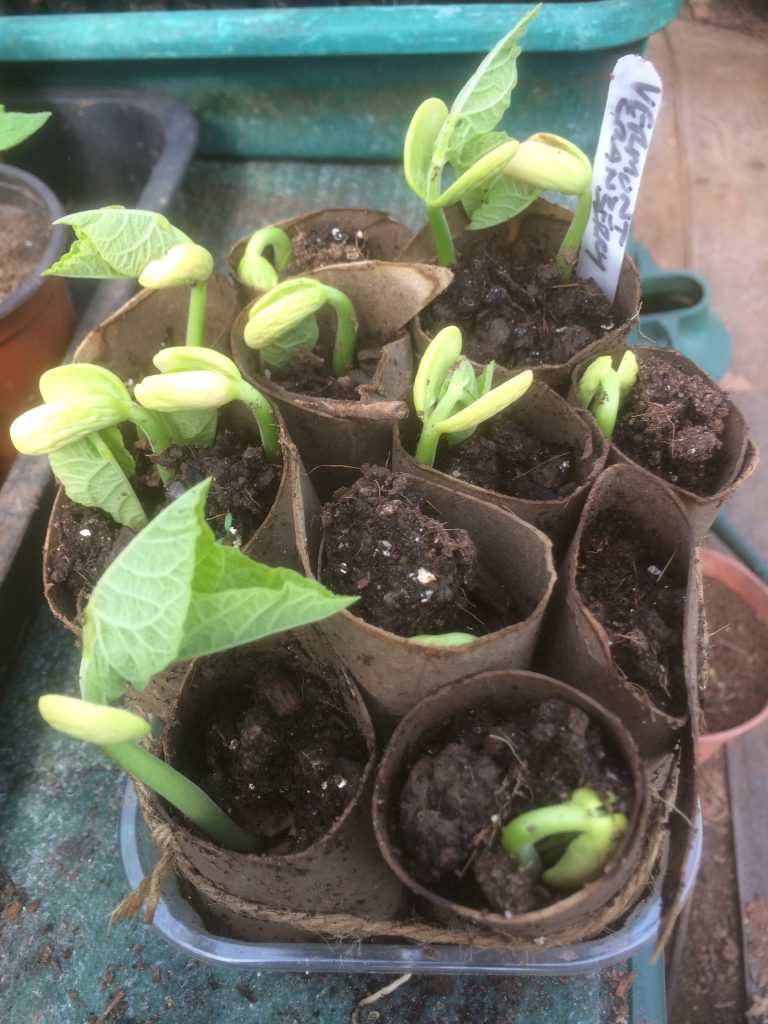
Now put one seed into each tube – two if the tube is large – and cover with soil. You want the seeds to be about 2cms below the surface. Not all the seeds will neceassrily germinate so having a few spares is always a good idea. I have sown into 12 tubes and hope I can end up with 10 plants.
Water the pots and put somewhere warm like a windowsill. You can put another plastic tray on top but this is not necessary. Be sure the soil is moist but not water-logged and hopefully in a week or so plants will start to emerge and don’t forget to add a label! If you put something over the top be sure to remove it as soon as the first seeds germinate. With luck you will have some bean seedlings to plant through your cardboard or equivalent weed suppressant early in May. Gardening requires patience!
I sowed the beans on 24th March and they started to emerge on 12th April
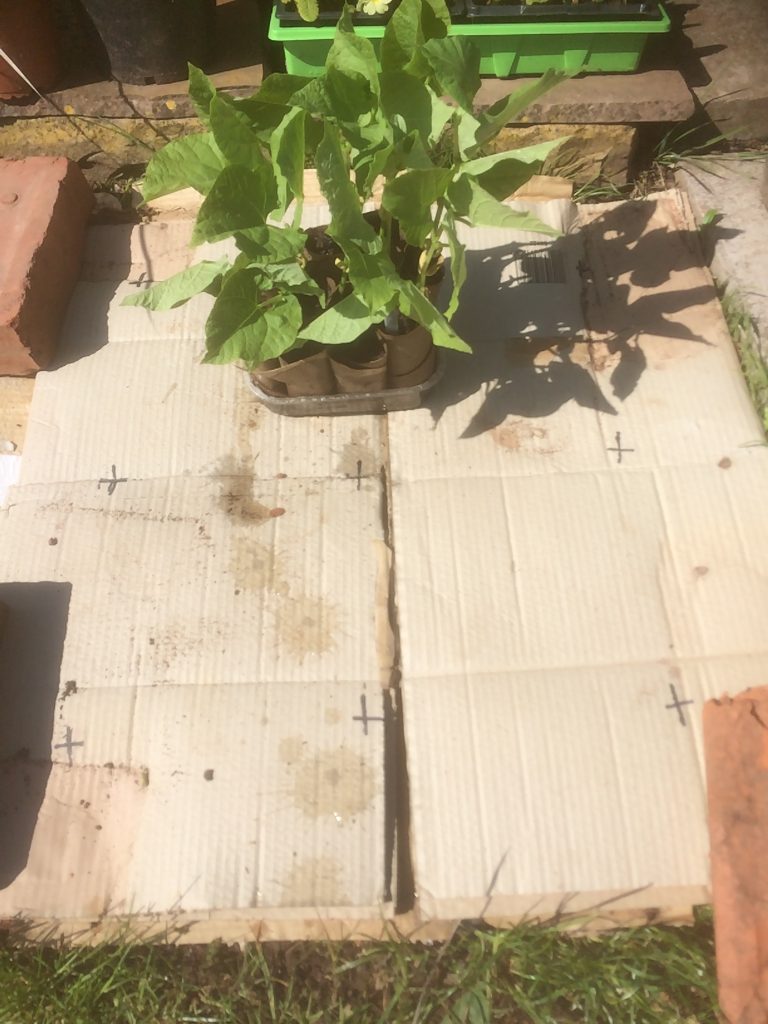
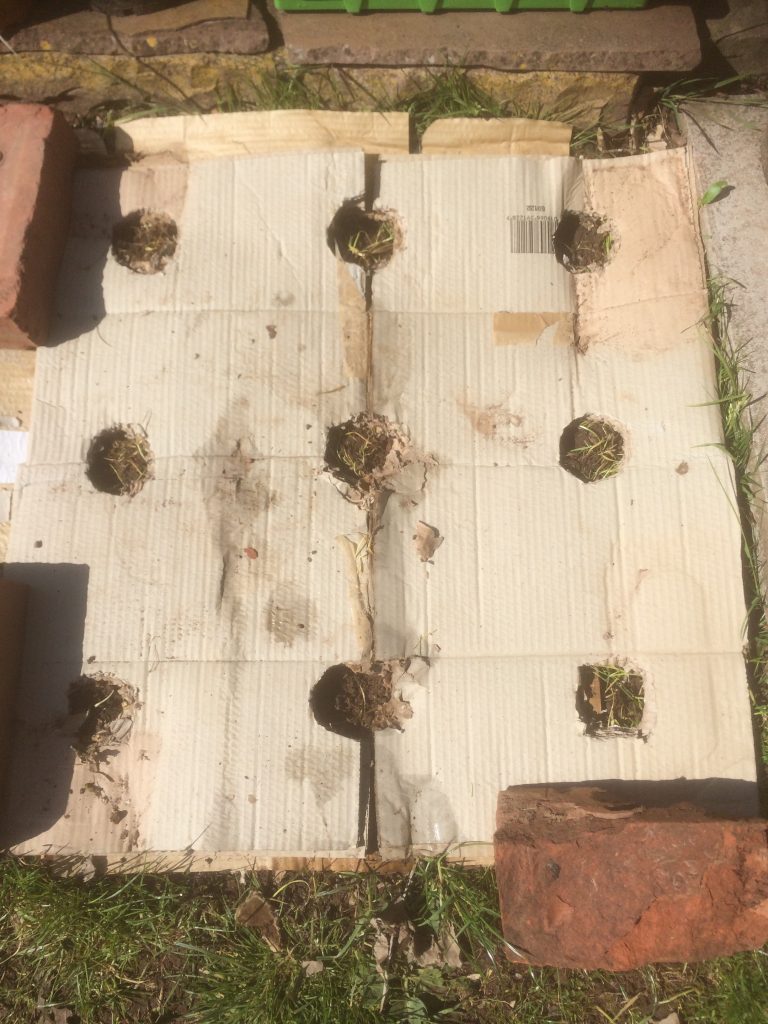
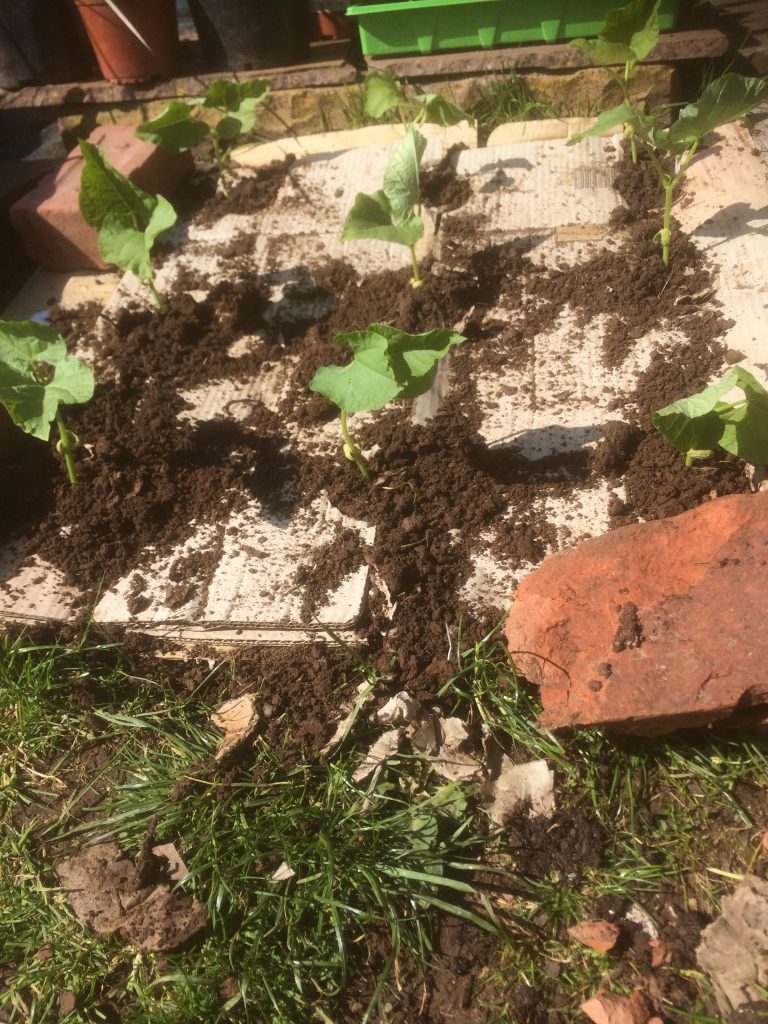
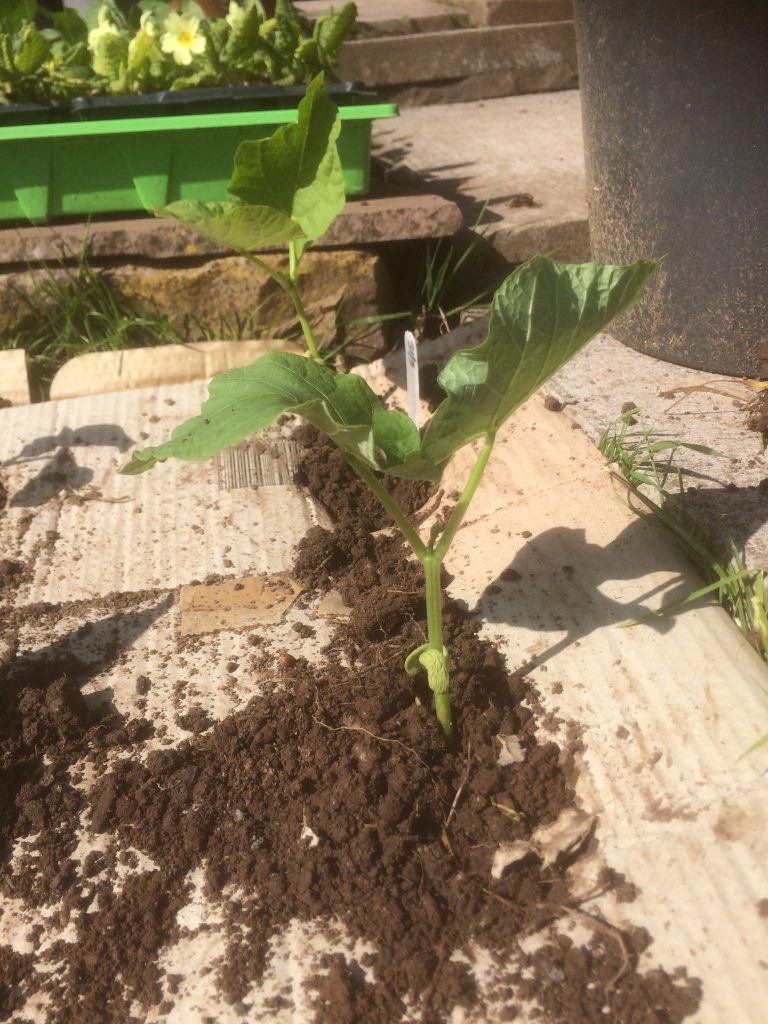
I then put them in a sheltered spot outside to acclimatise. This stage is called ‘hardening off’. On 19th April I planted the seedlings out. First I marked up on the cardboard where I wanted to plant them in a block spacings of 20cms x 20cms. Then I cut holes through the cardboard about 5cms in diameter – big enough to easily accommodate the loo-rolls. Using a trowel, although an old table spoon will do the job too, dig holes about 10cms deep – slightly more than the length of the loo rolls.and plant each bean ‘module’. Crumble the soil you remove before filling in the hole. Remove and small stones you might find and any grass/weeds that you dig out. If you have more than one bean growing in a loo roll ‘module’ you can gently tease them apart and plant separately.
Be sure to give the plants a good watering which will help them settle in. Just as long as there are no frosts there should be some beans to harvest in the next few weeks.
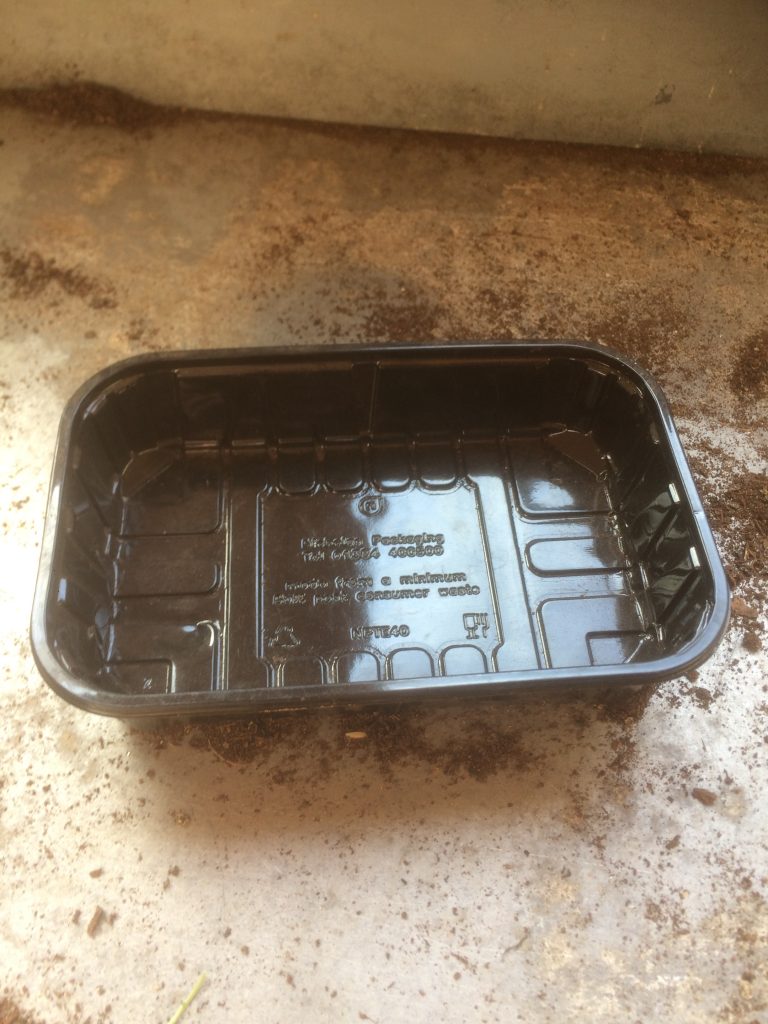
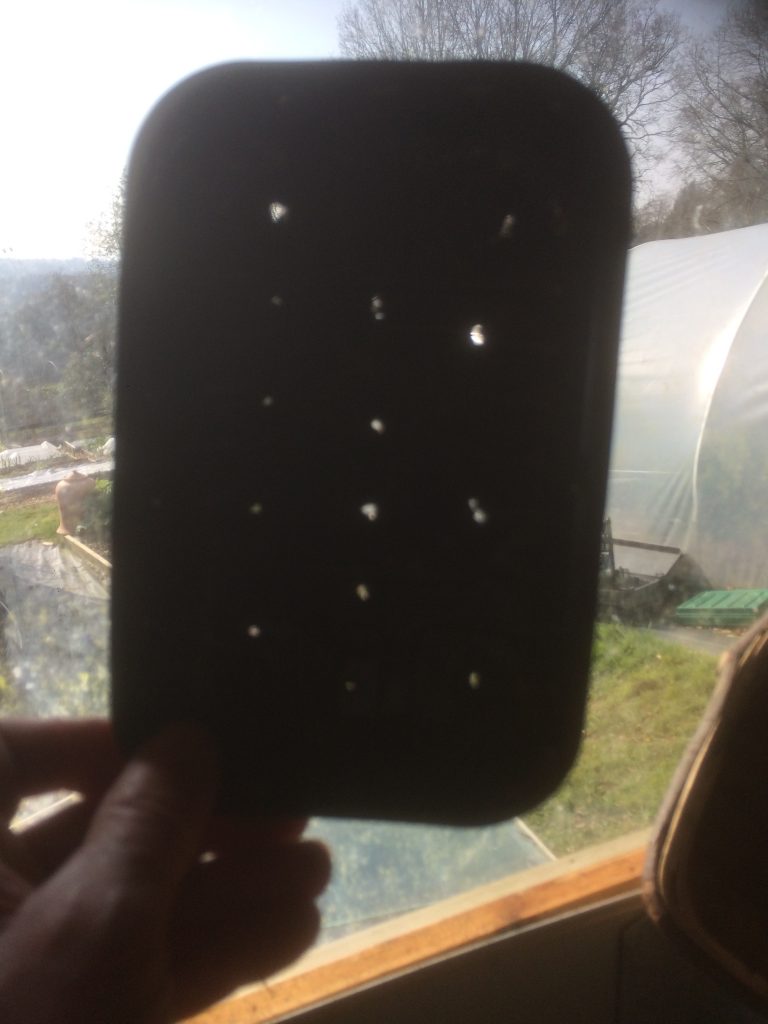
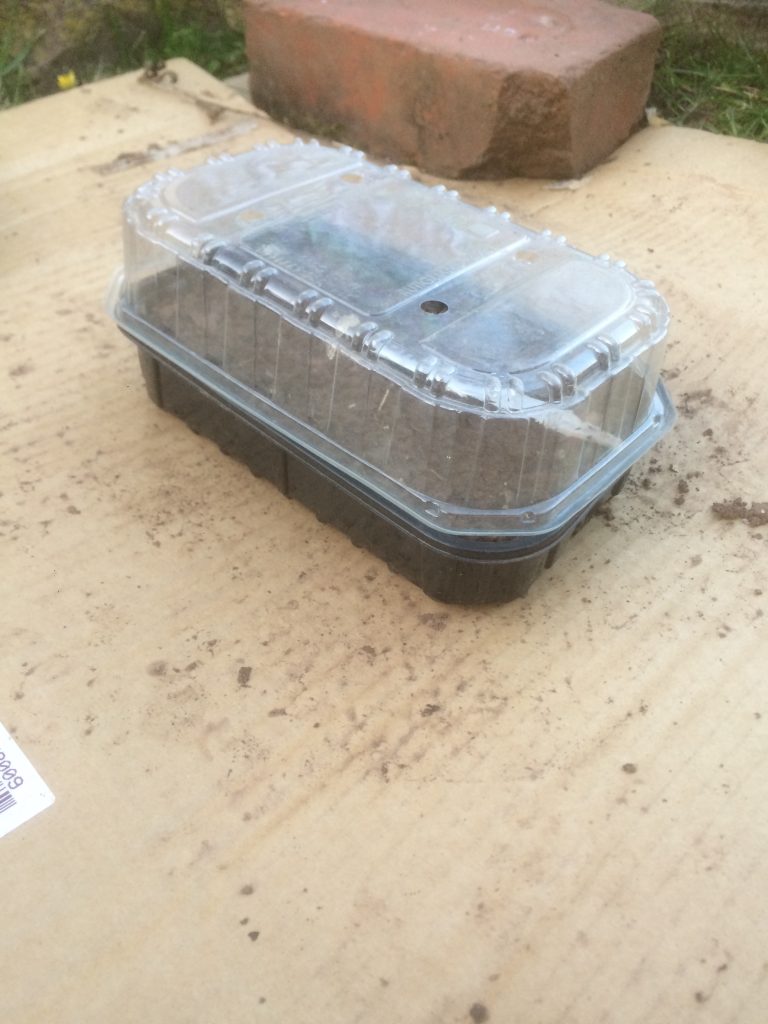
If you like lettuce now is a great time to sow some seeds. If you are going to plant seedlings through your weed barrier, (cardboard or similar) you will need to sow some seeds in a container like this one which I saved after a supermarket shop. You need to make some drainage hole with the tip of a sharp knife. If you are unable to buy some seeds see if a neighbour or a friend have some spare. All you need is literally a pinch.
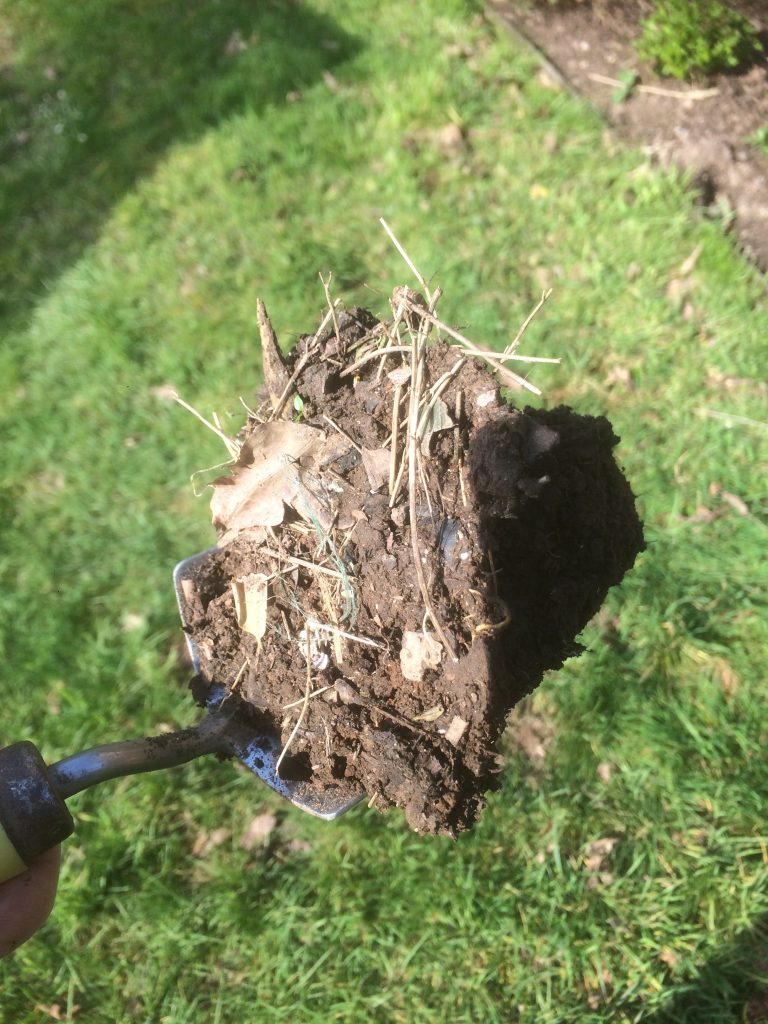
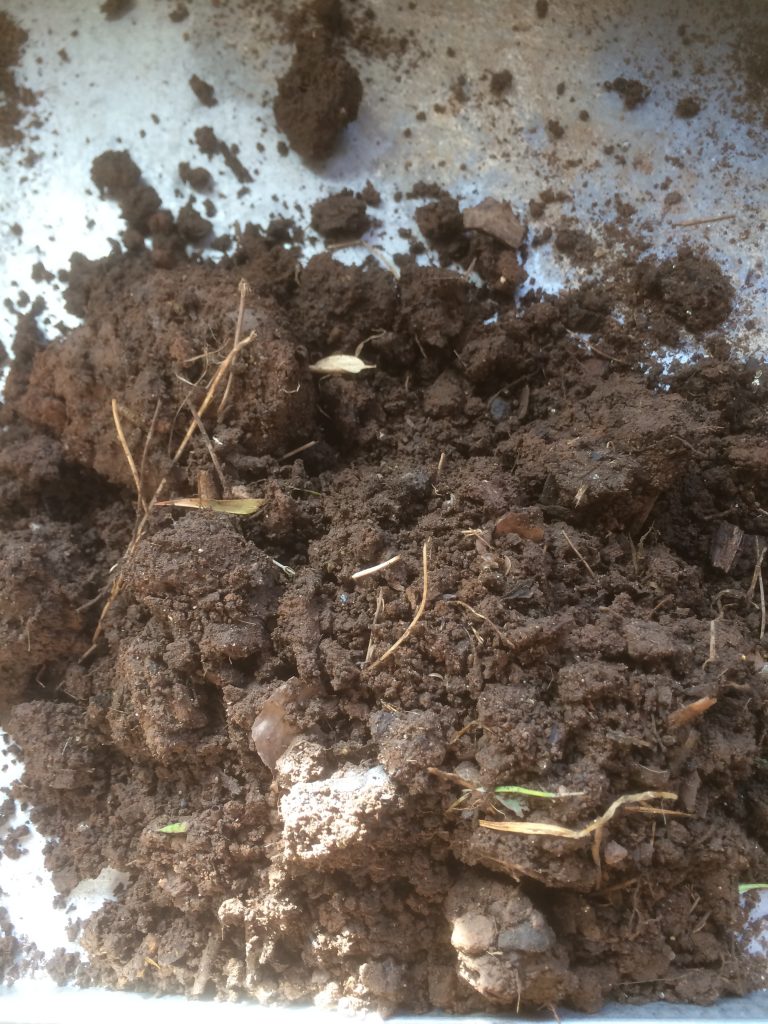
The next thing is to add soil. I have used my trowel to scoop up enough from a corner of my garden which I have sifted to remove bits of twig and then rubbed through my hands to make it more friable.
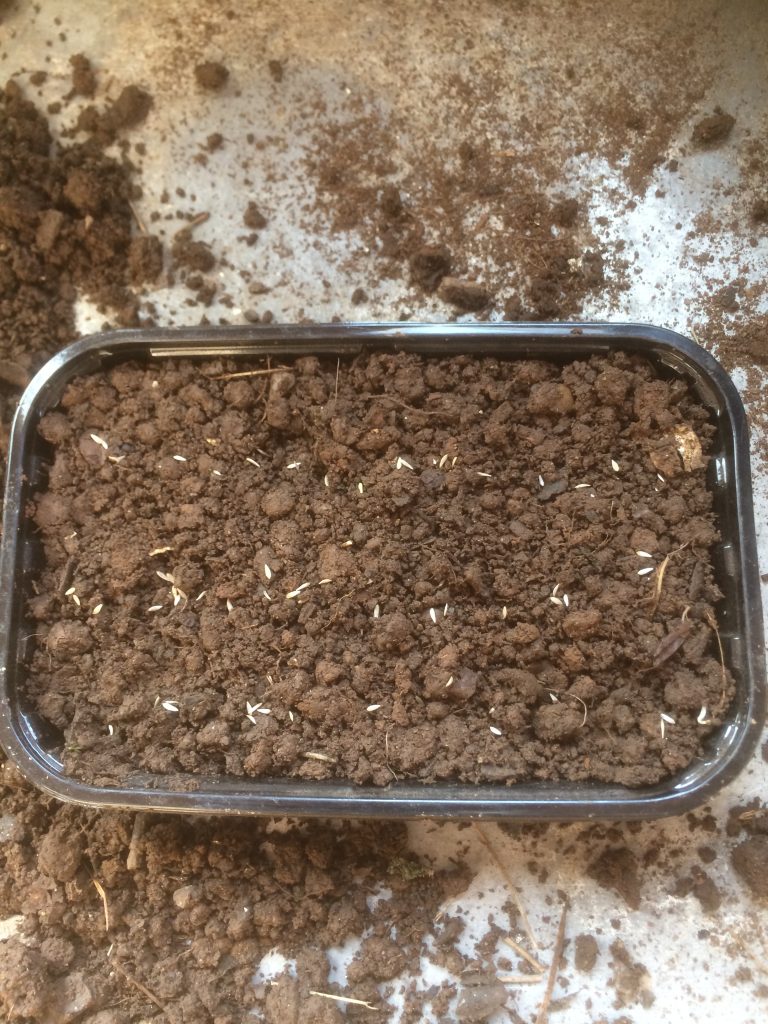
One of my favourite lettuces is Little Gem. They are a tasty, fast-growing little cos type. Because garden soil can contain lots of weed seed sow the seeds very thinly as in the photo in rows so you can identify them when they germinate and not weed them out by accident!
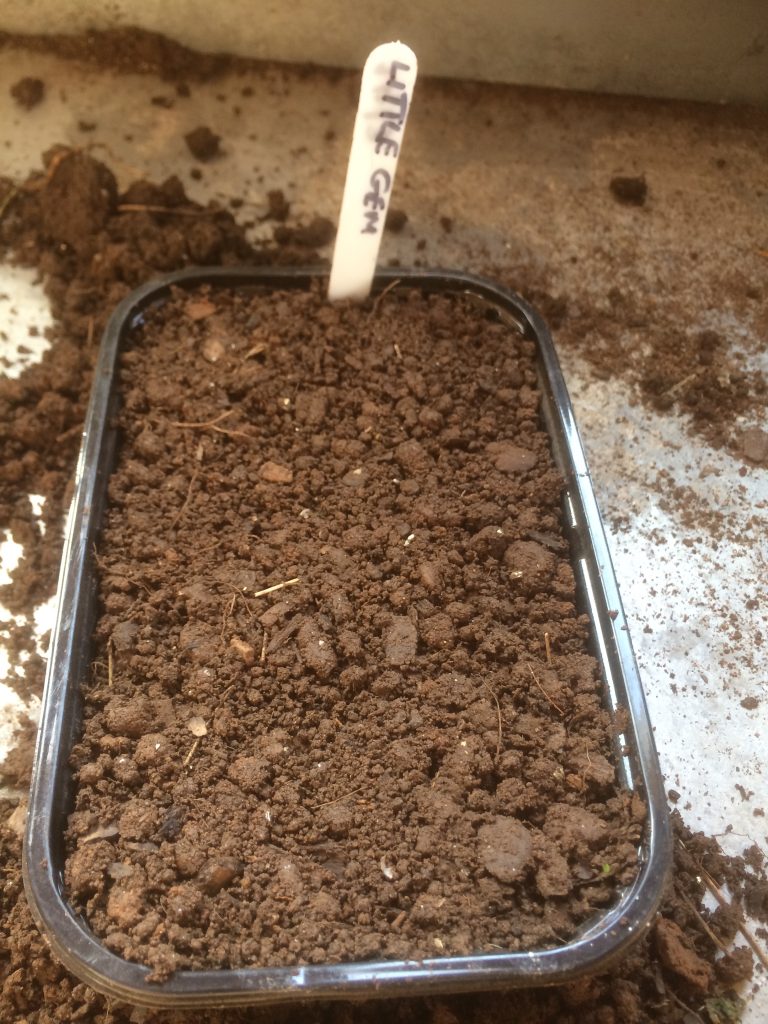
Once you have sown the seeds sprinkle a little soil over them, gently firm and then, if you have a watering can with a rose, lightly water. Otherwise water carefully using a jug. You want the soil to be moist, not sodden. I like to add a label and date to remind me what I have sown.
Now you need to put the seed tray somewhere light and warm. A windowsill in the kitchen is ideal. If you have another clear plastic container the same size you can put it on top like a mini-cloche. Alternatively cover with some cling film. With luck, in a few days you will see the seedlings start to emerge.
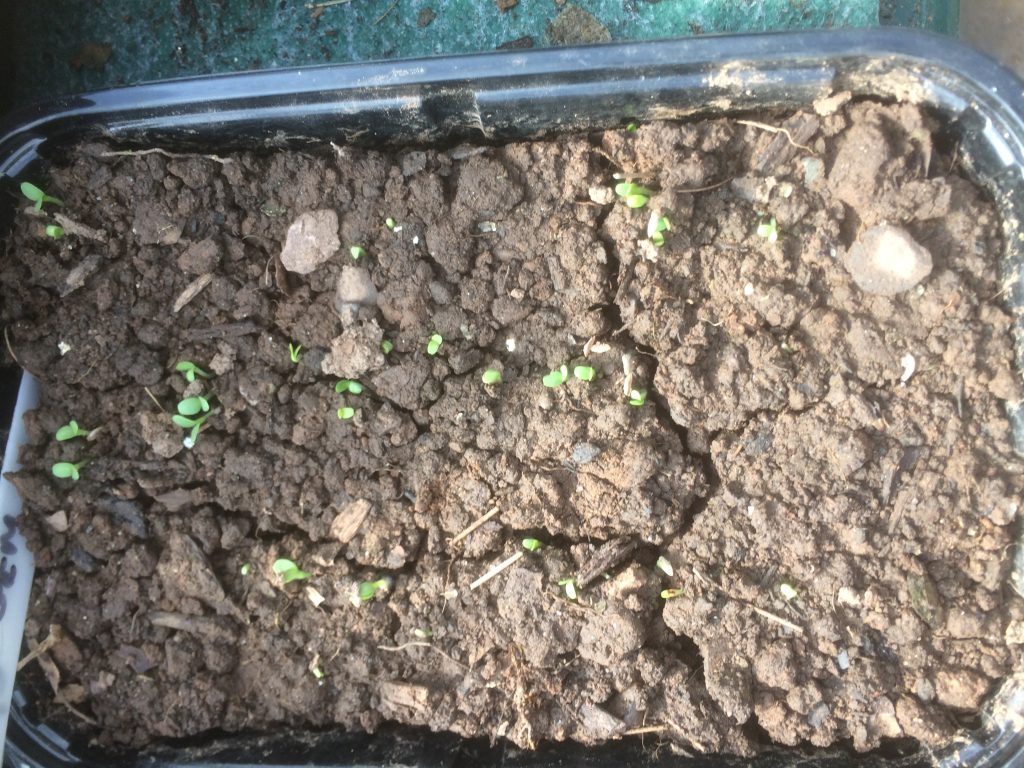
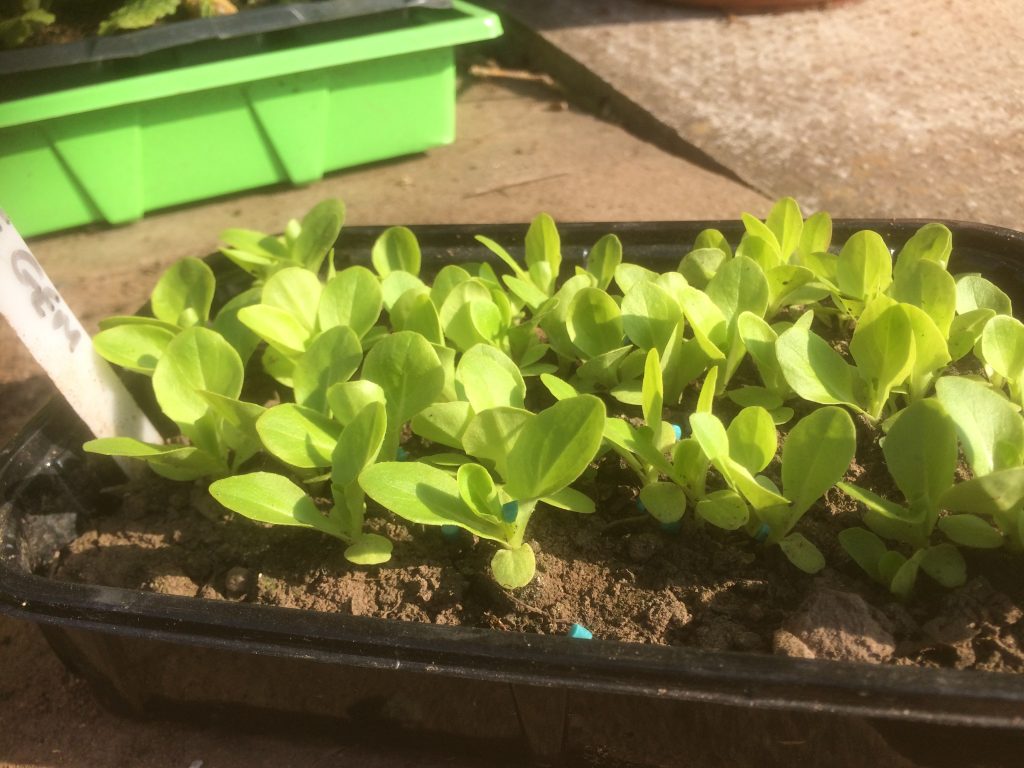
After just seven days the first lettuce seedlings have started to emerge. Keep the seedlings moist and grow on outside out of direct sunlight if you are keeping the cover on, otherwise a sunny spot is fine. Watch out for slugs nibbling them. It is worth checking the seedlings when it is dark and removing any slugs. But, hopefully this will not be a problem. As you can see in the photo, the seedlings are roughly in three rows. If any weeds emerge they will now be easy to identify and remove.
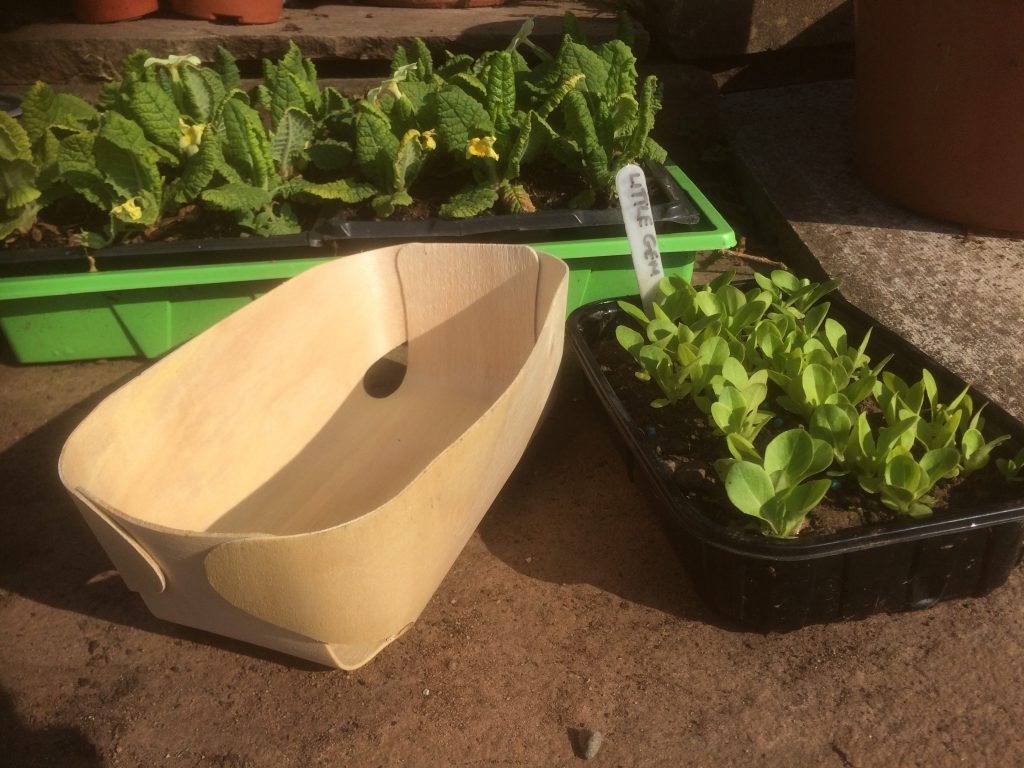
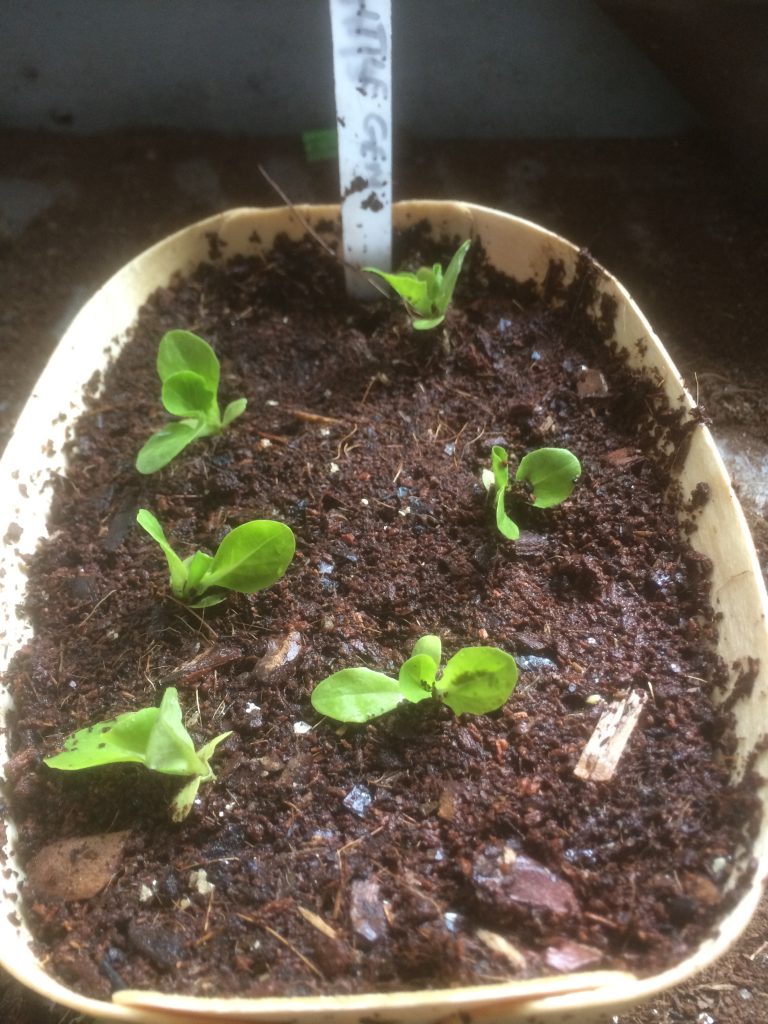
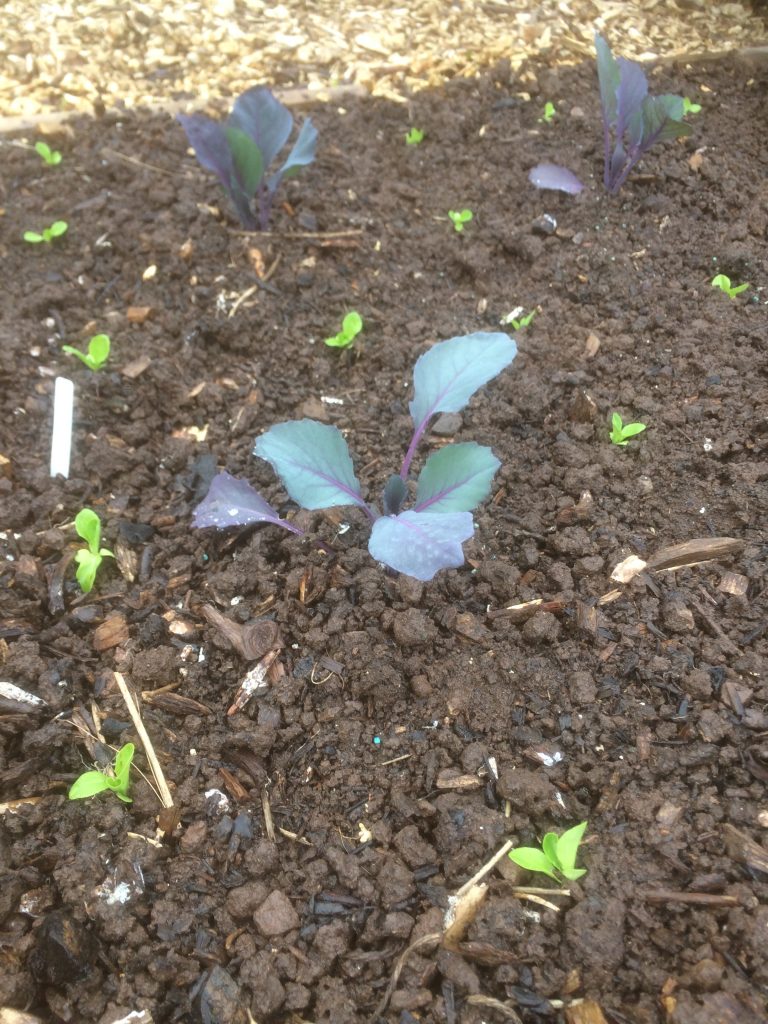
After two or three weeks the lettuce seedlings should have four true leaves and be ready for pricking out into a new container to grow on or be planted into the vegetable plot. If you have crops already planted out like young brassicas then inter-cropping with lettuce is a great way to make use of space. The lettuce should be ready to start harvesting long before the brassicas take over. Pricking out spacing about 5cms apart into a small container either using potting compost or garden soil is a great way to make use of surplus plants which can be given to friends, family and neighbours or to allow the seedlings to grow on and be planted out later for a successional crop.
an ideal container
pricking out
intercropping
ready for planting up
If you have some clear ground then you can plant out the seedlings. These are Little Gem which can be spaced 15cms apart in blocks or rows. As with all vegetables that are being transplanted lettuce can be planted through a weed suppressant like cardboard. These lettuce should be ready to harvest in about a month. Having transplanted your lettuce seedlings sow some more for a continual supply.
We can grow delicious vegetables pretty much anywhere and at virtually no cost,
I am starting this post on 23rd March to help anyone who has even the roughest patch of garden, however large or small, to start growing a few delicious, healthy vegetables. I am doing this myself to demonstrate how easy and trouble free it can be. The first thing to do is select a site. Ideally you want to grow your vegetables in the sunniest and warmest part of your garden.. However, even if the ground is shaded you can still grow lots of great veg.
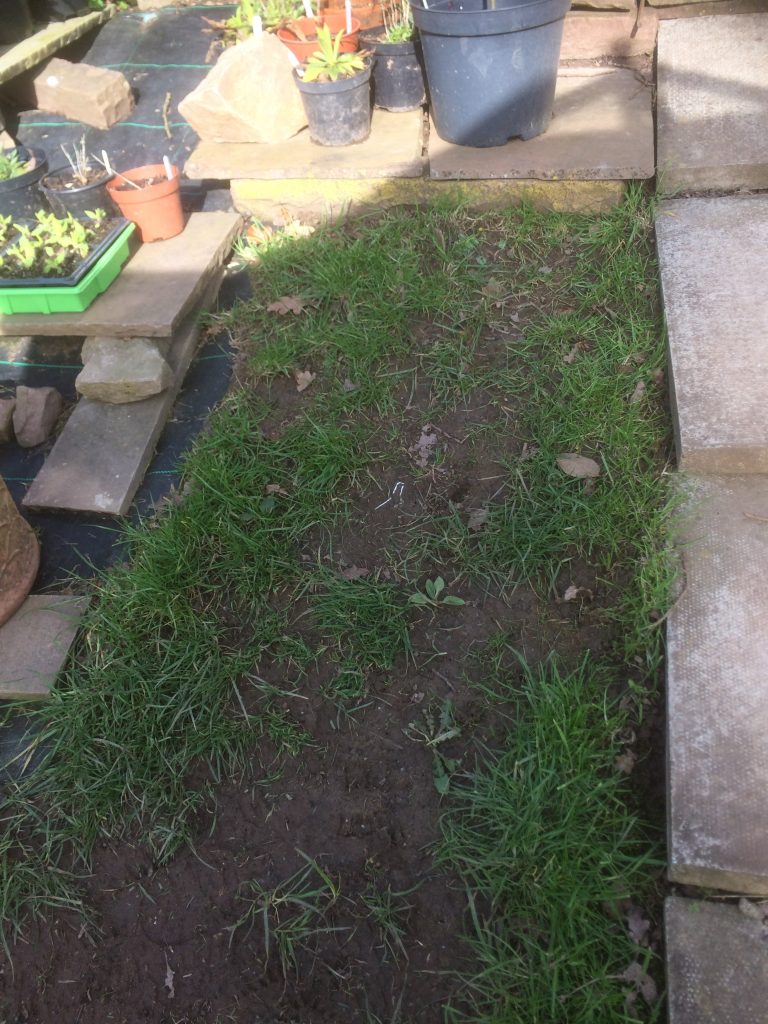
This is the spot of rough grass I have chosen.
The only tool I will be using to start with is a hand trowel, and I won’t need that for the next month. I need to cover the patch of ground with something that will suppress the grass and weeds. I have chosen a cardboard box, which when opened out measures 70cms x 60cms, (2’8″ x 2”) more than enough space for me to grow a few dwarf French beans. A few bricks I had lying around will keep the cardboard firmly in place. If you don;t have any cardboard alternatives that will do the job just as well are bits of old carpet or black polythene.
If you have never grown any veg before, my advice would be to start with just a small patch which you can expand as and when you feel able to and most importantly, when you are enjoying the experience of growing some of your own food! You will be amazed at how much you can grow in a small space. If you can cover a piece of ground 1 metre by 2 metres that will be an ideal start.
The most important part of growing food is the soil. Even the poorest of soil will grow something. Gardeners like to add organic material like manure or compost to improve the soil and fertilisers like fish, blood and bone. But it you don’t have any of these things it really doesn’t matter. Improving one’s soil is an ongoing process and the very act of growing vegetables will help to the soil anyway. If your patch is full of stones or rubble and you are able to remove the worst of it, then please do. If the ground is very weedy, especially if you have perennial weeds like nettles, docks, dandelions and brambles growing in it, then you will need to remove as much of these as you can. If your patch is just a neglected bit of your garden you might like to trim any weeds or grass – if necessary using some old scissors if you don’t have shears or a strimmer – but worry not. The most important thing is to exclude all light, which will stop all but the most persistent of weeds from growing. This preparatory work done, there is nothing more you need to do to the ground until you want to plant in early May.
So what are you going to grow? If your new patch is in a warm and sunny spot I would recommend starting with dwarf French beans. They are ready to be harvested from as little as two months after sowing, heavy cropping and very easy to grow. Beans like the soil to be warm too. If your plot is in a more shaded area then one crop that will grow quite happily is lettuce. So, whilst the cardboard is stopping the weeds and spring is yet to get into full swing, we can, non the less, start off beans and/or lettuce in the house, easily and very cheaply. So, start saving all your loo rolls as they make ideal starter pots. Also any small plastic pots like yoghurt and even those baked bean tins that normally go to recycling are ideal for beans. A small plastic food tray that is at least 2.5cms, (1″ deep) will do for lettuce. You will need to make a few small drainage holes in the bottom of any pots, tins and trays. If you are saving loo rolls you will need an old plate to put them on when it comes to sowing. Now for the seeds. 12 bean plants, enough to provide several meals over 6 weeks, will take up an area of 60 cms by 80 cms (2′ x 2’6″) so I will hope to grow 10 plants on my little patch. Lettuce can be spaced as little as 15cms apart. A packet of dwarf French bean seed, which costs between £2.50 and £3.00 contains up to 200 seeds, A packet of lettuce seeds costs under £2 and can contain as many as 1000 seeds, so one packet is enough for you and your neighbours. Any you don’t use this year can be kept in an airtight container somewhere cool- ideally your fridge – and be used next season.
If growing lettuces, you will want to dig up enough soil from your garden to fill a small plastic container. Try and remove and stones and all weeds from the soil and crumble it up as finely as you can. You only need to sow a pinch or two of seeds. Level out the soil in your tray to just below the top and sprinkle seeds very thinly on the surface When I say thinly I mean allow about roughly 1cm between each seed. lIghtly cover the seeds with a little more soil and gentle water. Put the tray on a warm and sunny windowsill. Keep an eye on the soil to be sure it doesn’t dry out. Equally, you don’t want it to be water-logged. Just nice and damp. Within a week you should see teh first signs of seedlings emerging. What to do next will be in my next post.
You will want to start off your beans in pots of soil which you have collected from the garden in the next couple of weeks or so. Lettuce seeds can be sown now. The first place to go for seeds is your nearest garden centre or ask a friend or neighbour if they have any spare. Otherwise you can buy online. My favourite catalogue is www.organiccatlogue.com Another very good company is http://www.marshalls-seeds.co.uk
If you have any questions please contact me through the website Ask Adam section. For people who live near me, I am able to provide some small quantities of seeds and you can always check out my seed list on the website. Next episode will be all about sowing seeds.
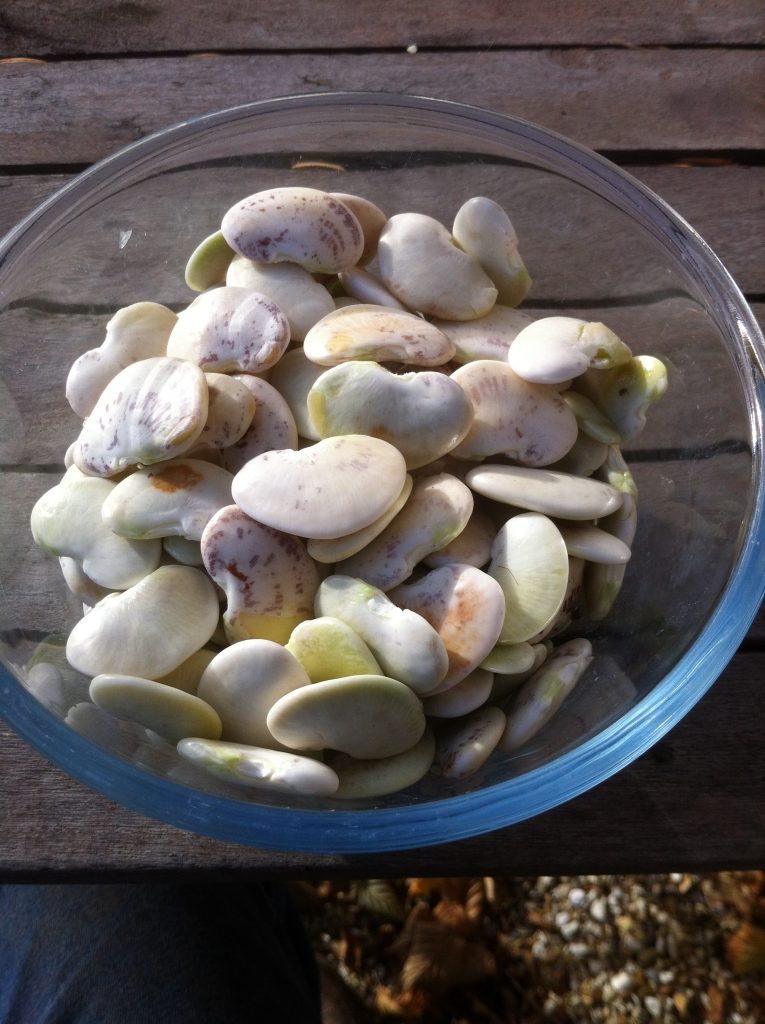
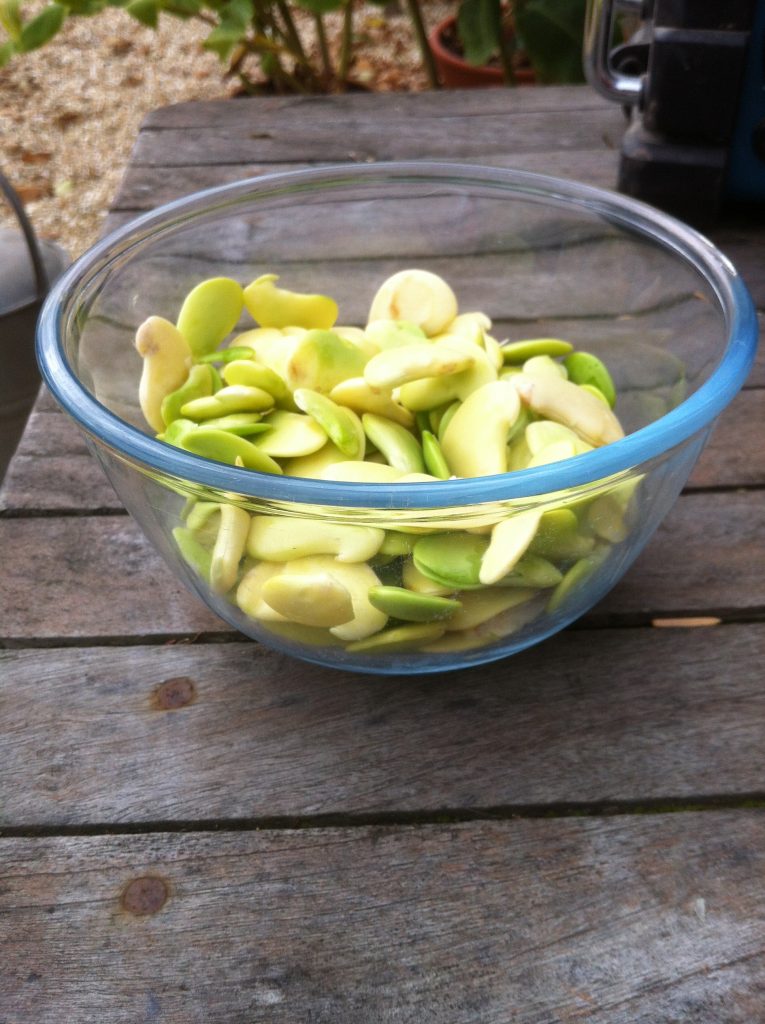
Earlier this year I gave a talk about seed saving in Hereford at a brilliant seed swap. I had lots of my own seeds to share and the event organiser Suzanne Noble took some Angry beans home to grow herself. I sowed a few in late May in a large tub and grew them up canes. I wanted to see if I could harvest anything from such a late sowing. Normally I would sow this bean in April in pots in the greenhouse and plant out in a warm, sunny spot in May. They beans have not ripened,due I am sure to the shortened growing season but I have still got enough for a good meal. I shelled the green pods and then spent a happy half-hour skinning them.
I will boil them for about fifteen minutes until they are nice and tender and then stir-fry them with some garlic, a little Burmese chilli, a good splash of soy sauce and a sprinkle of fresh parsley – a sort of Anglo-Burmese food fusion!
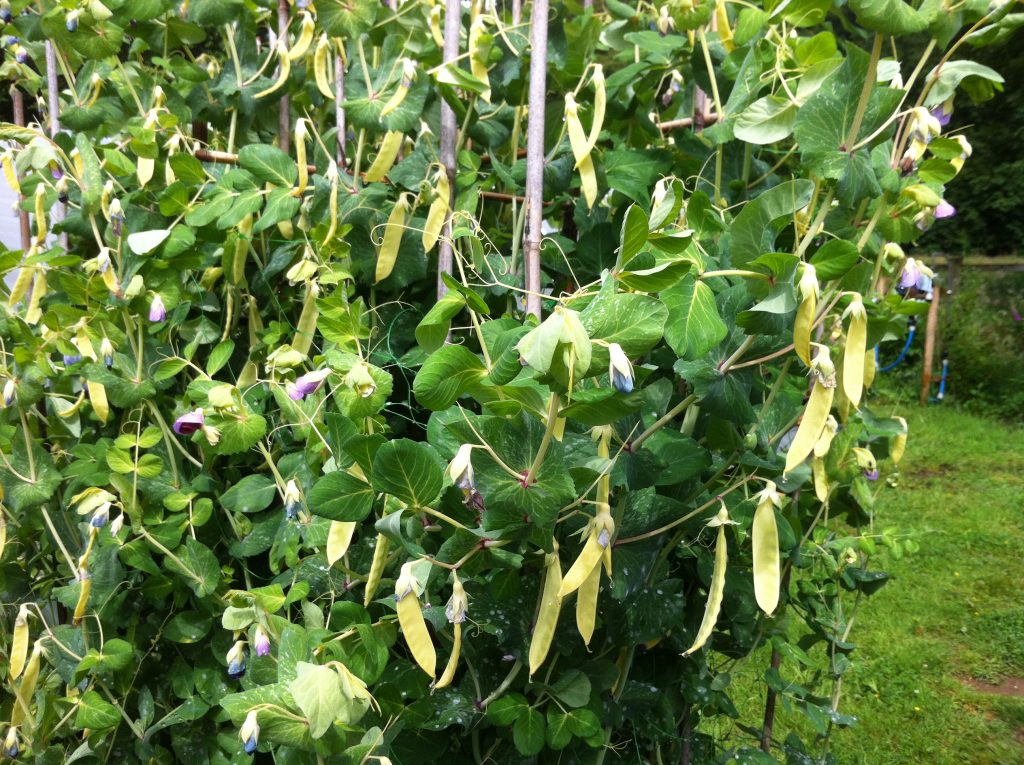
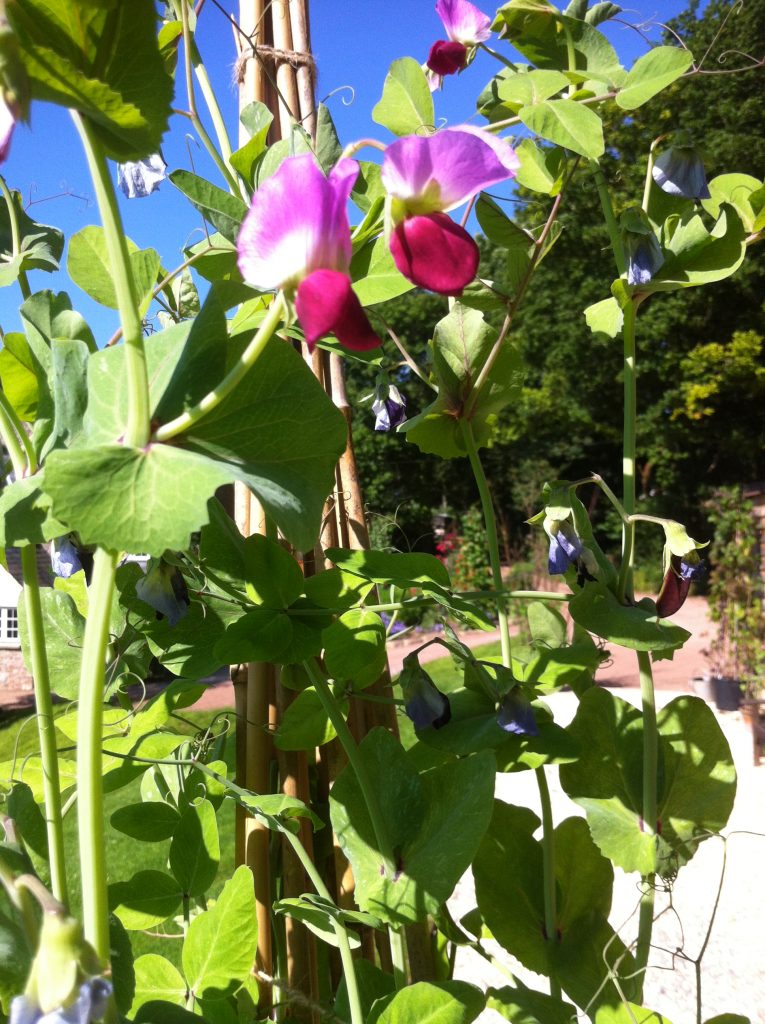
It’s been a good year for peas and I have enjoyed growing a number of familiar as well as new additions to my library for culinary pleasure, to return to the Heritage Seed Library and share with fellow vegaholics. My absolute favourite new addition is Jeaune de Madras. An old French variety given to me by Gerrit Oshan from the Dutch Gene Bank in Utrecht, I am told this gorgeous and most decorative mange tout is the source of a breeding effort in the USA to develop an improved variety – not that I think this beauty needs any improving.
I have had good crops of old English stalwarts of the HSL. Robinson, unimpeachably one of the most delicious peas you will ever eat. Considerd by the RHS at the end of the nineteenth century as one of the top ten peas in the world, Champion of England is another stately and yummy variety. But you have to grow this one yourself if you want to savour its special qualities.
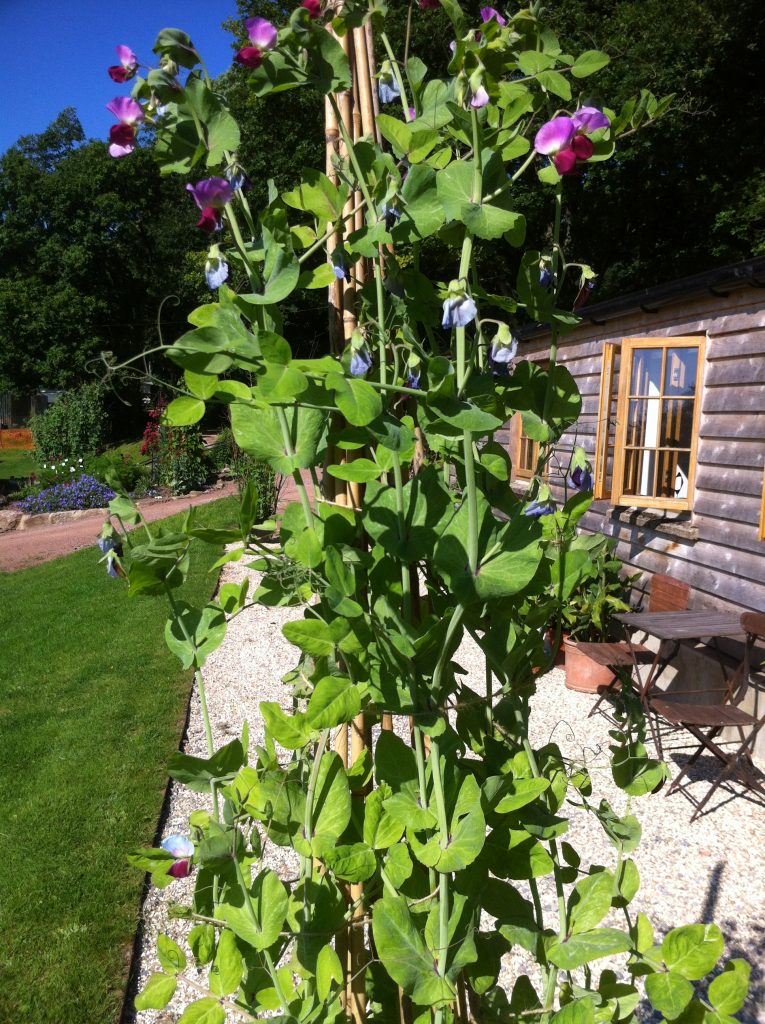
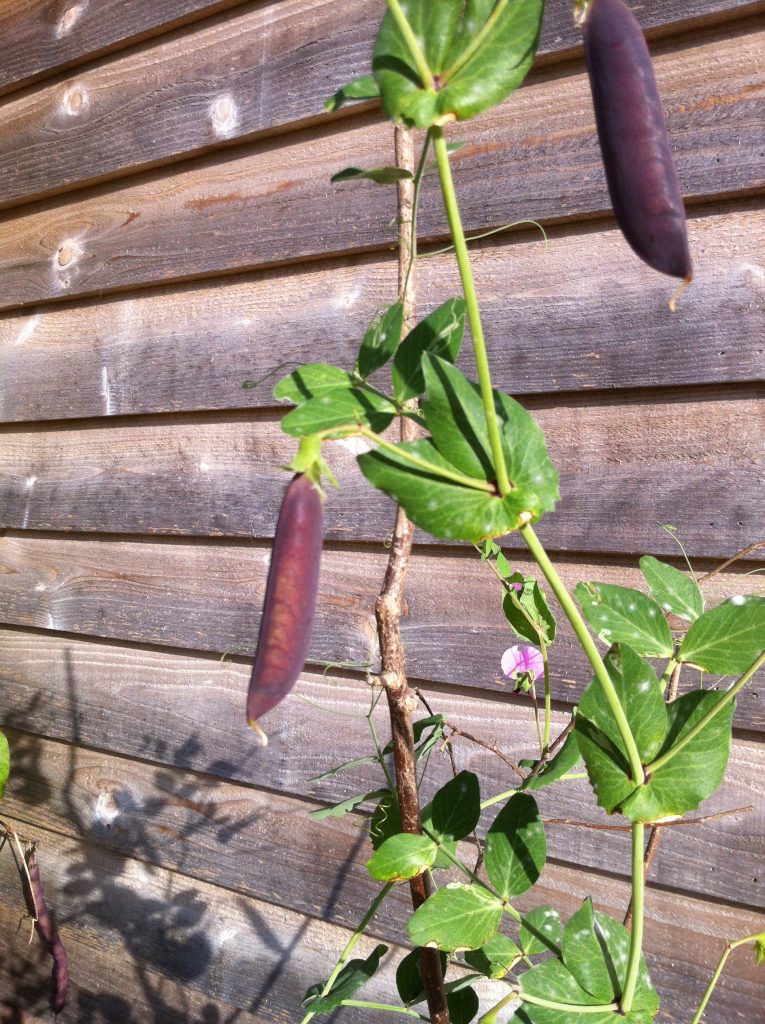
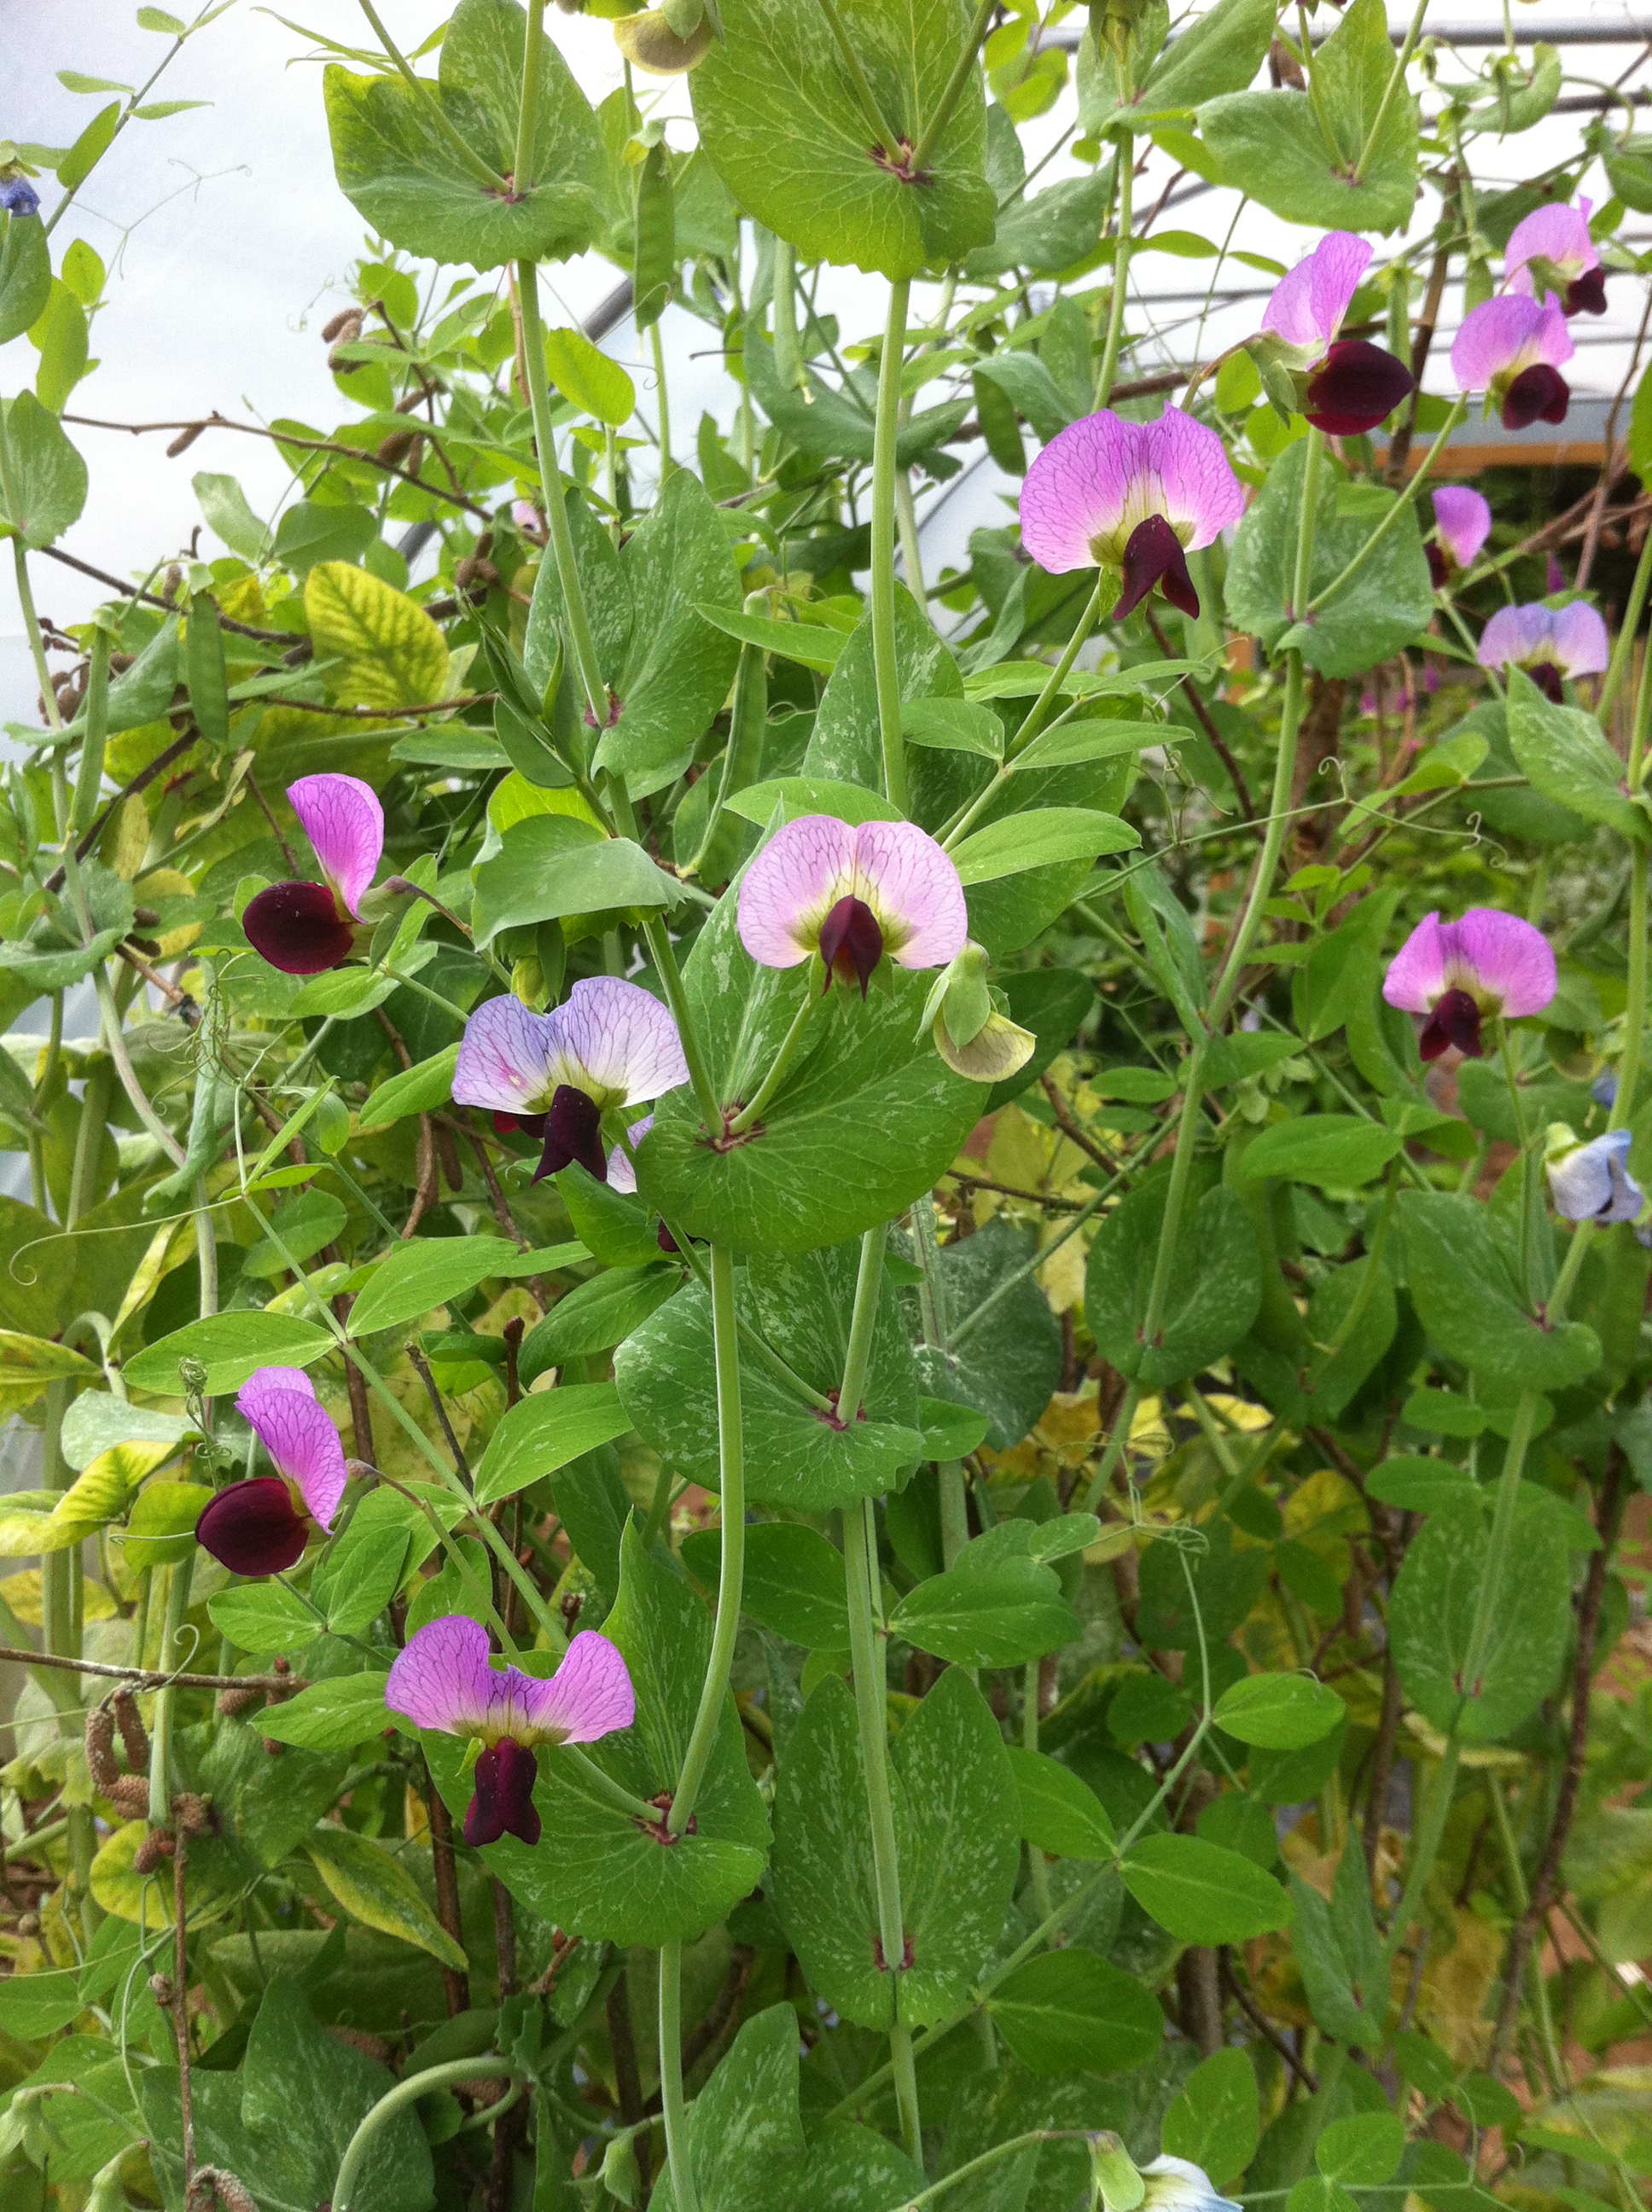
Peas come in all colours and I have grown three purple varieties this year. Two are from the HSL and well worth growing for their delicious, pale, small peas. Sutton’s Purple Podded is a tall pea with delightful flowers and easily picked pods.
Betony Blue has shorter and rounder pods with larger peas than Sutton’s Purple Podded. Like all tall peas, they grow well in large pots or tubs and can grace a flower border too.
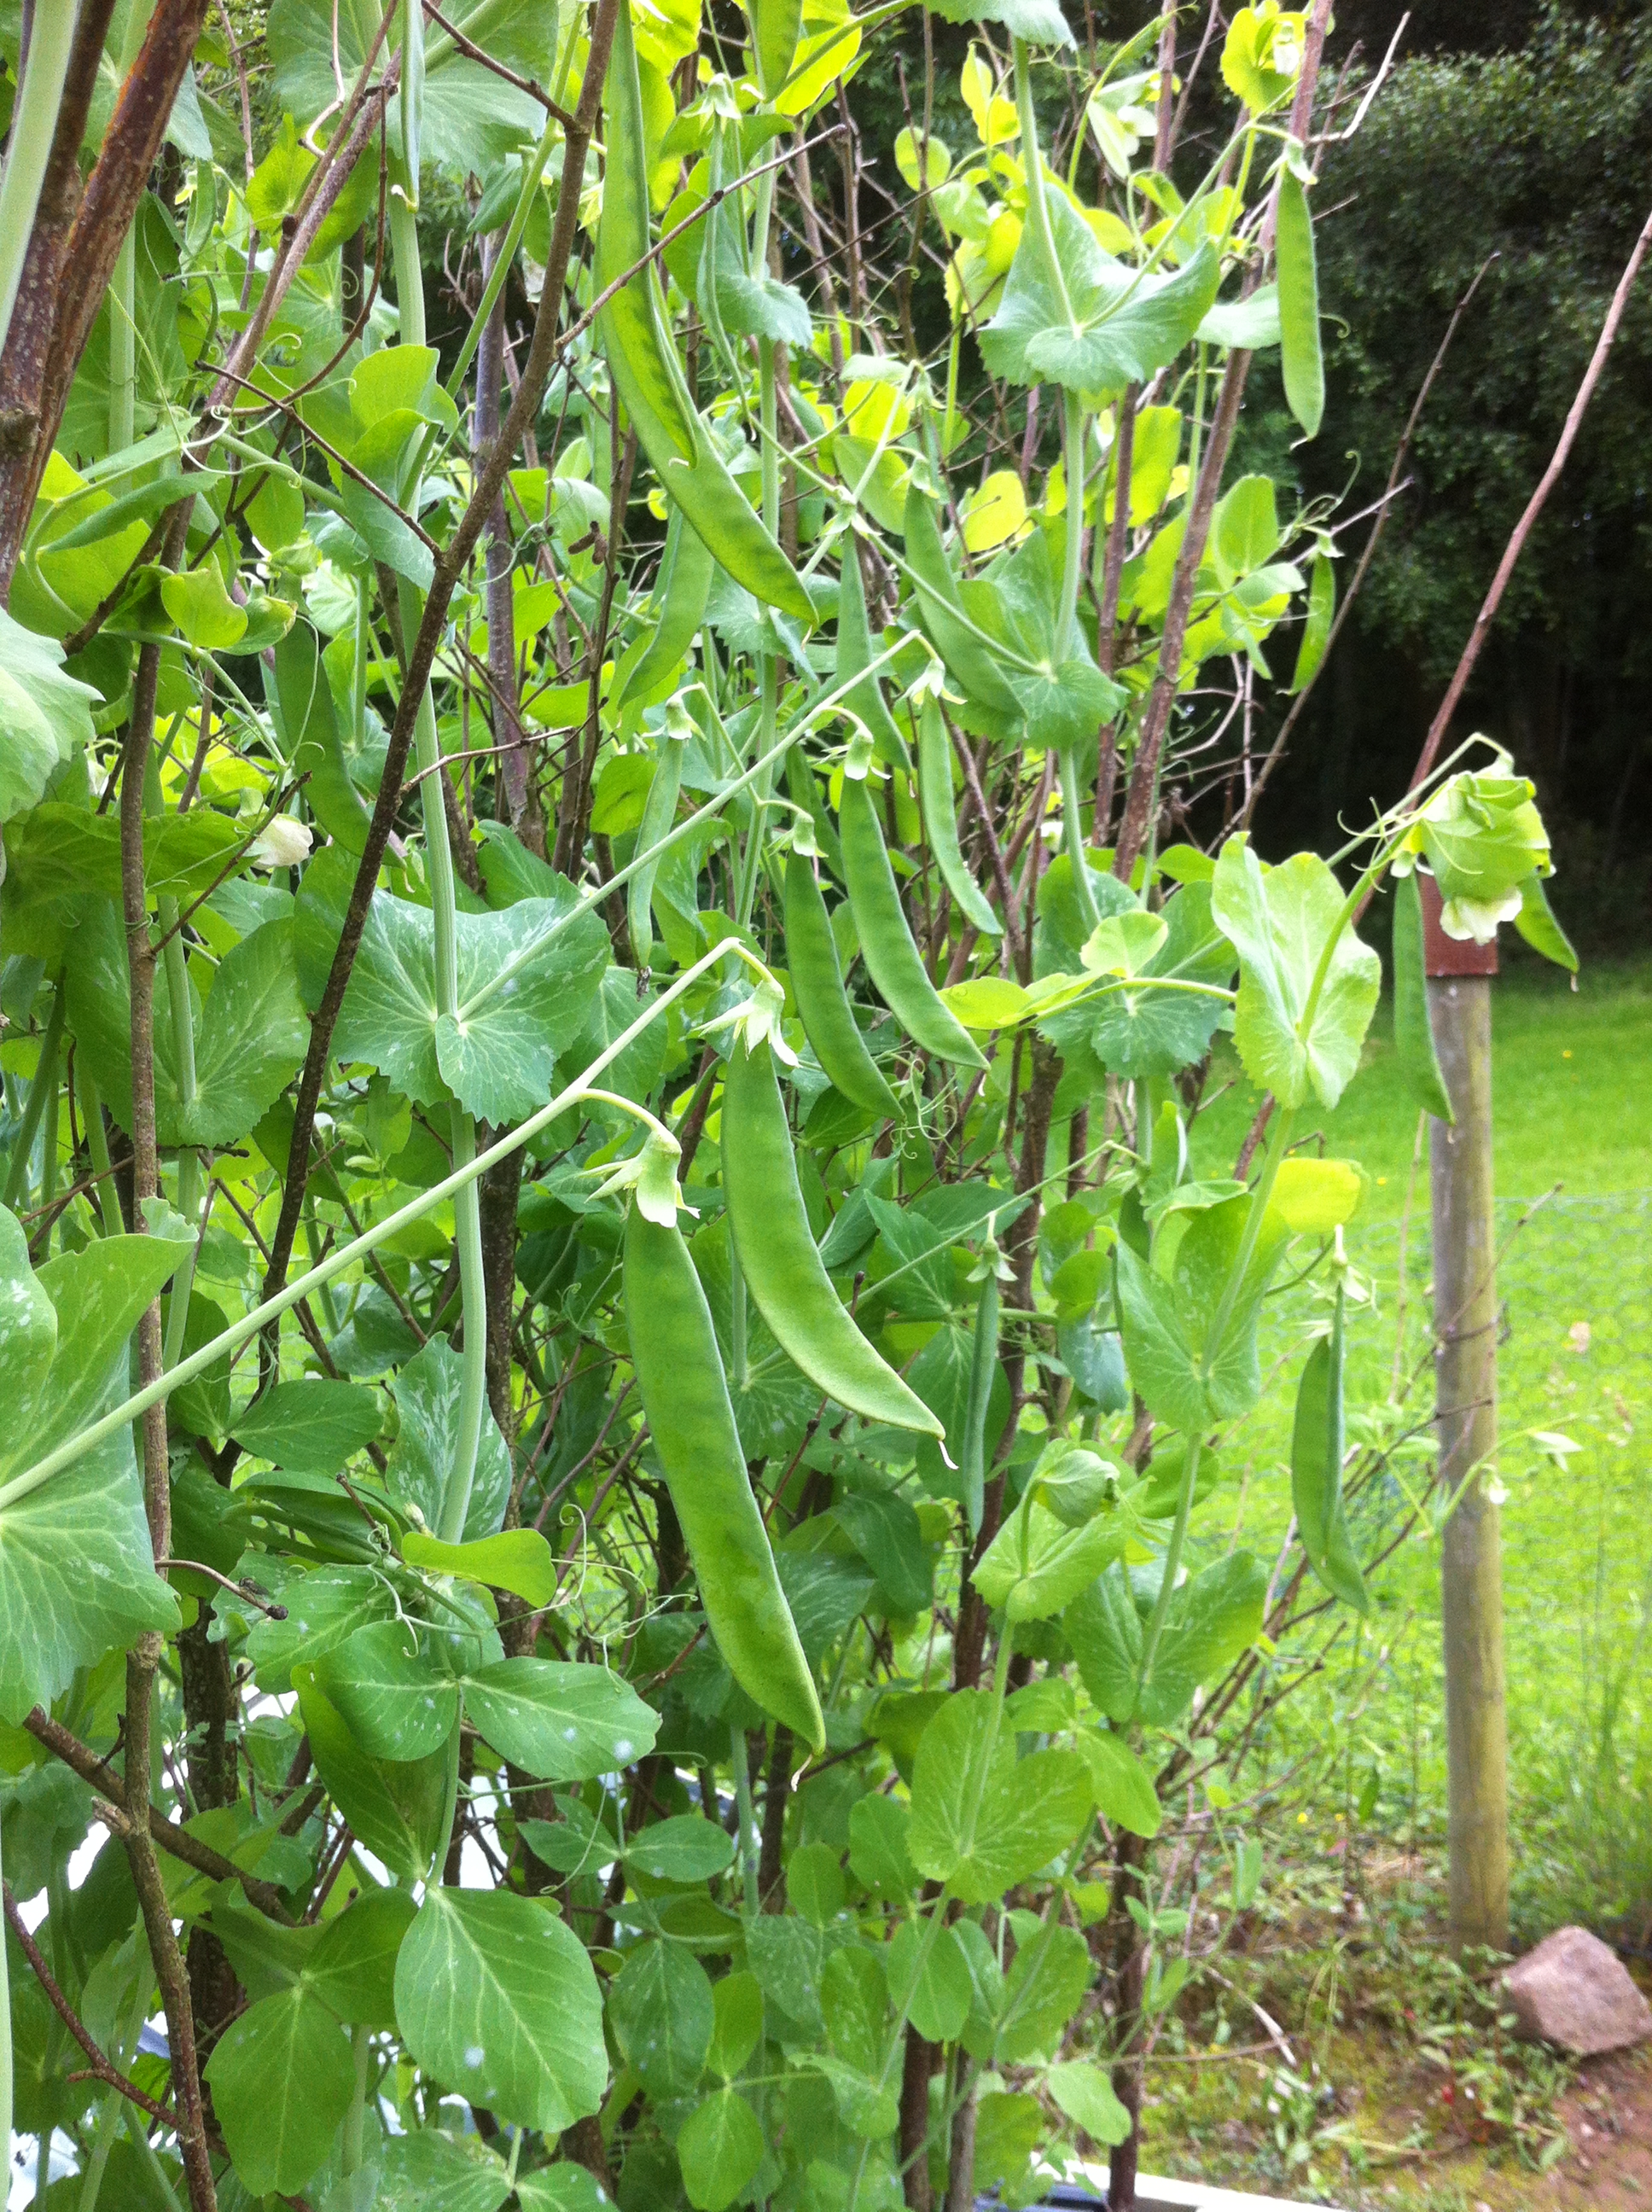
Often fellow growers offer me vegetables with unusual stories. Liam Gaffney who grows in Inverness-shire sent me Daniel O’Rourke. It grows to up to 2 metres with a heavy crop of small pods filled with sweet little peas. It is dual purpose so the dried peas can be used as a soup pea in winter. Daniel O’Rourke is an Irish heritage seed that comes from the Irish Seed Savers’ Exchange. However, the provenance of the pea is mysterious. It was originally saved in the Russian seed bank in St. Petersburg that was founded by Vavilov at the start of the 20th century. Vavilov travelled the world collecting seed to put in the world’s first proper seed library. So, did Vavilov ever visit Ireland and bring this pea back to his library or did Daniel O’Rourke get the seed from Vavilov? If so, what is the origin of this pea which has double flowers and is the result of selective breeding.
The Belgians also bred peas and another HSL variety I have had very good, heavy crops from is Espoir de Gembloux. it grows to about 1.2 metres and is a very heavy cropper with a abundant well filled pods.
The third purple-podded pea I have grown this year has a great name but I cannot remember where I got it from! Hangman’s Door grows to about 1.2 metres. I had a disaster because of the eight peas I had to grow, my hens escaped one day and ate six of them. So with just two plants I have ten precious pods – after I ate the peas from a couple of pods to see just how nice they are – enough seed to grow on for a proper crop in 2017 maybe.
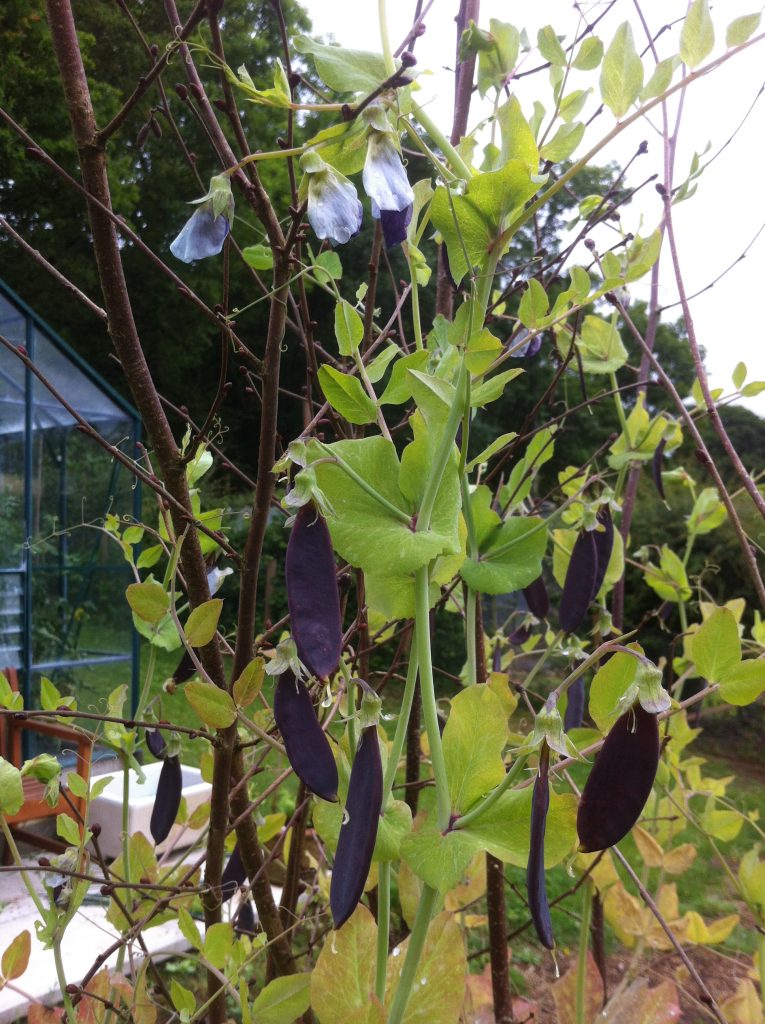
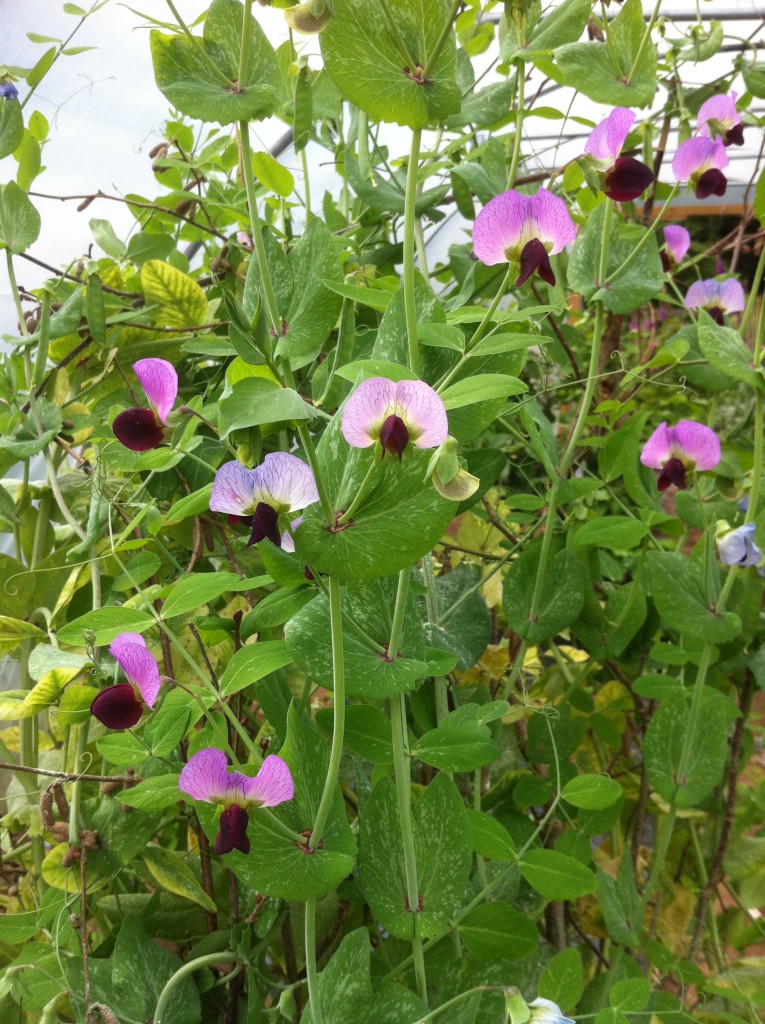
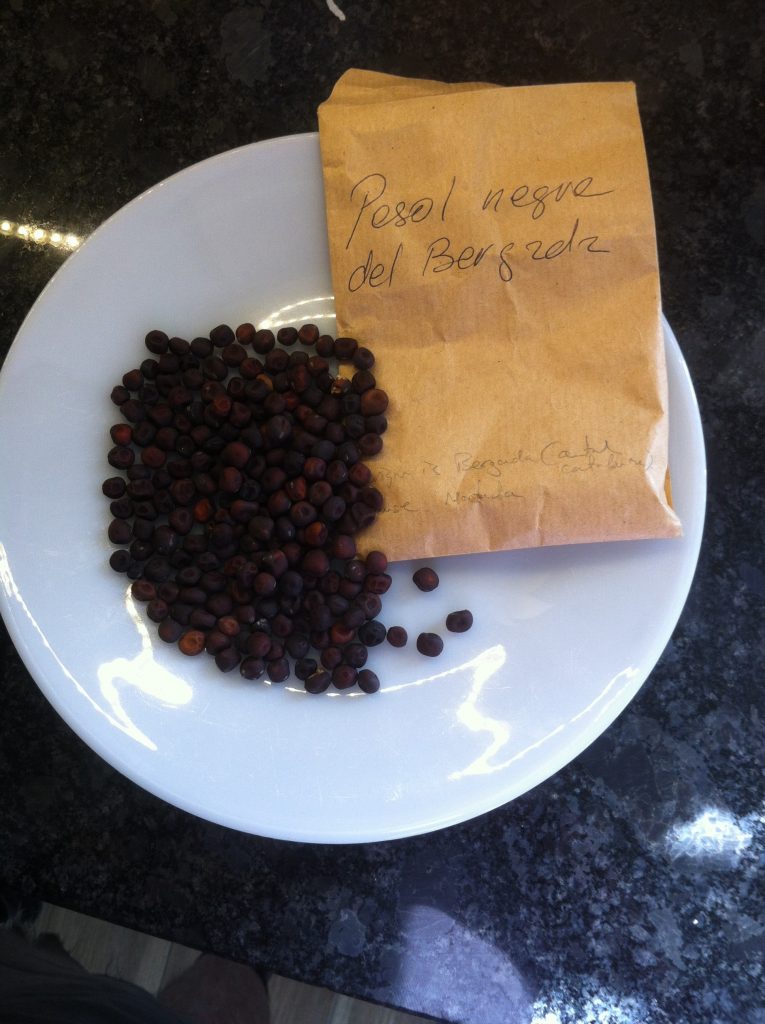
One can grow peas all year round. I was given a very special pea by my friend Jesus Vargas who lives in northern Catalonia. Pesol Negre del Belgarda is a very rare local variety of winter-sown tall pea that is grown for its black seeds which form a staple as a dried pea. It has the most gorgeous flowers and fat pods with a rough skin.
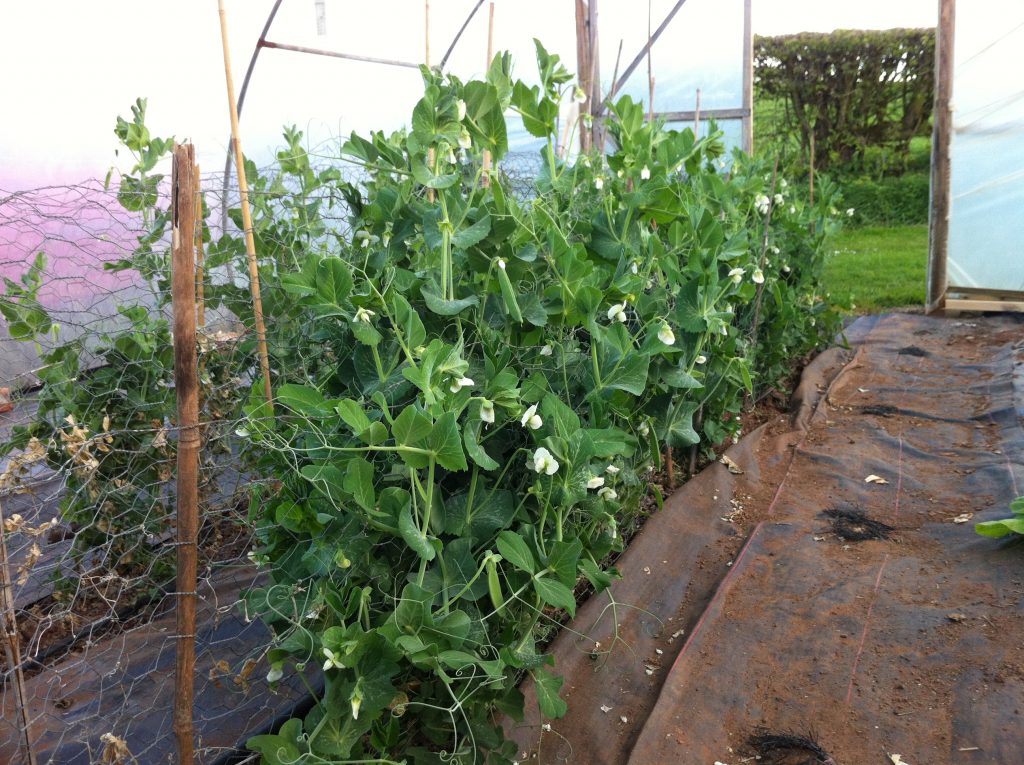
And finally a pea I sow in late autumn to harvest in May, a French stalwart that is commercially available, Douce Provence is prolific, tasty and hardy. I grow it in a polytunnel but the pea is quite happy sown outside in October and given some cloche protection through the worst weather until it starts to grow on in March.
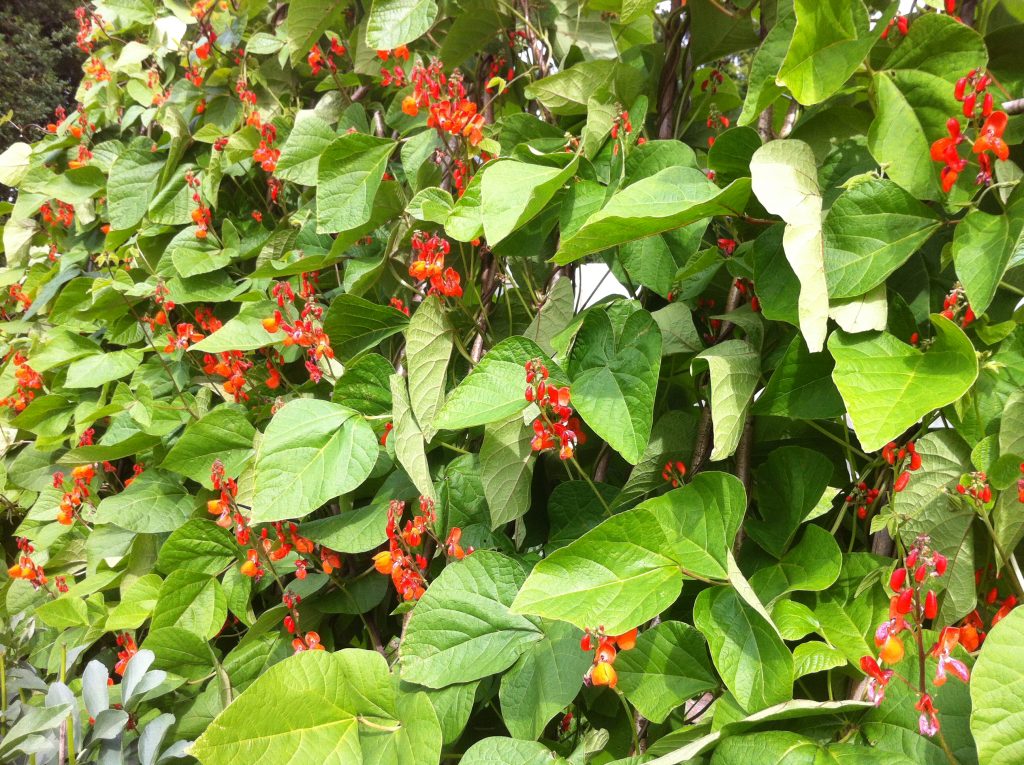
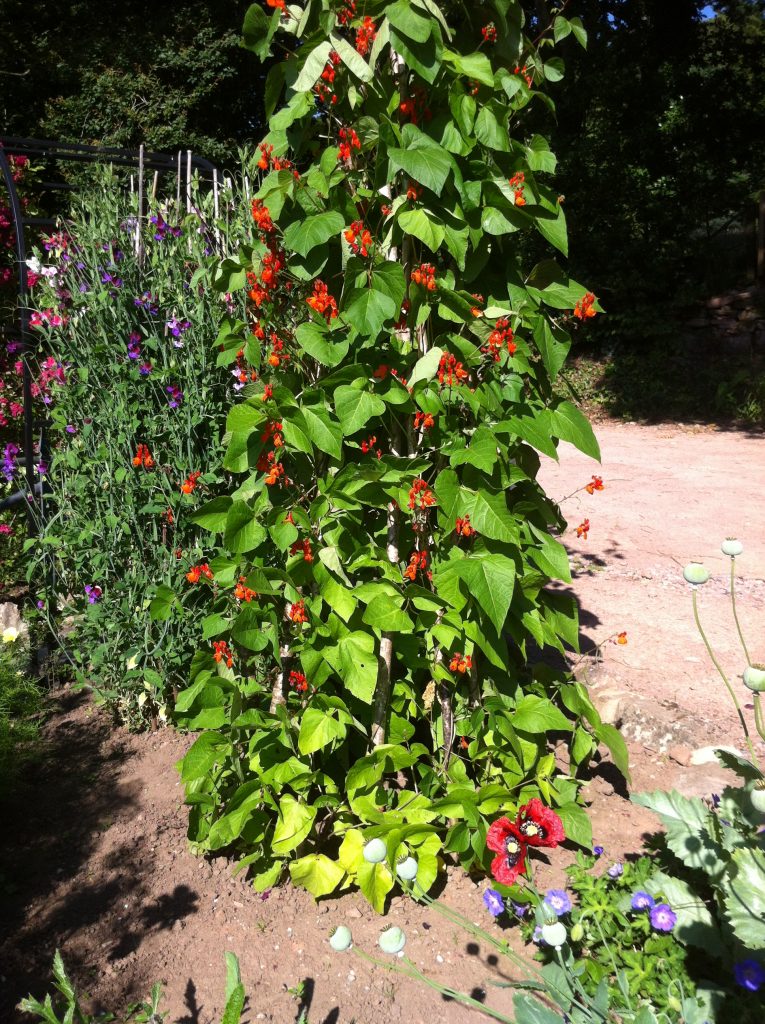
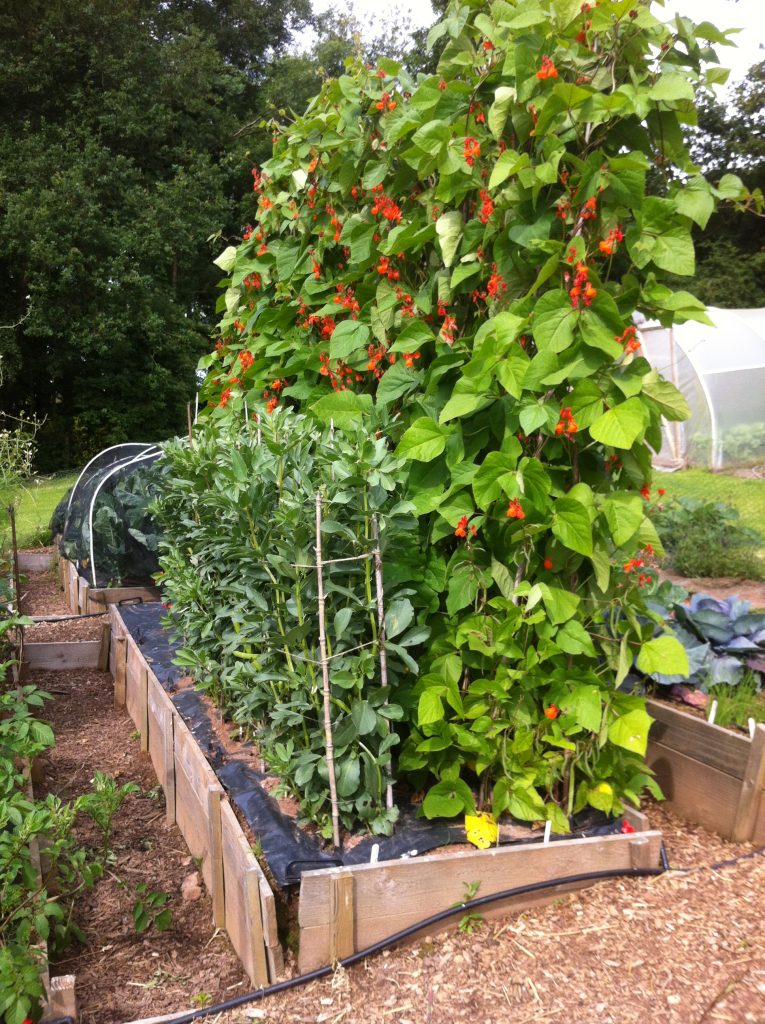
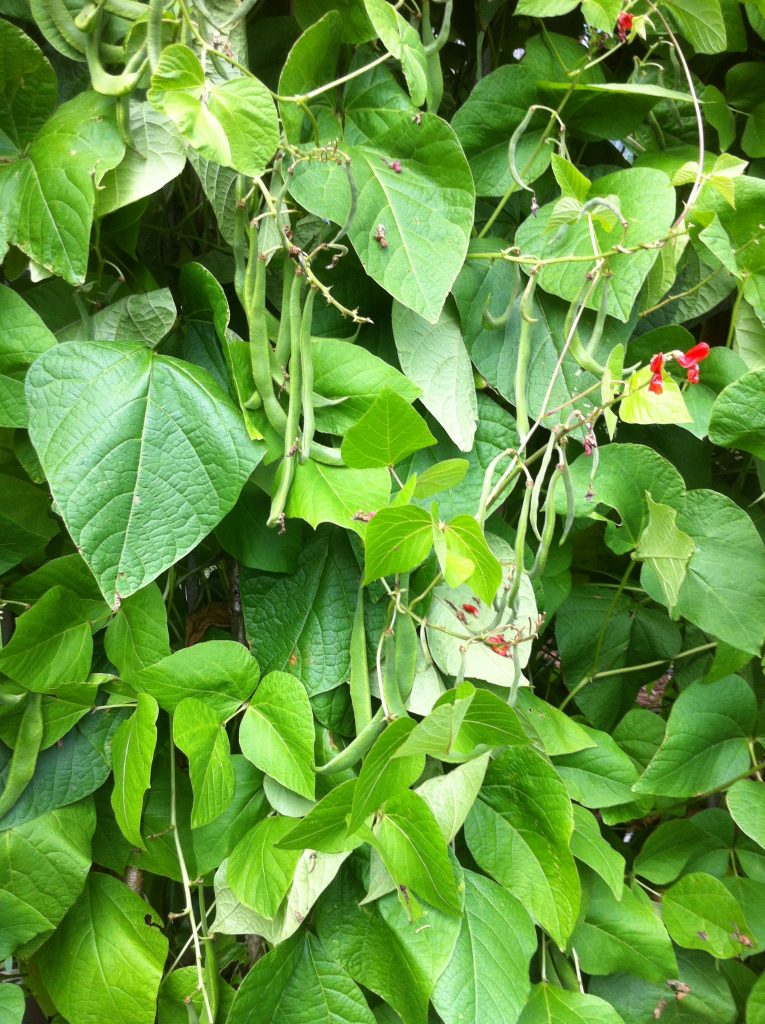
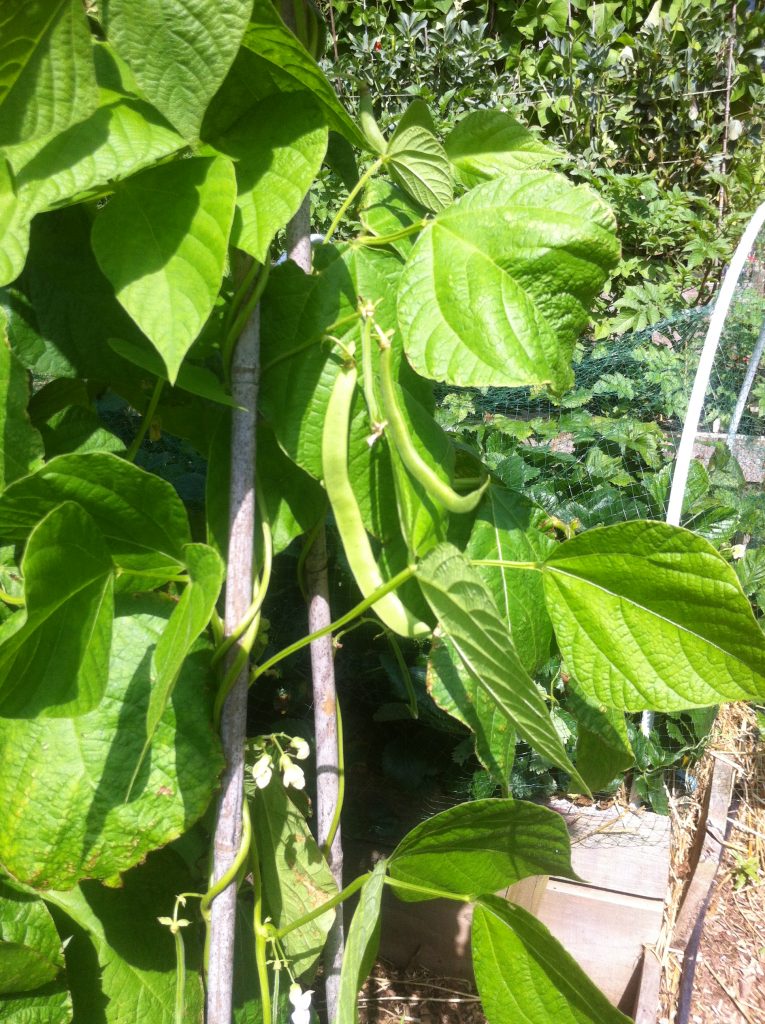
I am fortunate to be benefiting from a very productive year – so far – growing a range of beans to enjoy on the plate and also for seed to save, return to the Heritage Seed Library at Garden Organic and to share with other gardeners. This year I am growing a runner bean called Montacute. Because runner beans cross-pollinate easily due to bee activity I have my neighbours grow the same variety. I also grow a few in a distant part of the garden further isolated from neighbours.
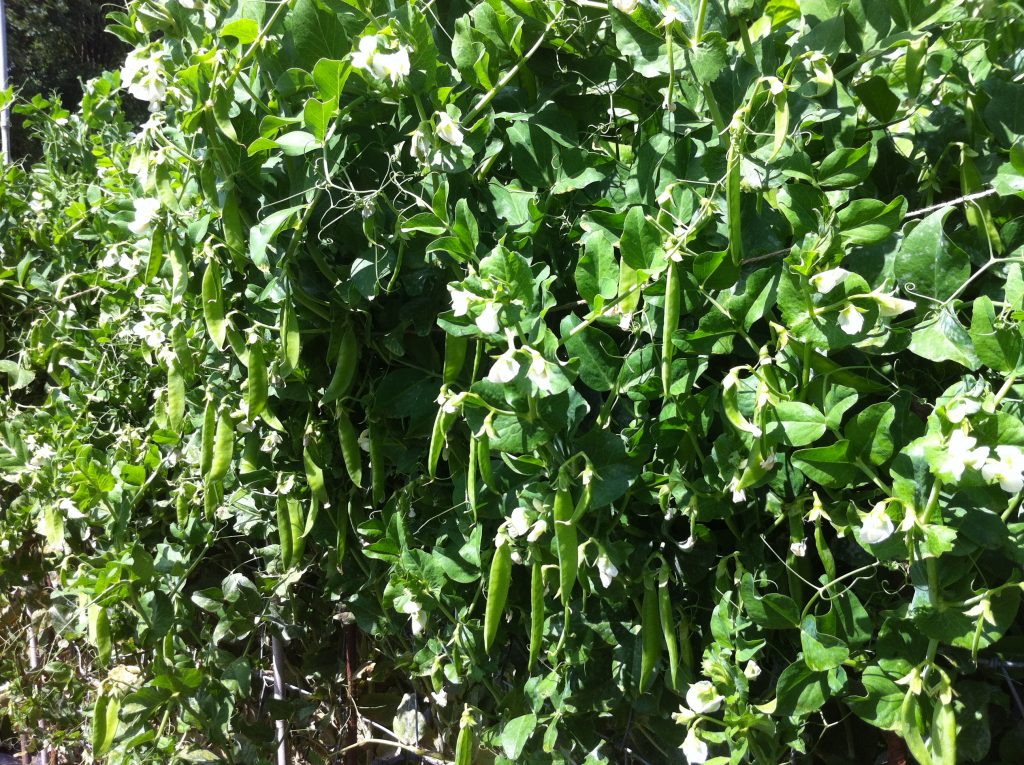
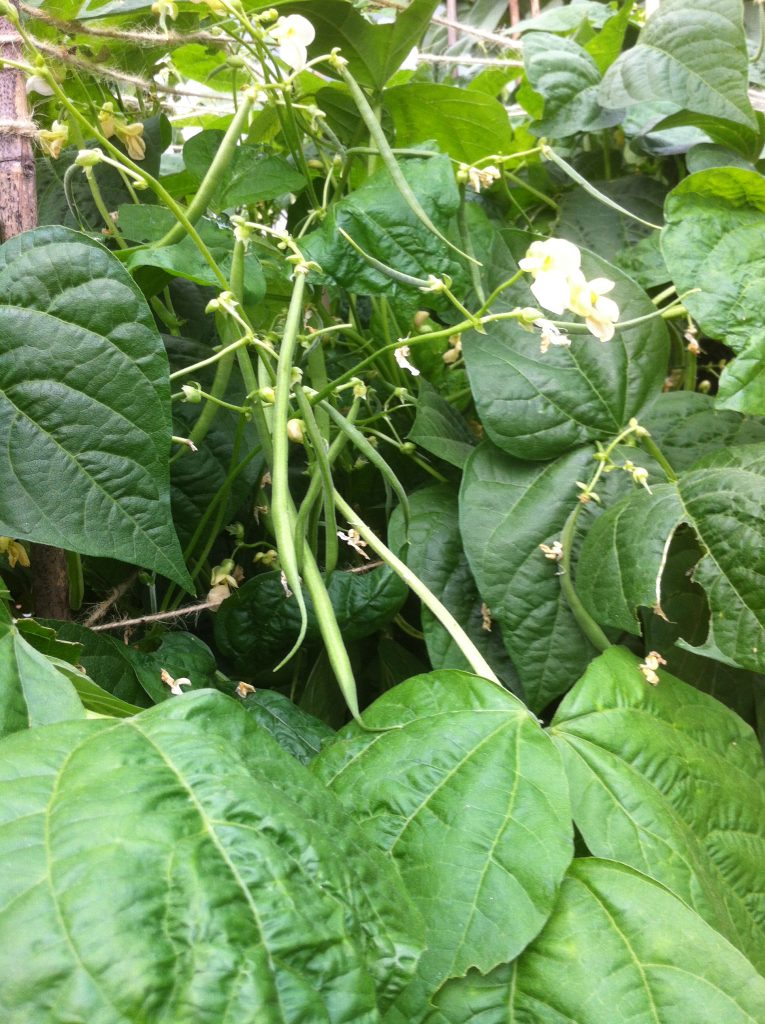
It is an heirloom from the Somerset estate of the same name. The flowering and pod set has been quite exceptional, due I think to a wetter than normal summer.
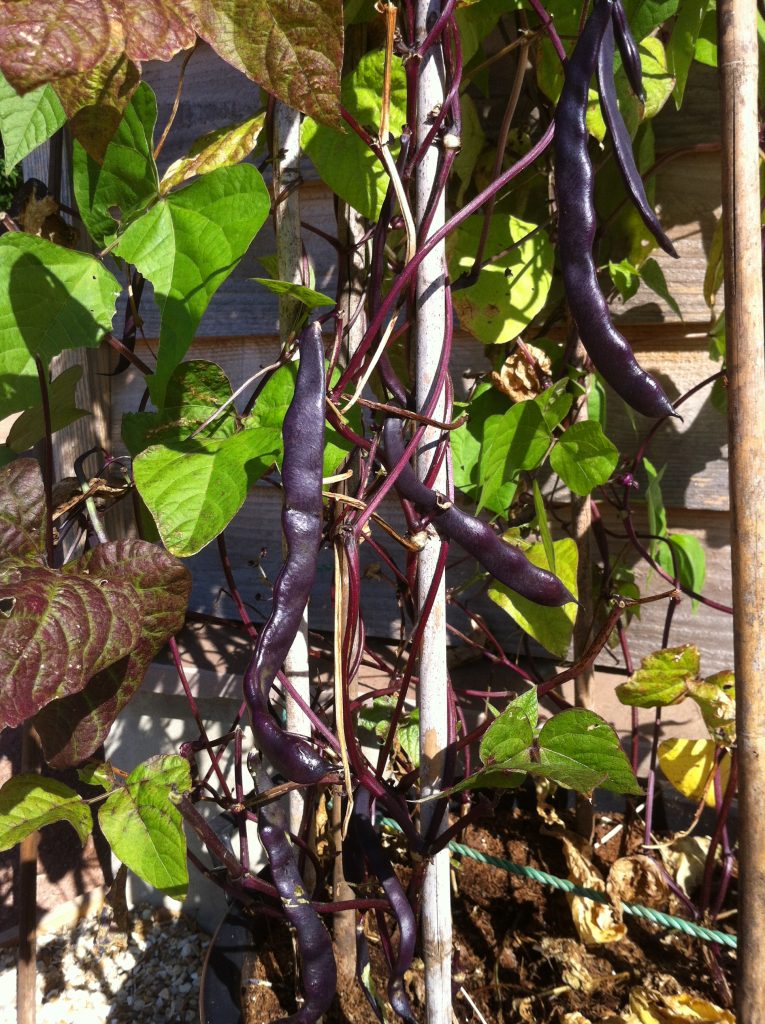
As a Seed Guardian I receive small numbers of seeds every year from from the HSL. I like to grow these few seeds out to give me enough seed to grow sufficient quantities to return to the library the following year. Container growing can be very effective. So this year I have a very pretty – and tasty – purple bean, Viola di Cornetti growing in a large tub.
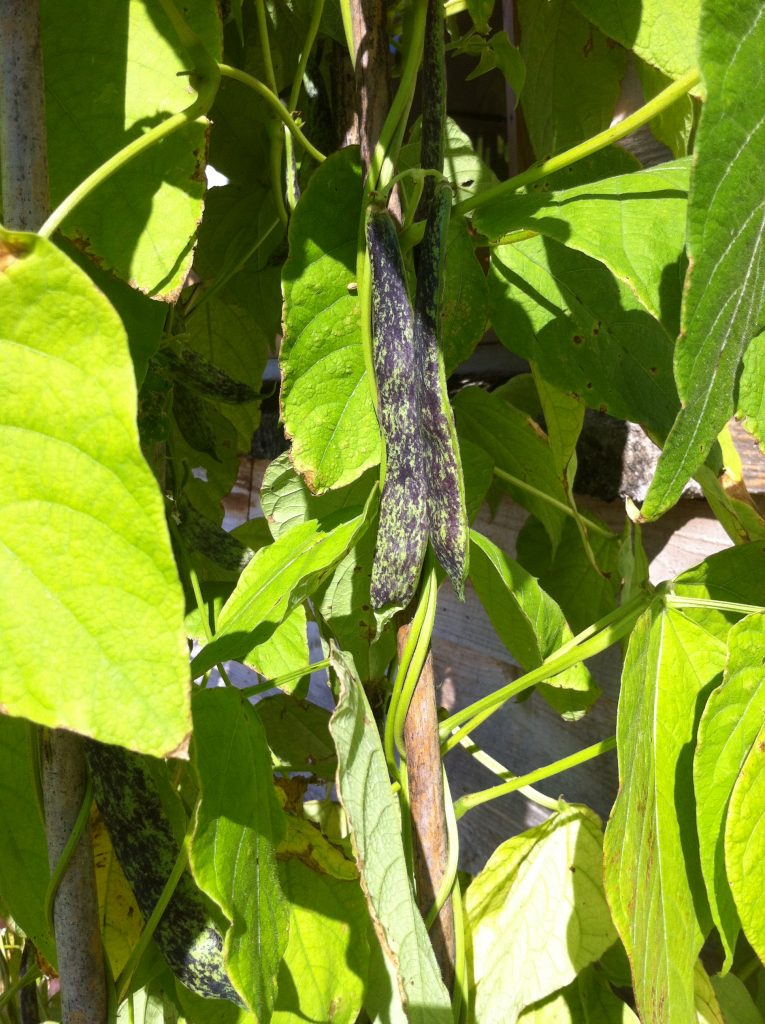
With nearly 500 varieties of vegetables in my library I need to refresh seed regularly and try to work on a seven-year cycle. This year I found myself with a few seed of a lovely HSL variety called Mrs Fortune’s that were last saved in 2009. Again, they are doing quite well in a large tub on a sunny veranda.
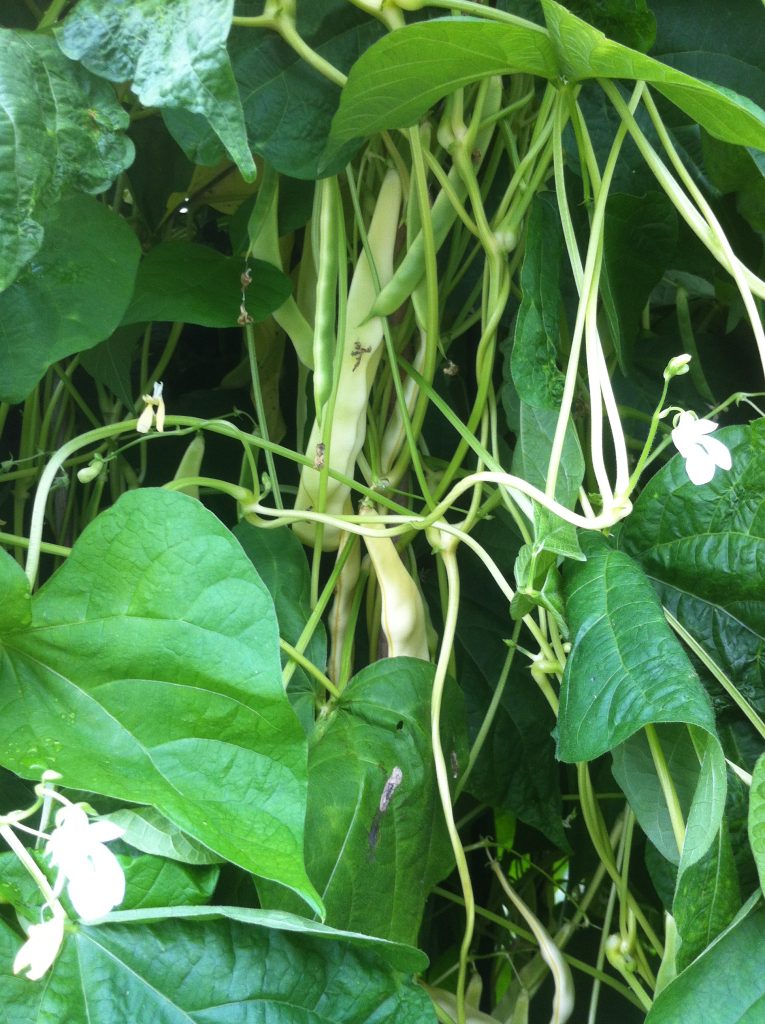
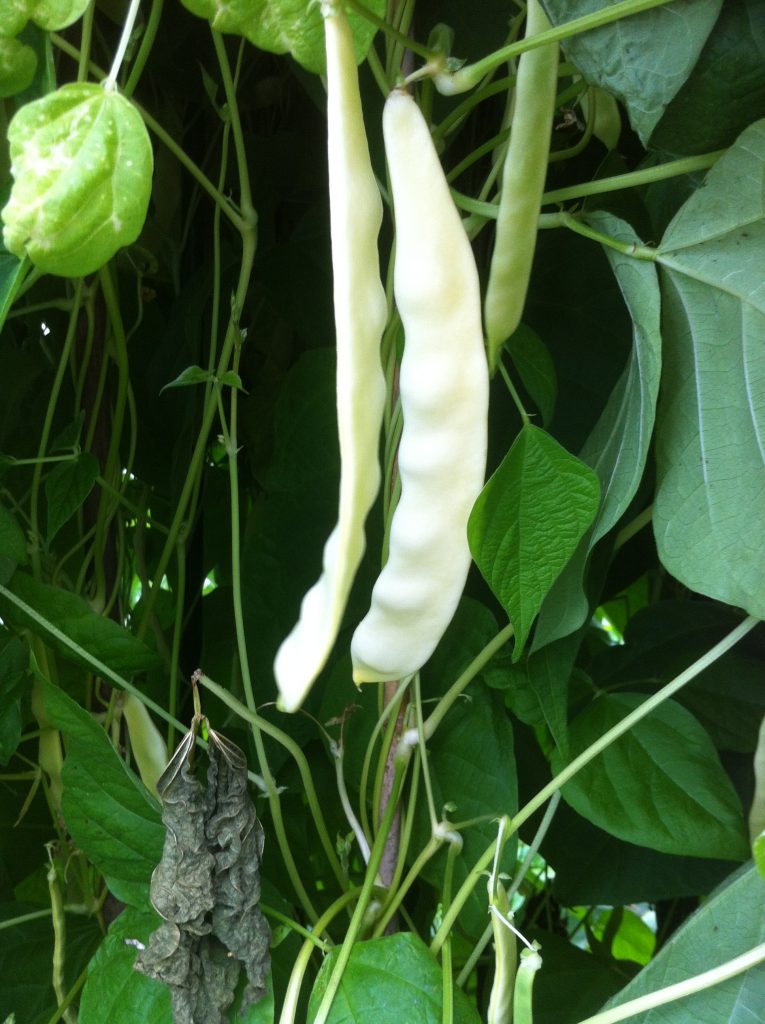
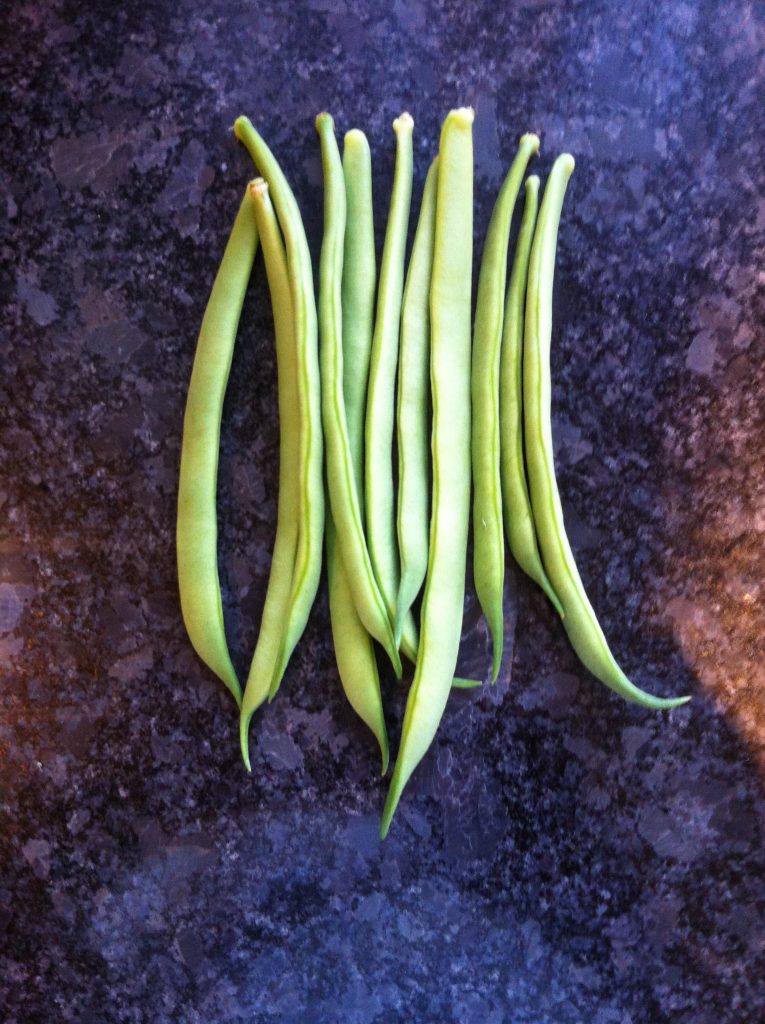
Another bean that was in the HSL catalogue this year is Madeira Maroon, a flat-podded French bean that can grow to 30 centimetres, but is best eaten when no more than about 20 centimetres in my opinion. Very tasty and quite prolific.
One of my jobs as a seed detective is to identify varieties that have been lost in their country of origin, to propagate and return them. A fine example of this is another French bean that is in the HSL, Ray’s Butter Bean which hails from Australia. On a recent trip to Victoria I met with the man who is at the forefront of growing heirlooms, Clive Blazey founder of The Diggers Club who told me he had never heard of it! As well as returning seed to the HSL I shall send him enough to start a re-introduction programme.
And then there are the dwarf beans. Val’s Bean is a delicious, if somewhat unruly bean that has been in my library for years. Now I am growing a quantity to return to the HSL after not having grown them in the last seven years.
My favourite French bean is Emperor of Russia. Finding myself very short of fresh seed this is another one I am propagating this year. From a March sowing the crop is now ripening and drying in a polytunnel ready soon to be harvested.
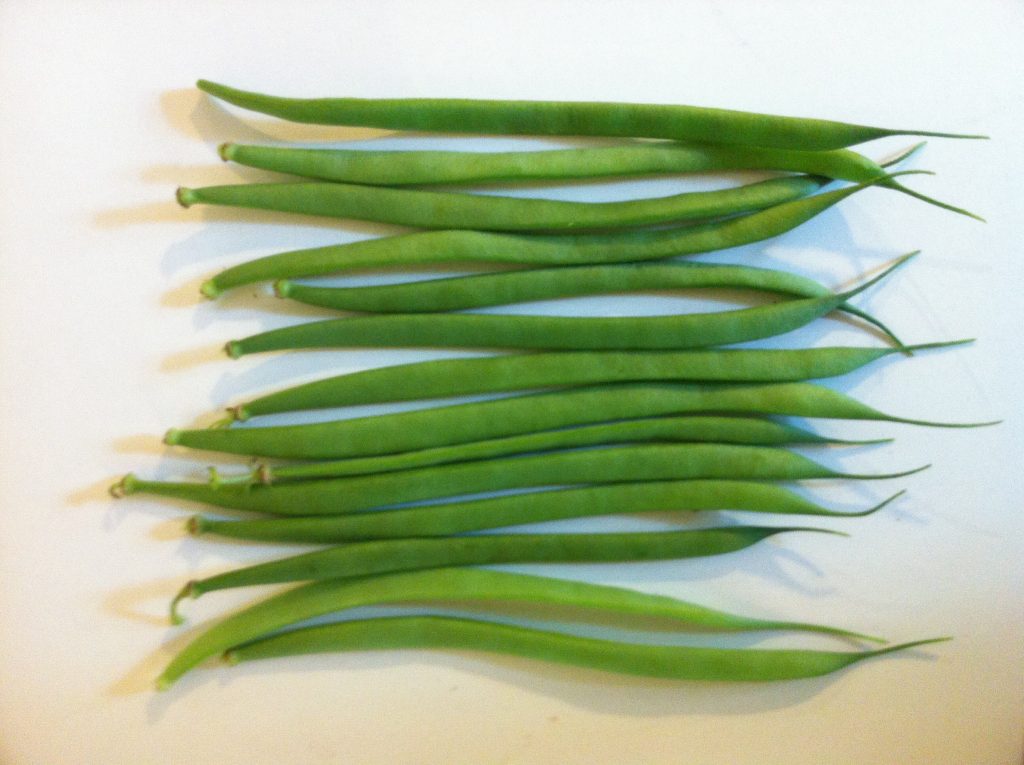
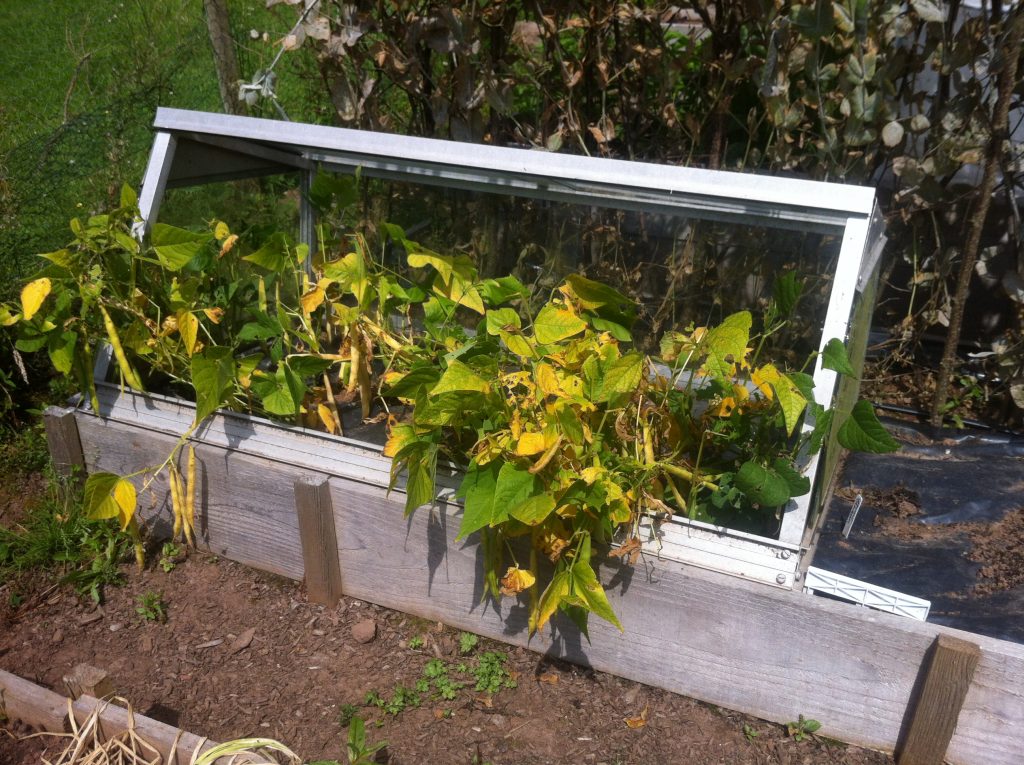
Many of the beans I grow are cropped for use as a dry bean. An American variety, Vermont Cranberry, is one such. Easy to grow yielding beautiful cranberry-coloured beans, this HSL stalwart is well worth adding to your vegetable plot. I grow them in a cold frame on a raised bed to help growth from an early sowing and to protect the crop from rain as the pods dry.
I love my peas and this year I have so many on the go, some new and some to replenish my stocks of seed as well as to eat! This little darling is Betany Blue, an HSL variety of which i had just eight seeds so a precious cargo. None will be eaten, all will be saved for a proper harvest next year maybe.
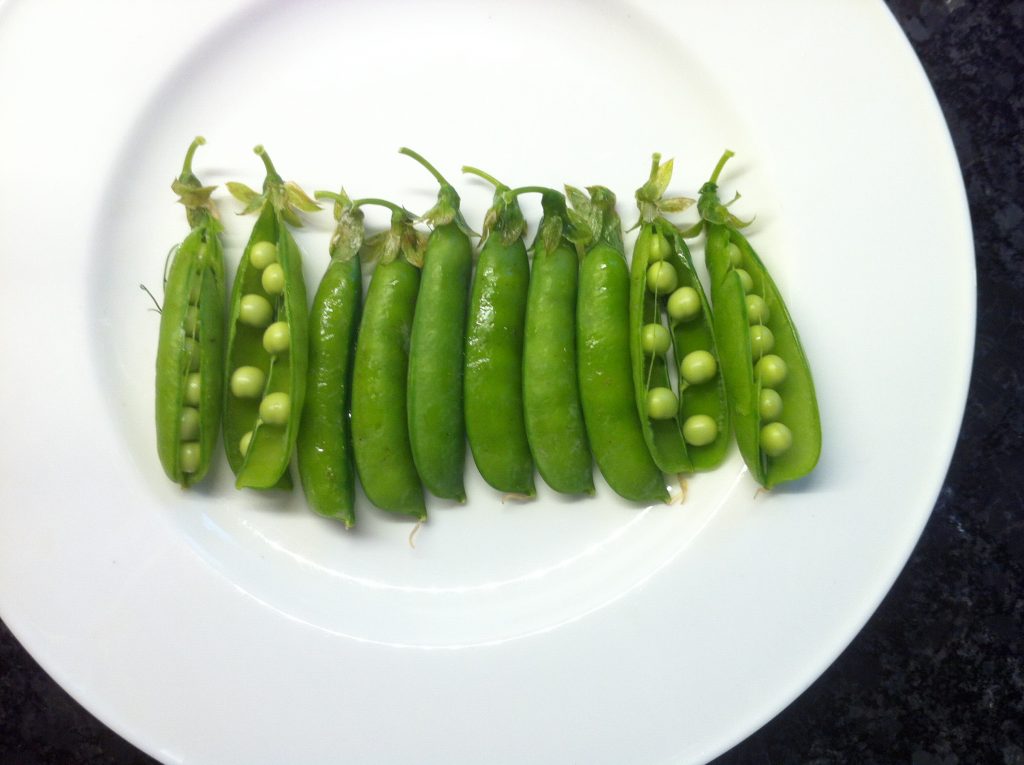
My most decorative and also delicious delight so far this summer is Jeaune de Madras, given to me by a fellow vegaholic in Holland. Peas are native to India so the name is no surprise. the colour is. My first yellow mange tout and as yummy as she is lovely to look at. I shall be saving seed and growing them in the future as a border climber as the lovely bi-colour purple and pink flowers, yellow/green stems and young leaves and verdant habit will make them an essential edible addition to the garden.
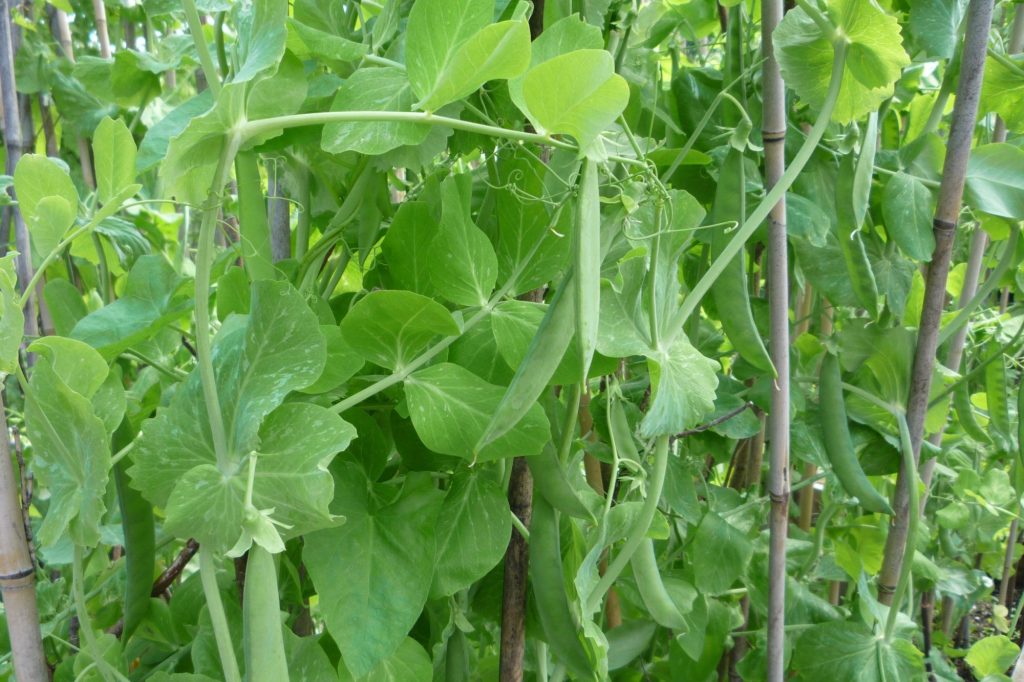
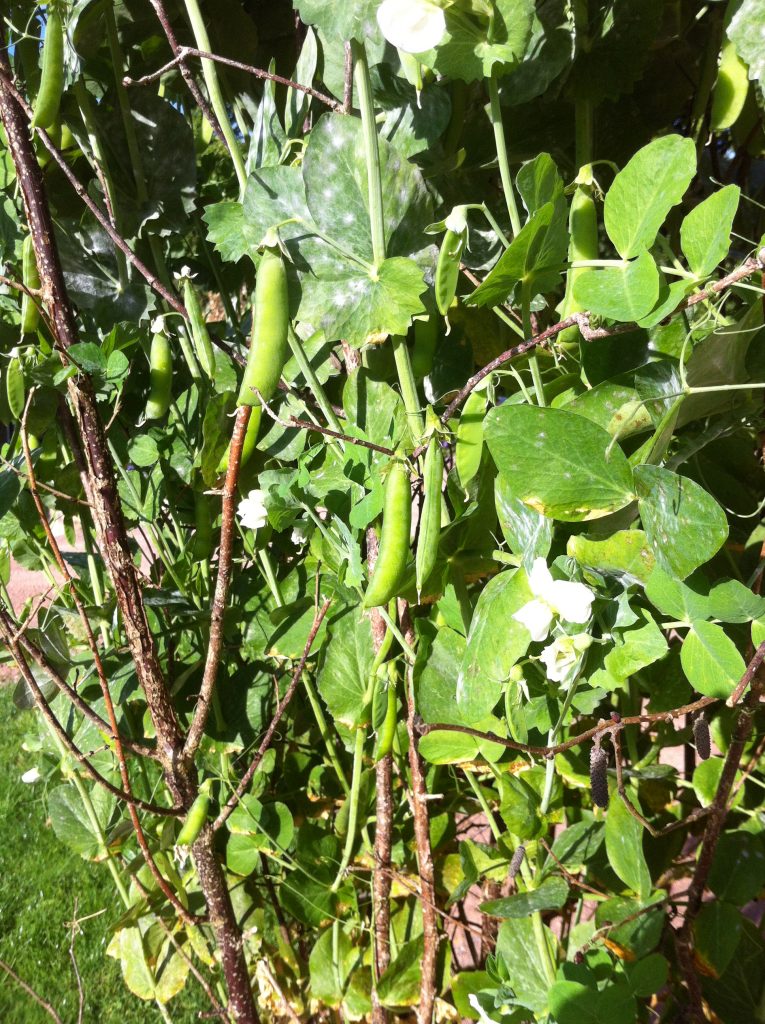
Next up is an old favourite which is currently setting pods and will be ready to harvest in a week or so. Robinson,, a Heritage Seed Library ex-commercial variety is, for me the prince of peas. Deliciously sweet, great long pods with ten or more peas that are hard to resist once picked. There are some seedsmen selling Robinson but I have no idea if theirs is the same as the HSL variety which has proven provenance as the original Robinson pea as bred by a certain Mr Robinson.
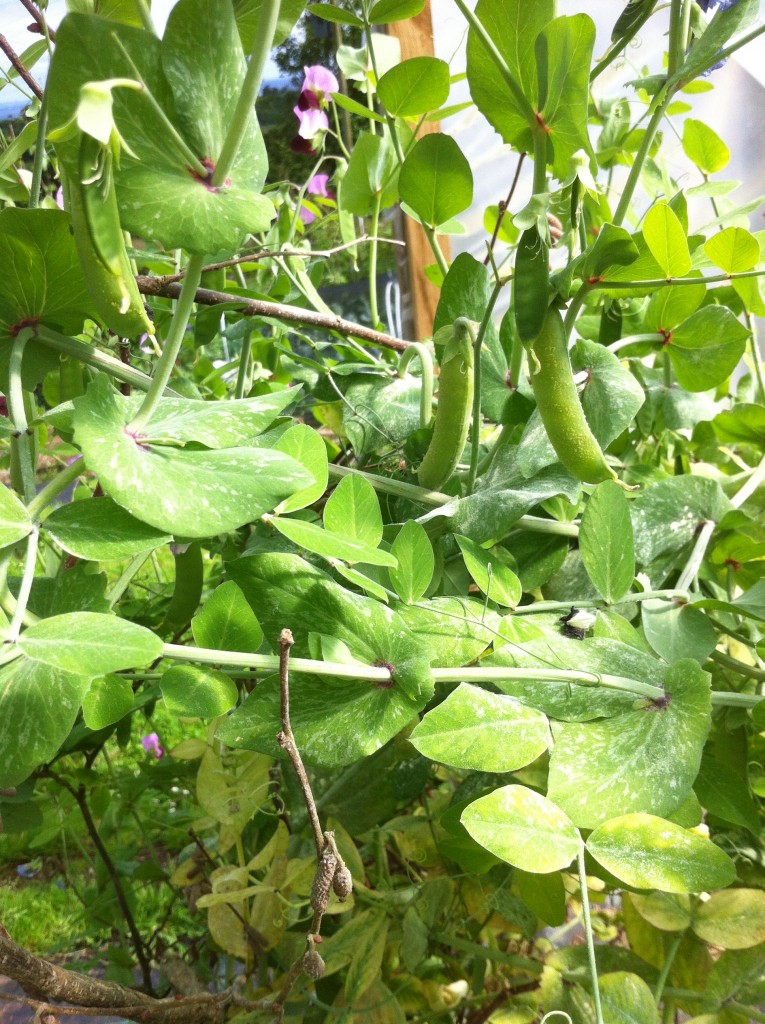
A very rare Catalan heirloom is the drying pea fesol Negre de Belgarda, which was given to me by Jesus Vargas. I grew it last year but some peas shed their harvest behind my back and I have some more growing in a polytunnel which are most decorative. The flowers are lovely and the peas small. They turn almost black when dry and were a staple of the region.
Harvested already have been a French variety, Douce de Provence, which I grew over winter in a polytunnel. A very hardy variety which does especially well under cover.
This photo was taken in mid-April as the first flowers were showing themselves and setting had just started.
I have made recent sowings of a number of other varieties, mostly in large tubs and the garden border; Champion of England, regarded by many at the time it was popular a hundred years ago, as being one of the ten best peas in the world. I’ve had a disaster with a variety given to me by an HSL member whose name I have forgotten sadly called Hangman’s Doors. I could only get three peas to germinate so they are precious little seedlings right now. Another very fine French variety that grows to about a meter, Espoir de Gremboux, again an HSL variety along with Suttons Purple Podded I am growing especially for the HSL this year. Last but not least, an Irish heirloom, Daniel O”Rourke. Named after the man who grew them originally and that was in the Vavilov collection in St. Petersburg but was given to me by a fellow member of the HSL in Scotland.
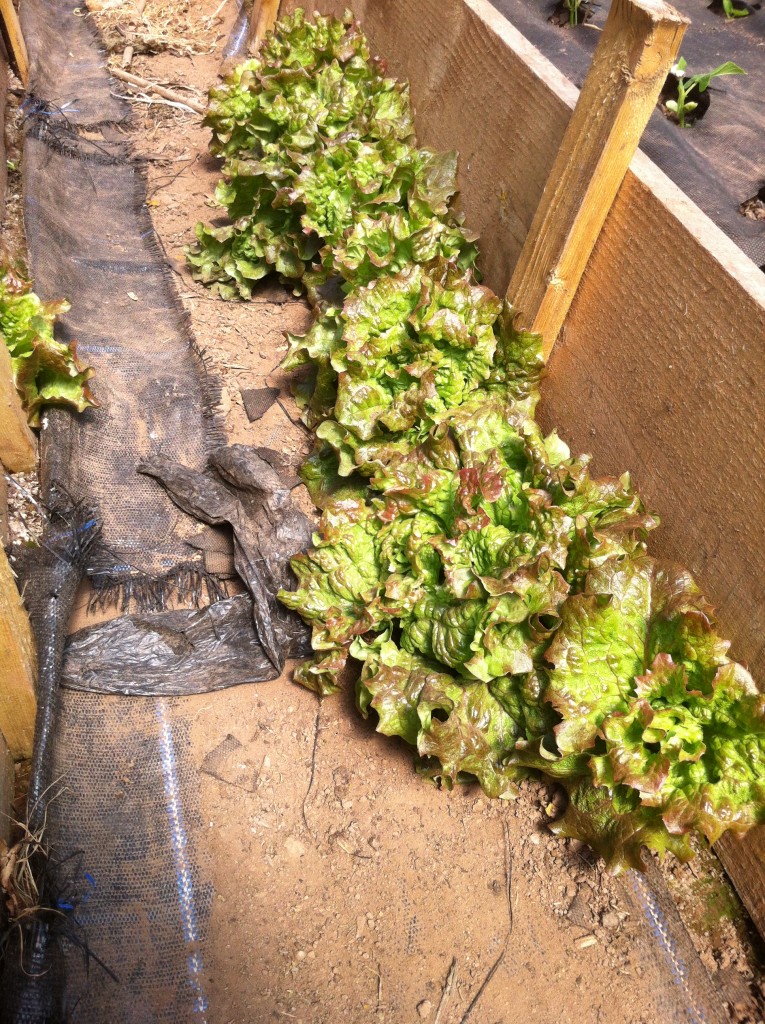
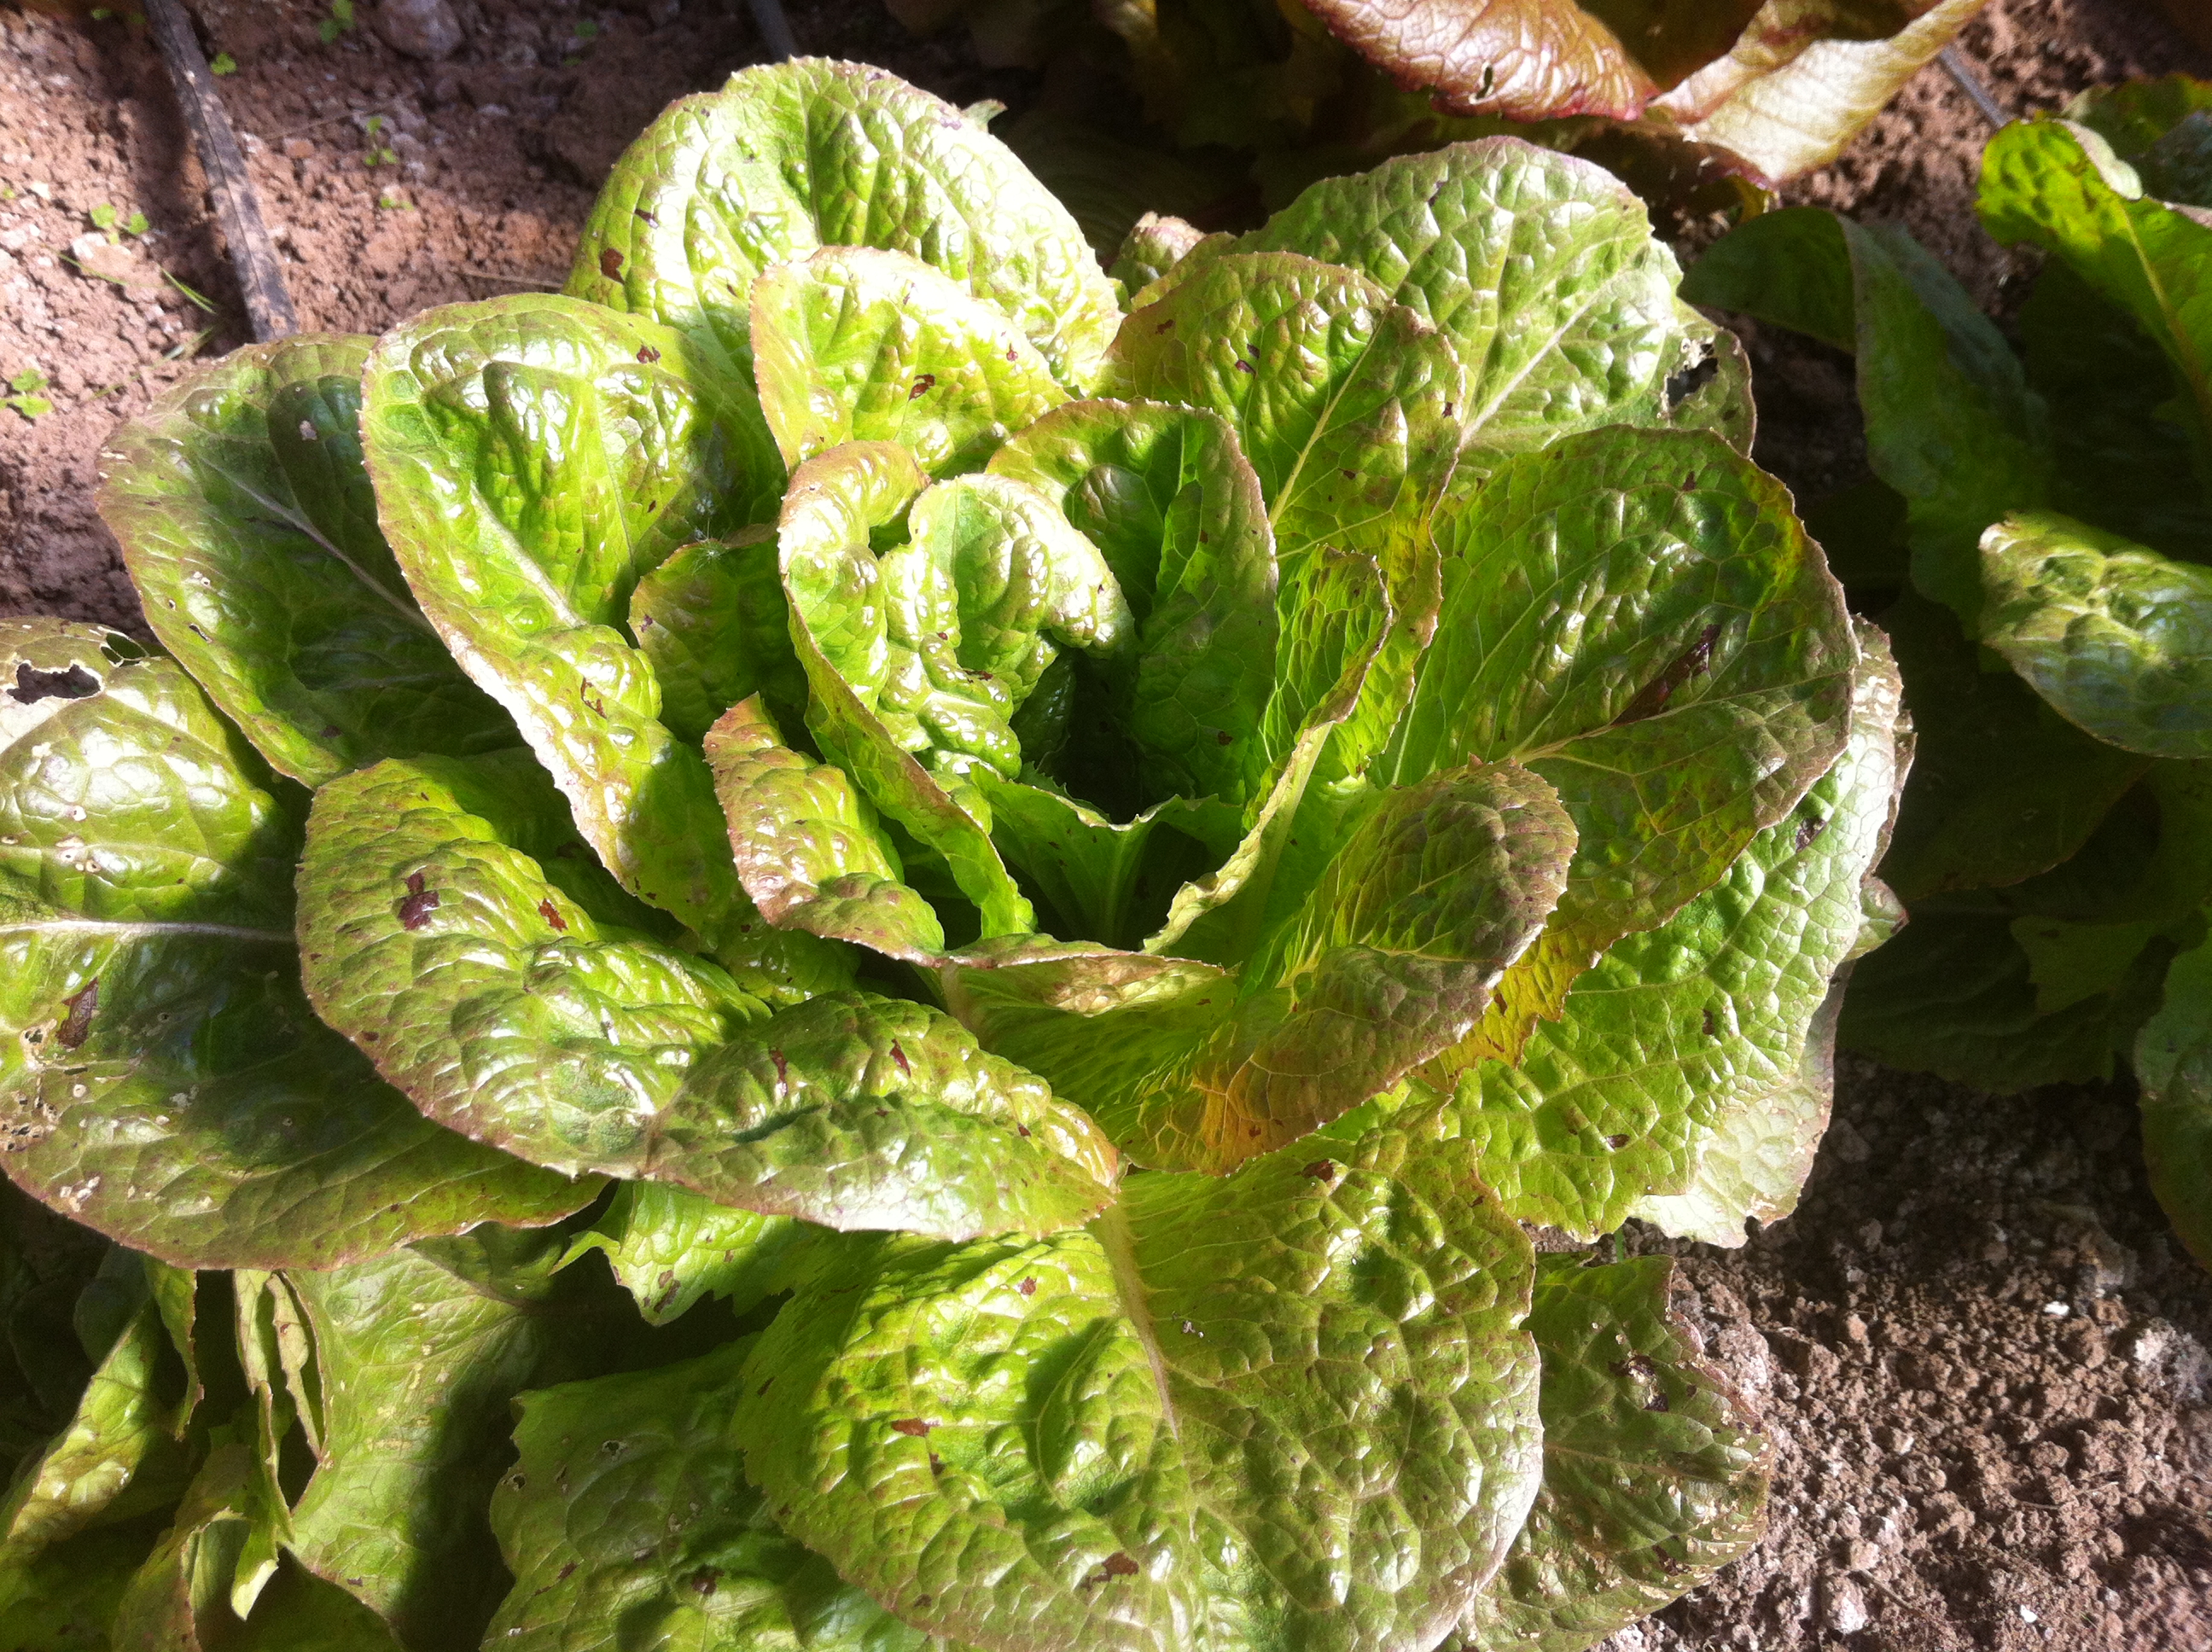
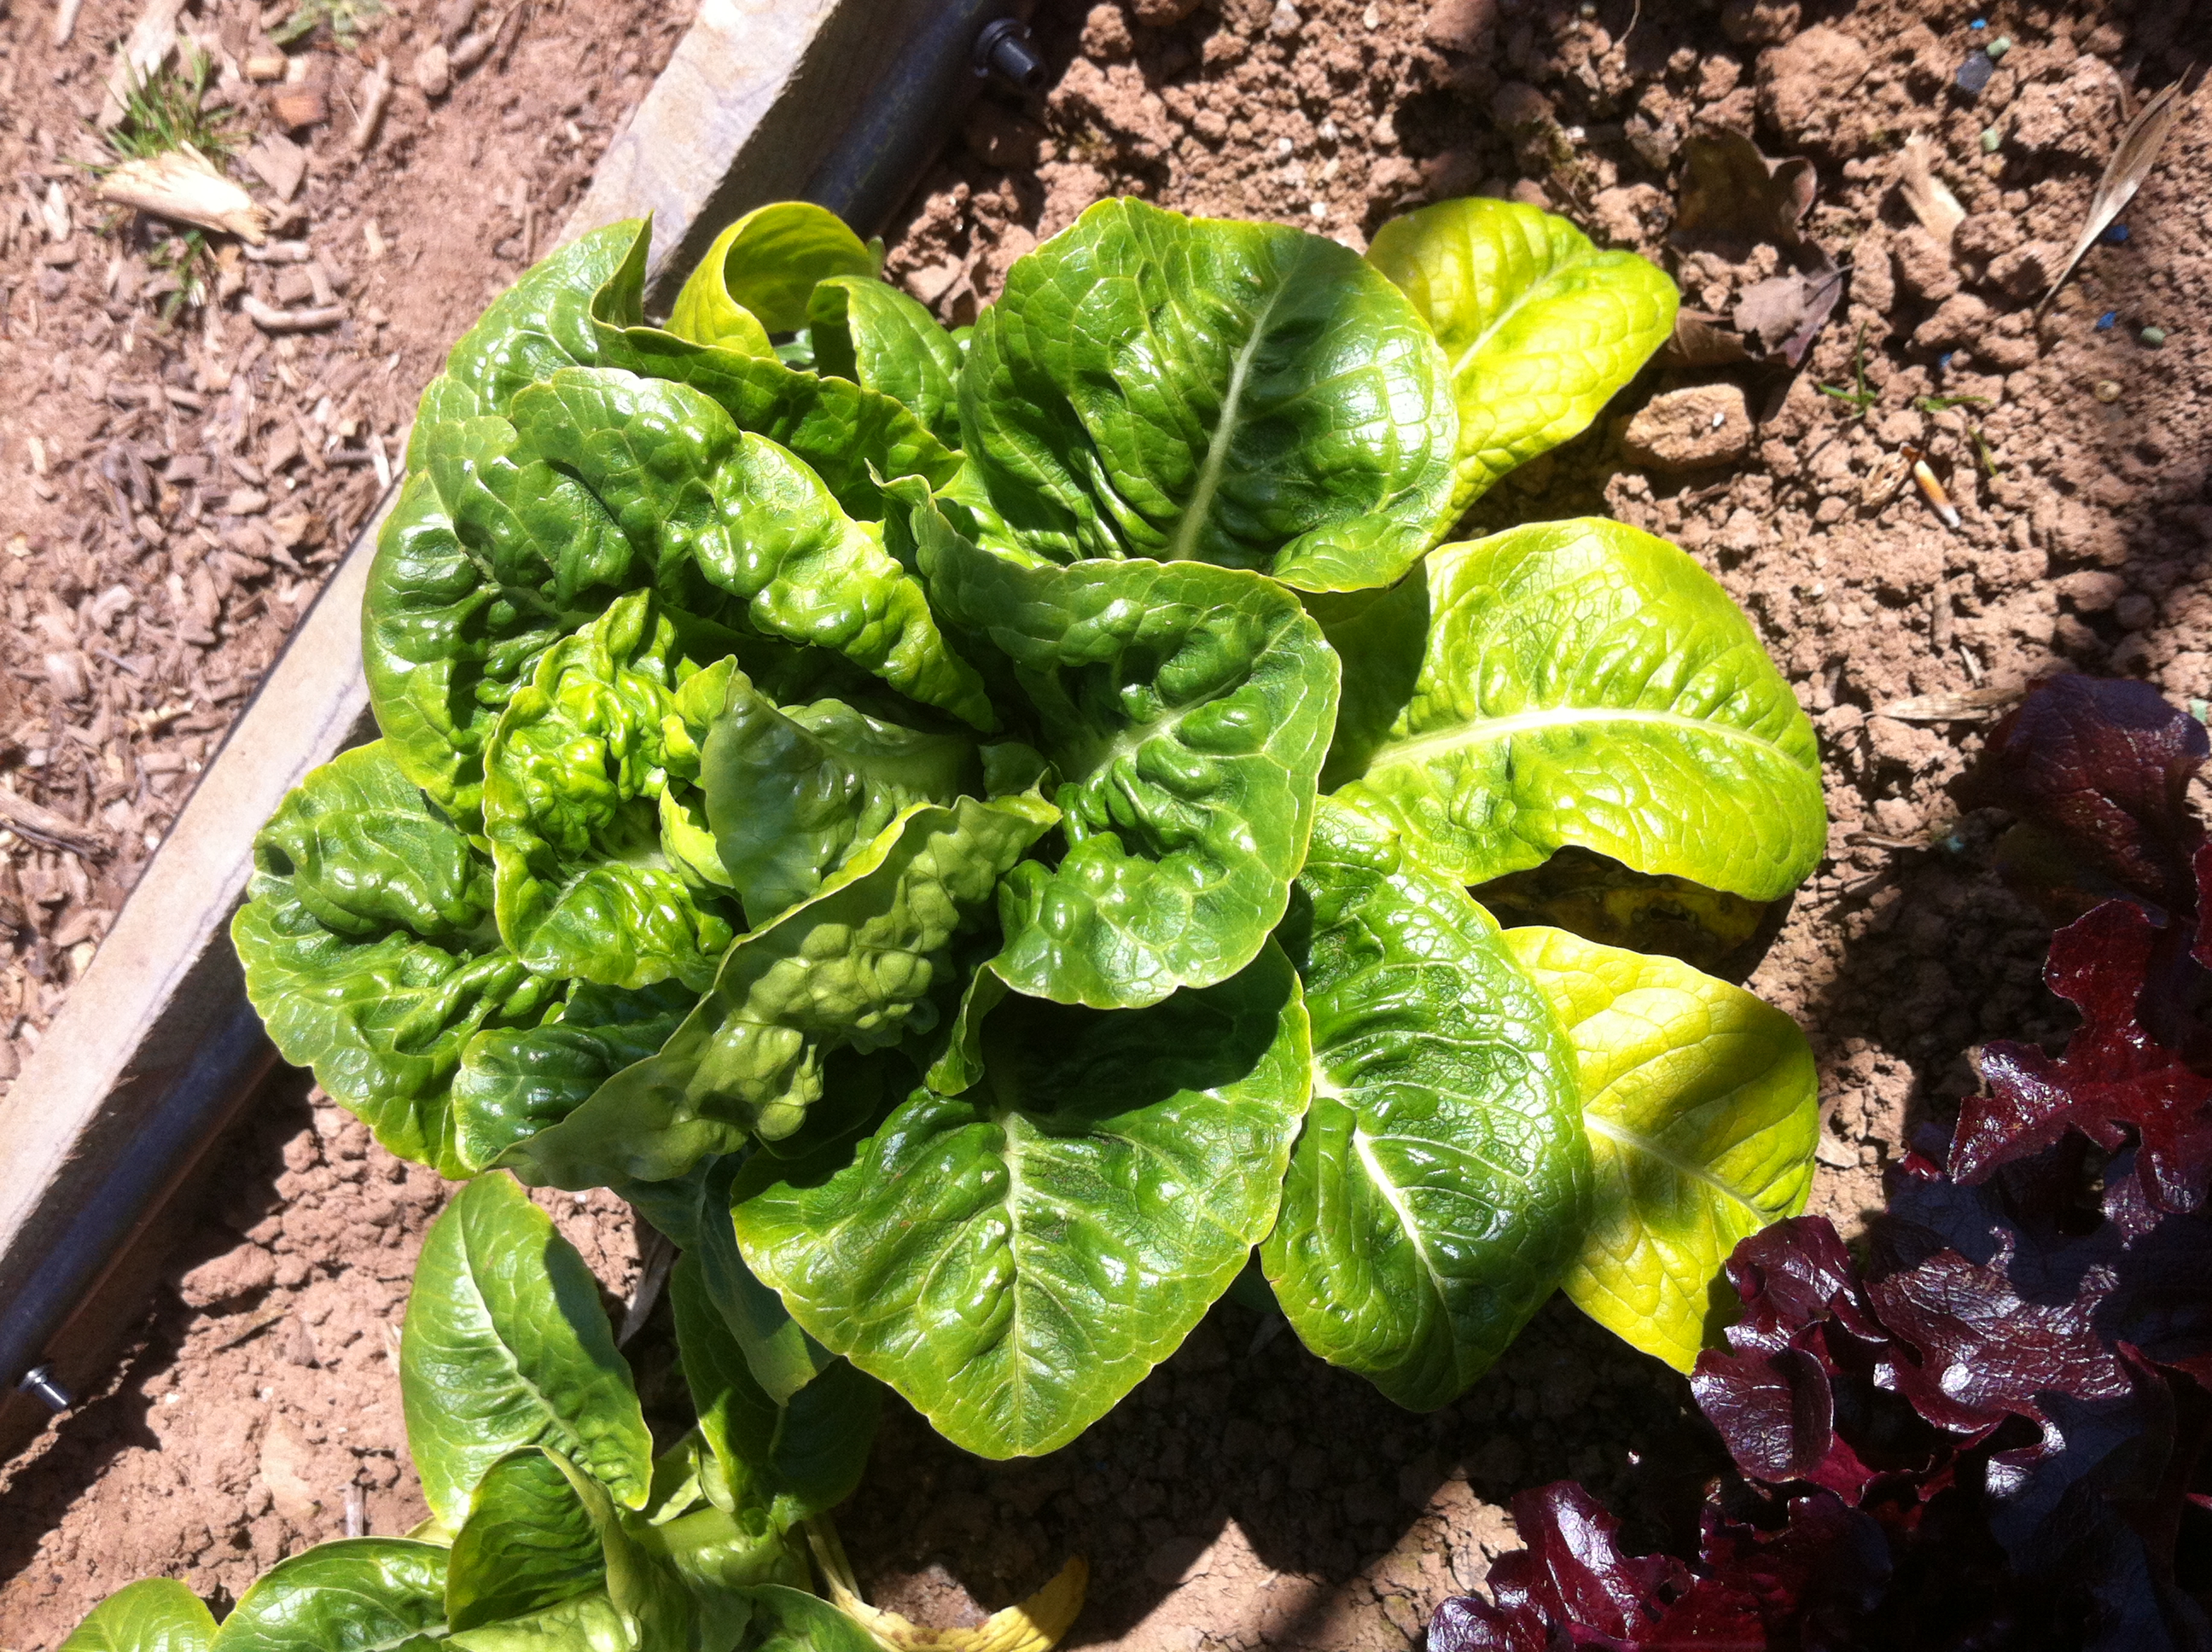
The winter of 2015/16 has been great for salad crops. The mild weather has meant that even a summer lettuce like Little Gem has survived through the winter and makes a tasty addition to the hungry gap. This little darling was harvested over the weekend.There are a trinity of rather lovely winter lettuce that are now almost at end in my garden.. Sown between September and October last year, they have provided me with a delicious and varied crop until now.
First up is Latuccino, an Italian variety that was given to me by the gardener who looks after my old school’s two-acre bio-dynamic walled garden. Grown as cut-and-come-again, I start thinning them in early January to 30cm apart and allow them to heart up. This is a truly delicious variety – sharp and tangy; one of my absolute favourites and well worth growing. I save seed of Latuccino and it does have a habit of self-seeding!
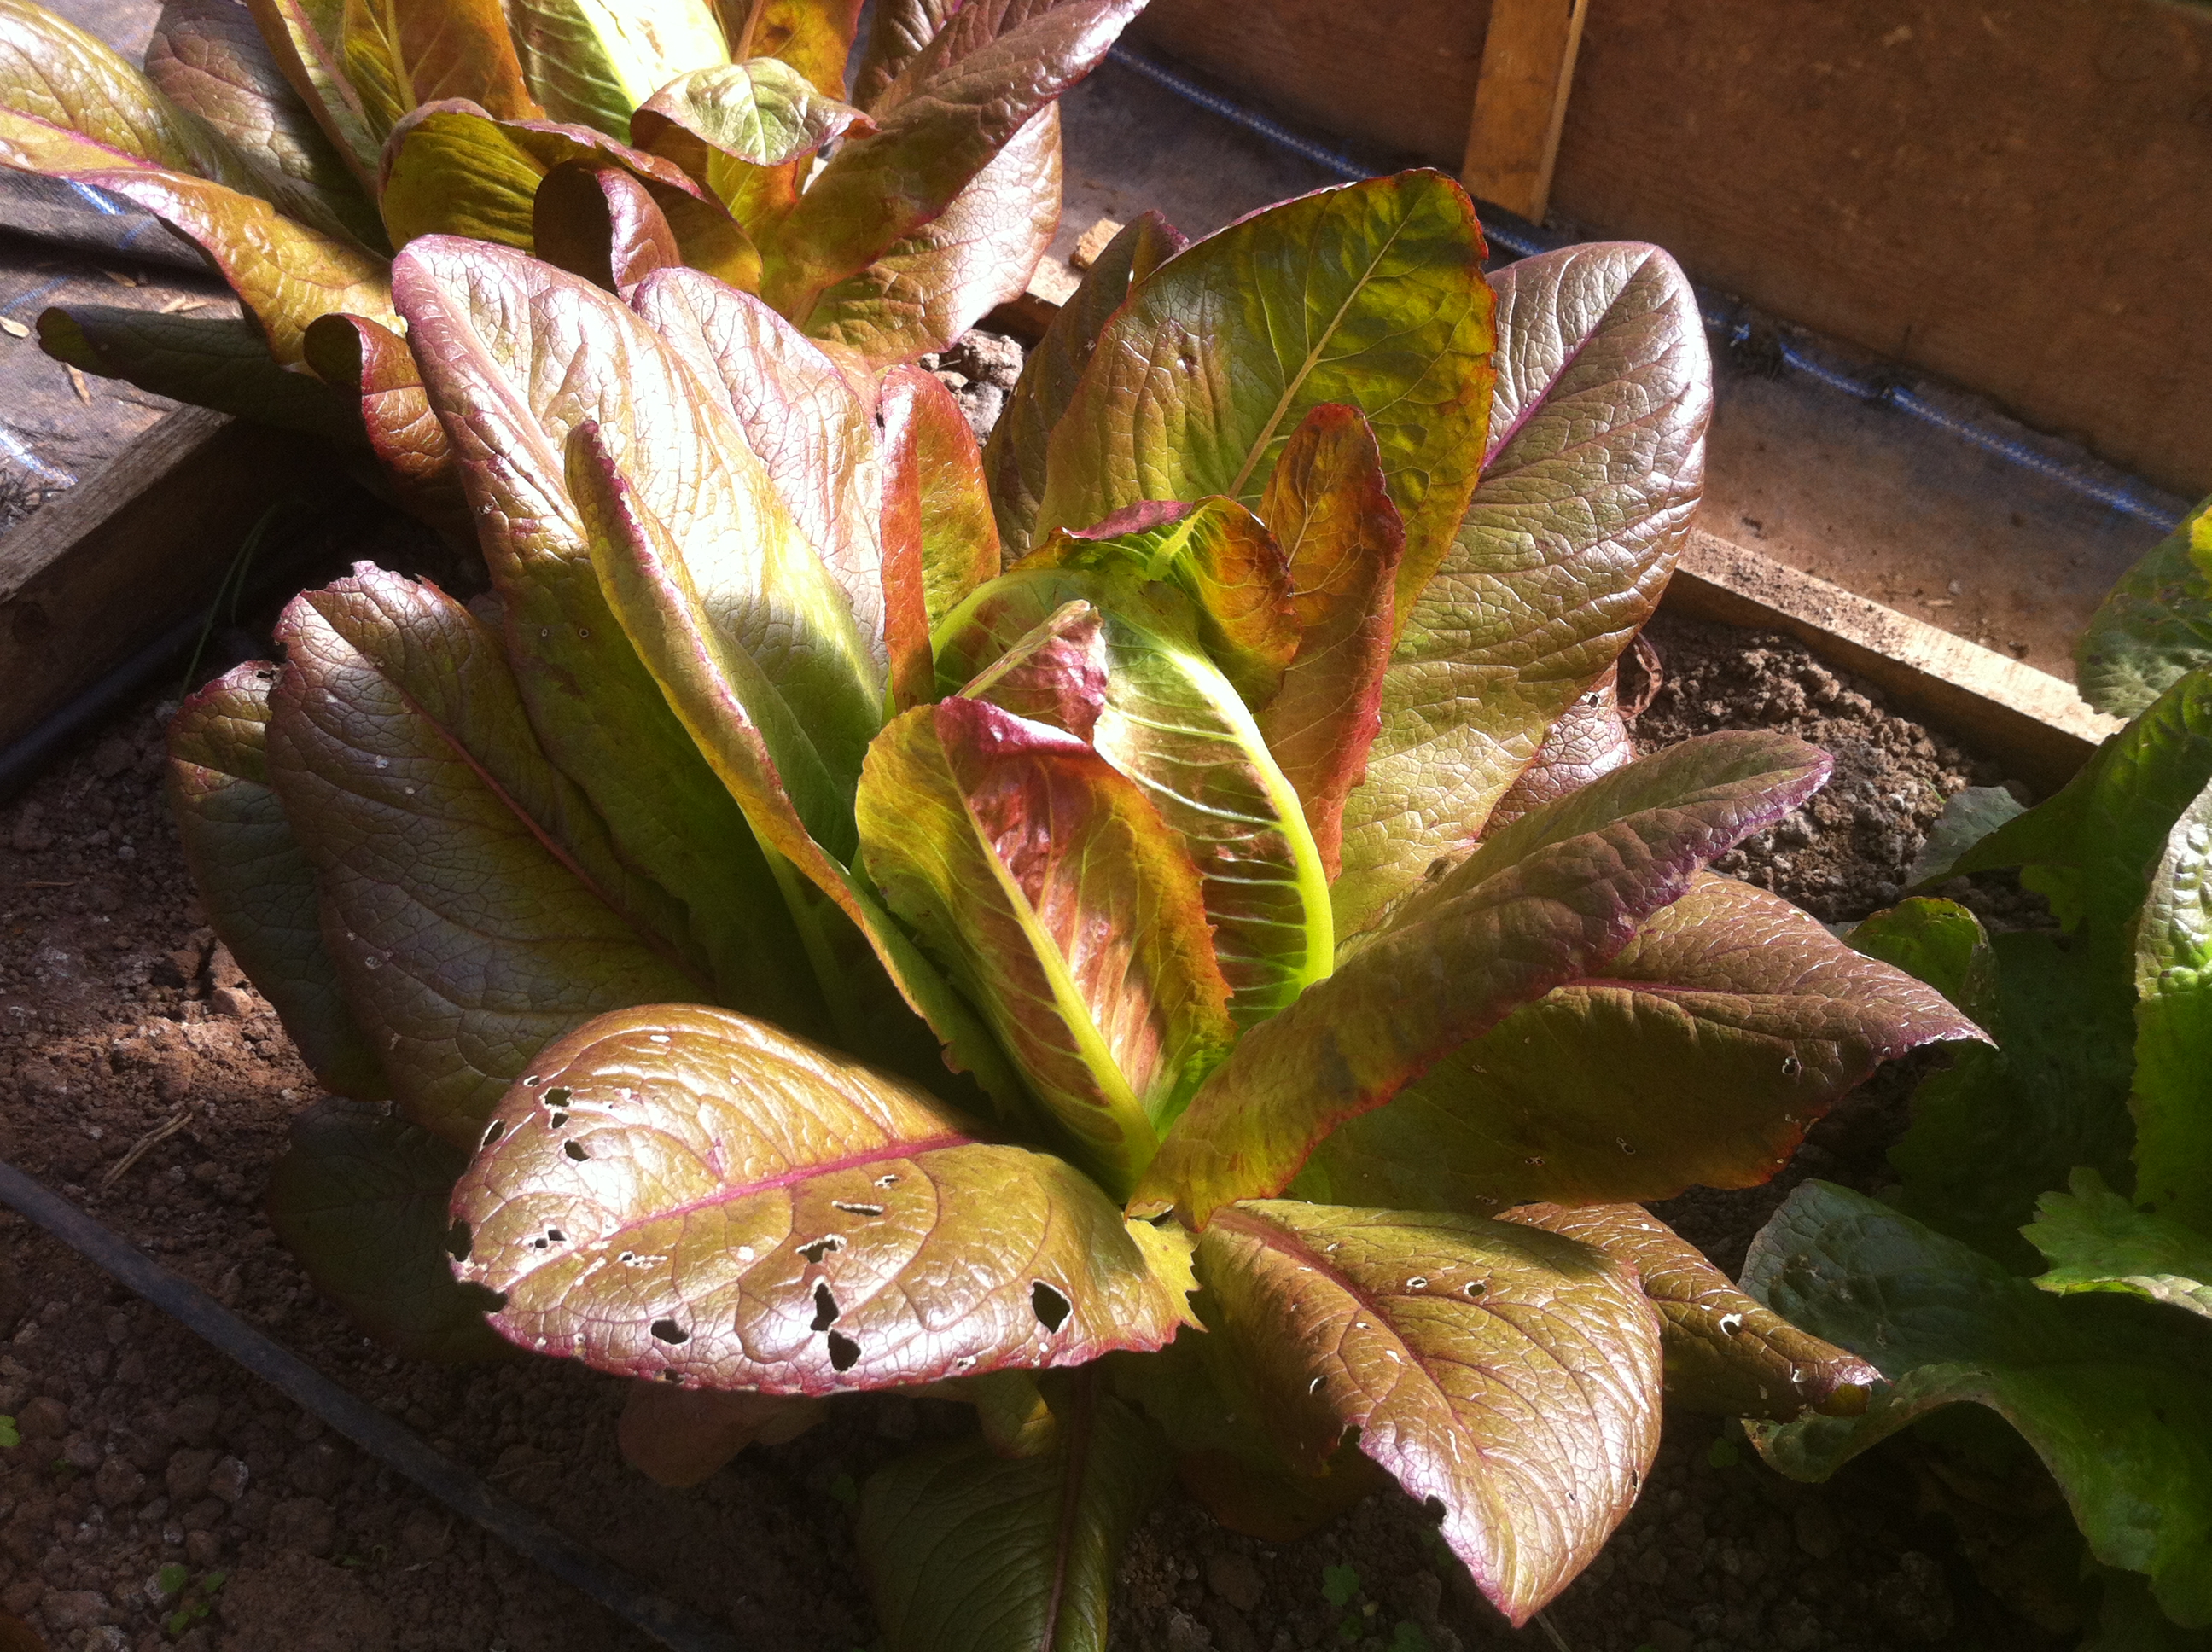
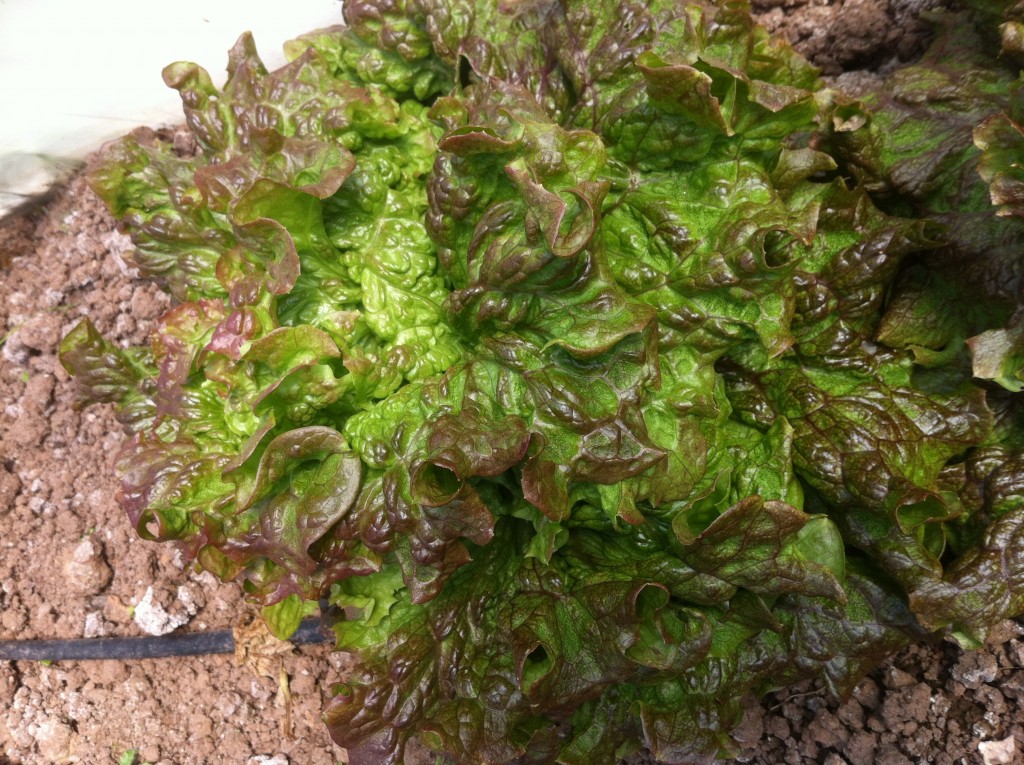
The trinity of lettuce includes two that come from Garden Organic’s Heritage Seed Library. First up a wonderful French loose cos type, Rouge D’Hiver that has a taste that is quite unimpeachable; crunchy, sweet and colourful too. And finally, an English variety, Bloody Warrior. The blood-red spots on these super-sweet green leaves tell it all. I plan to grow this variety for seed for 2017.
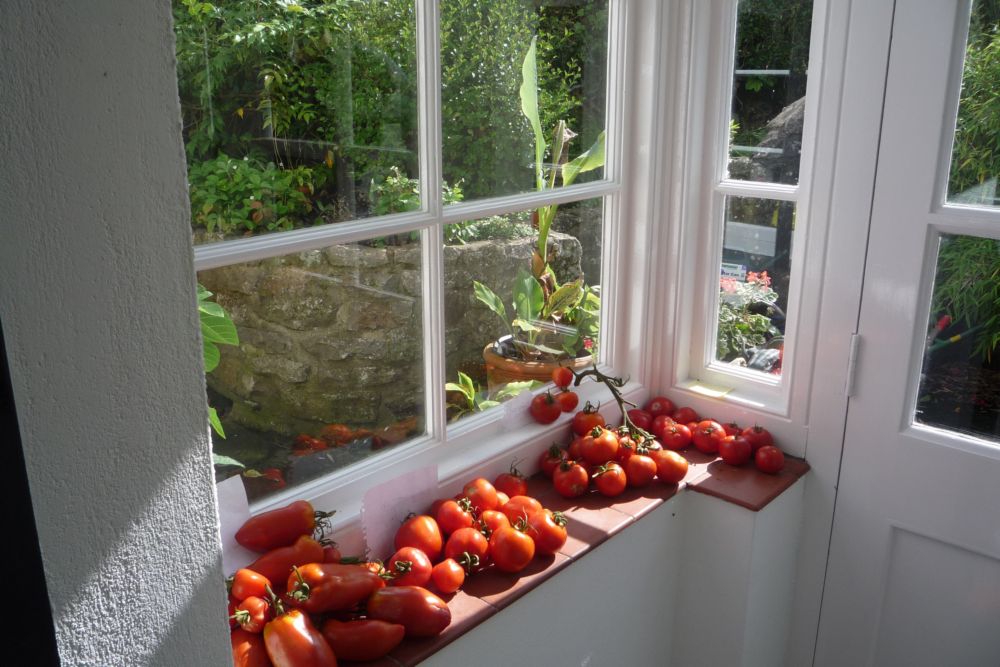
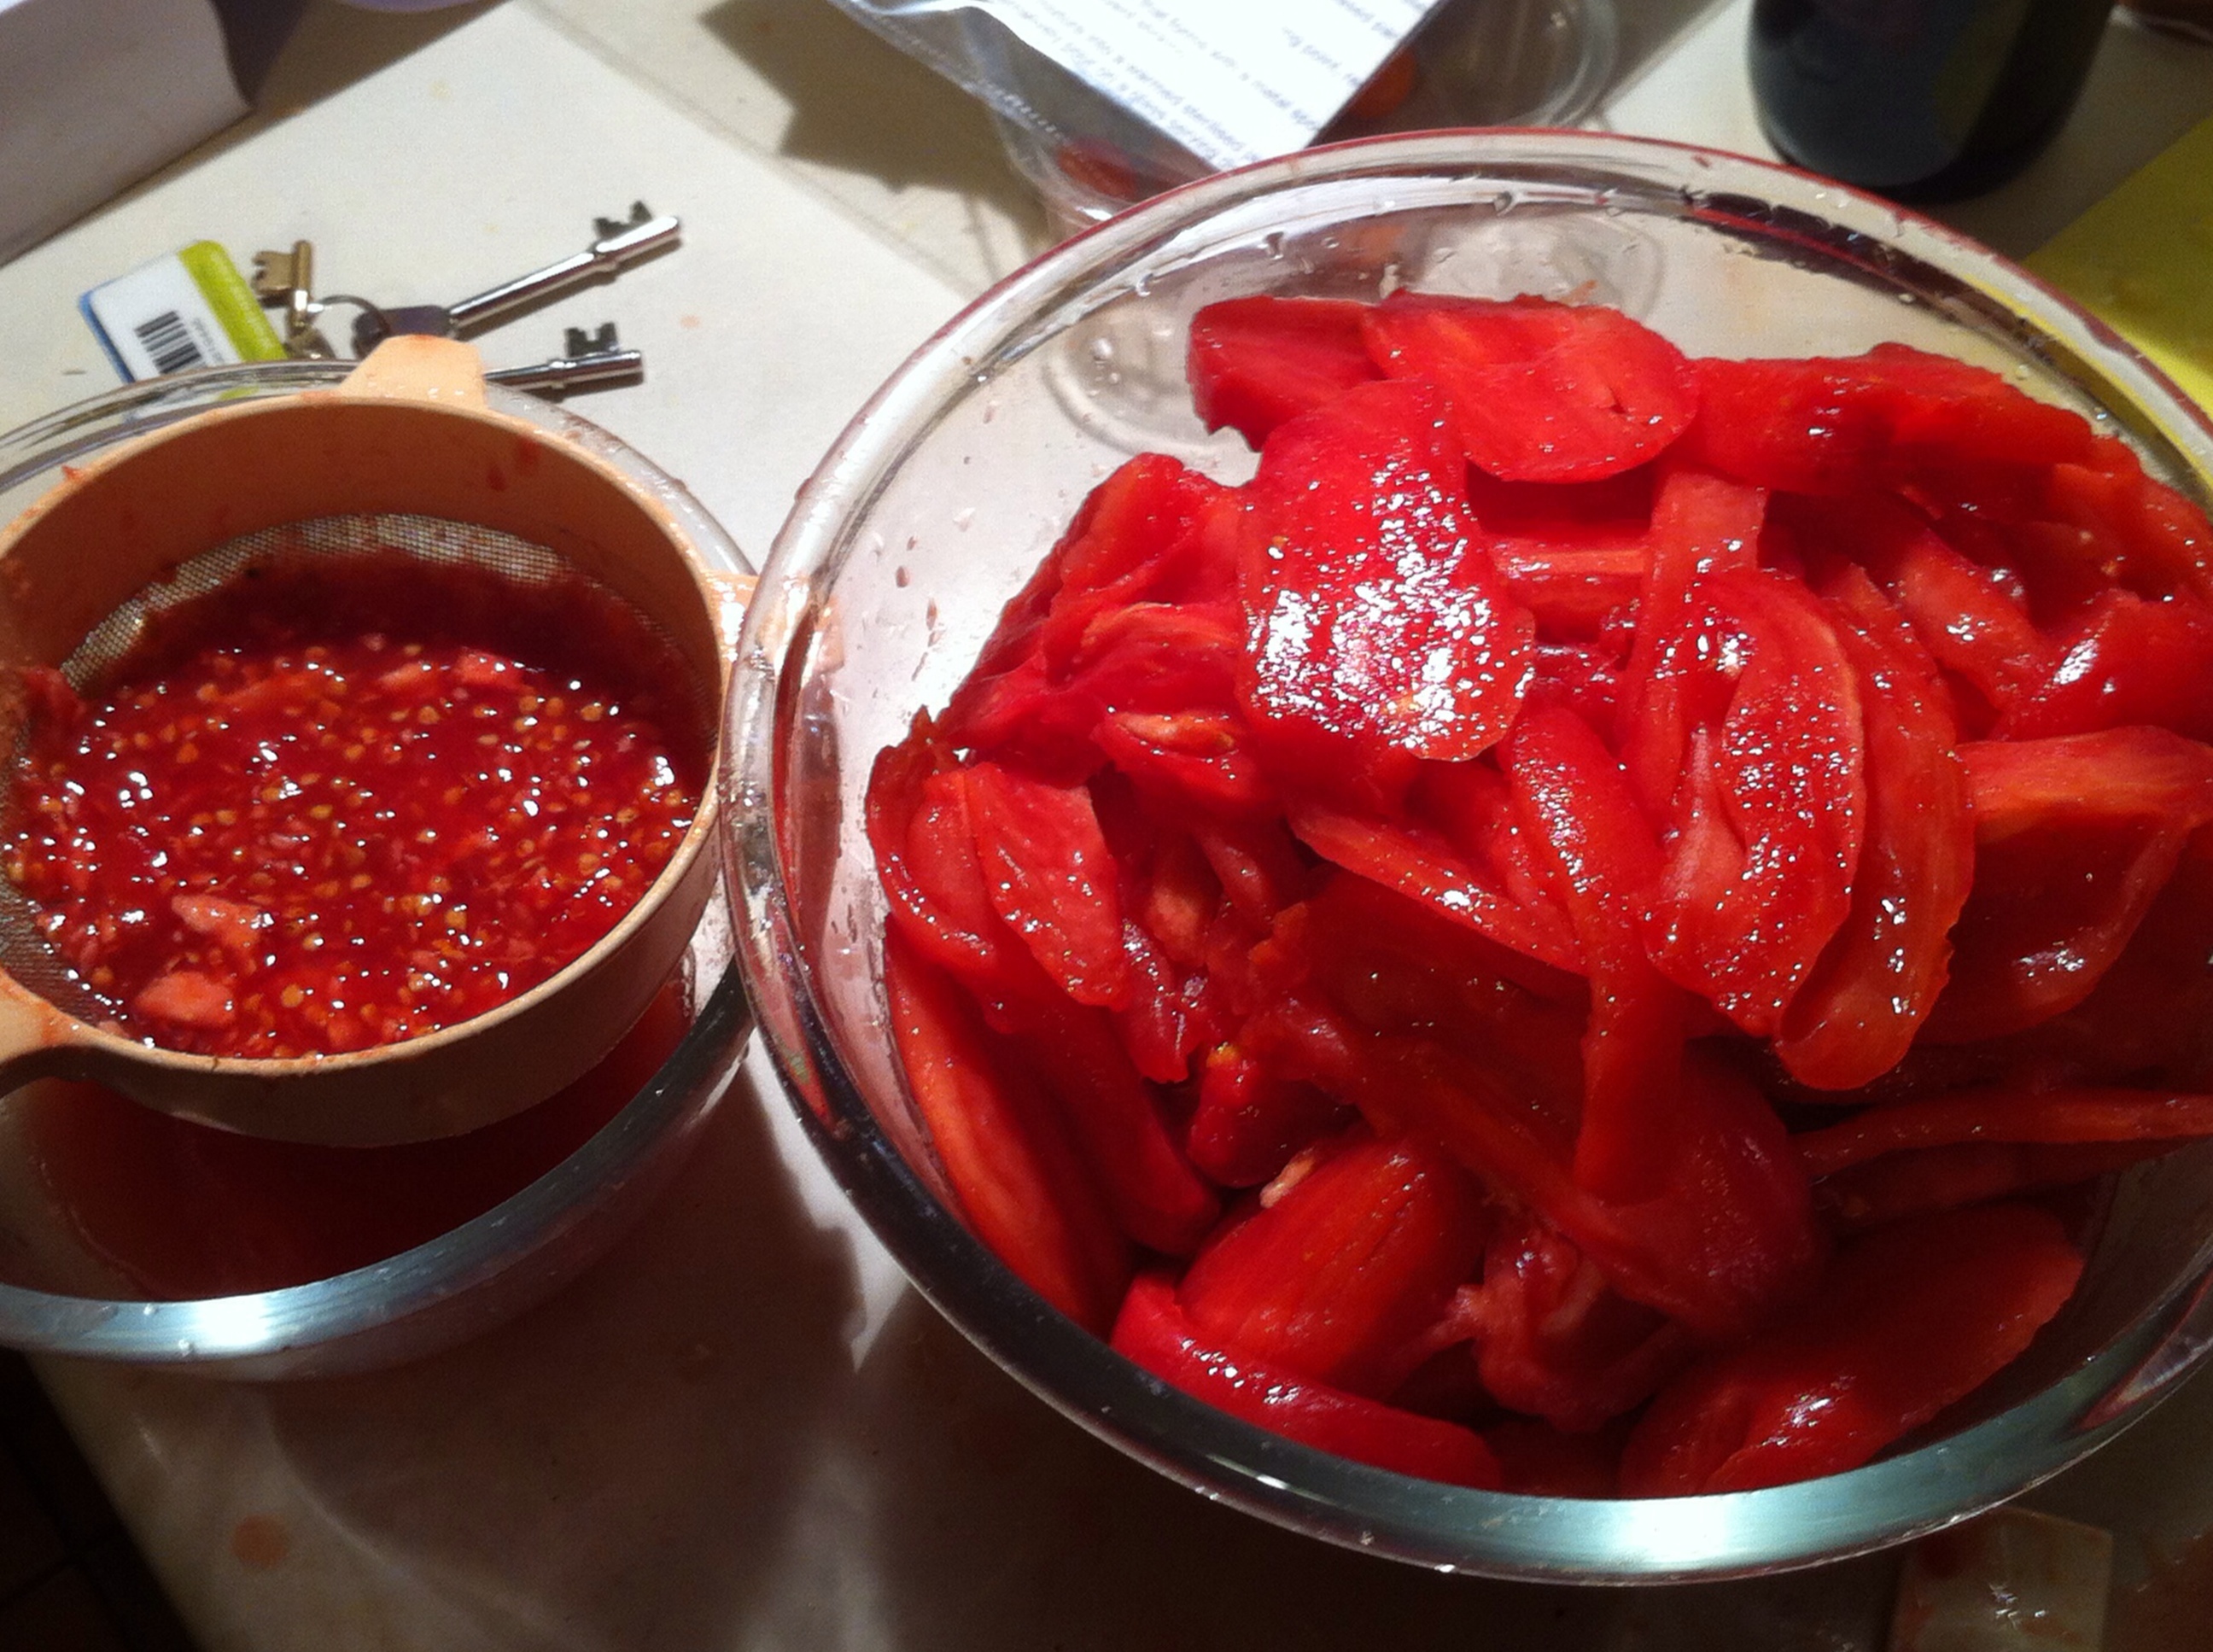
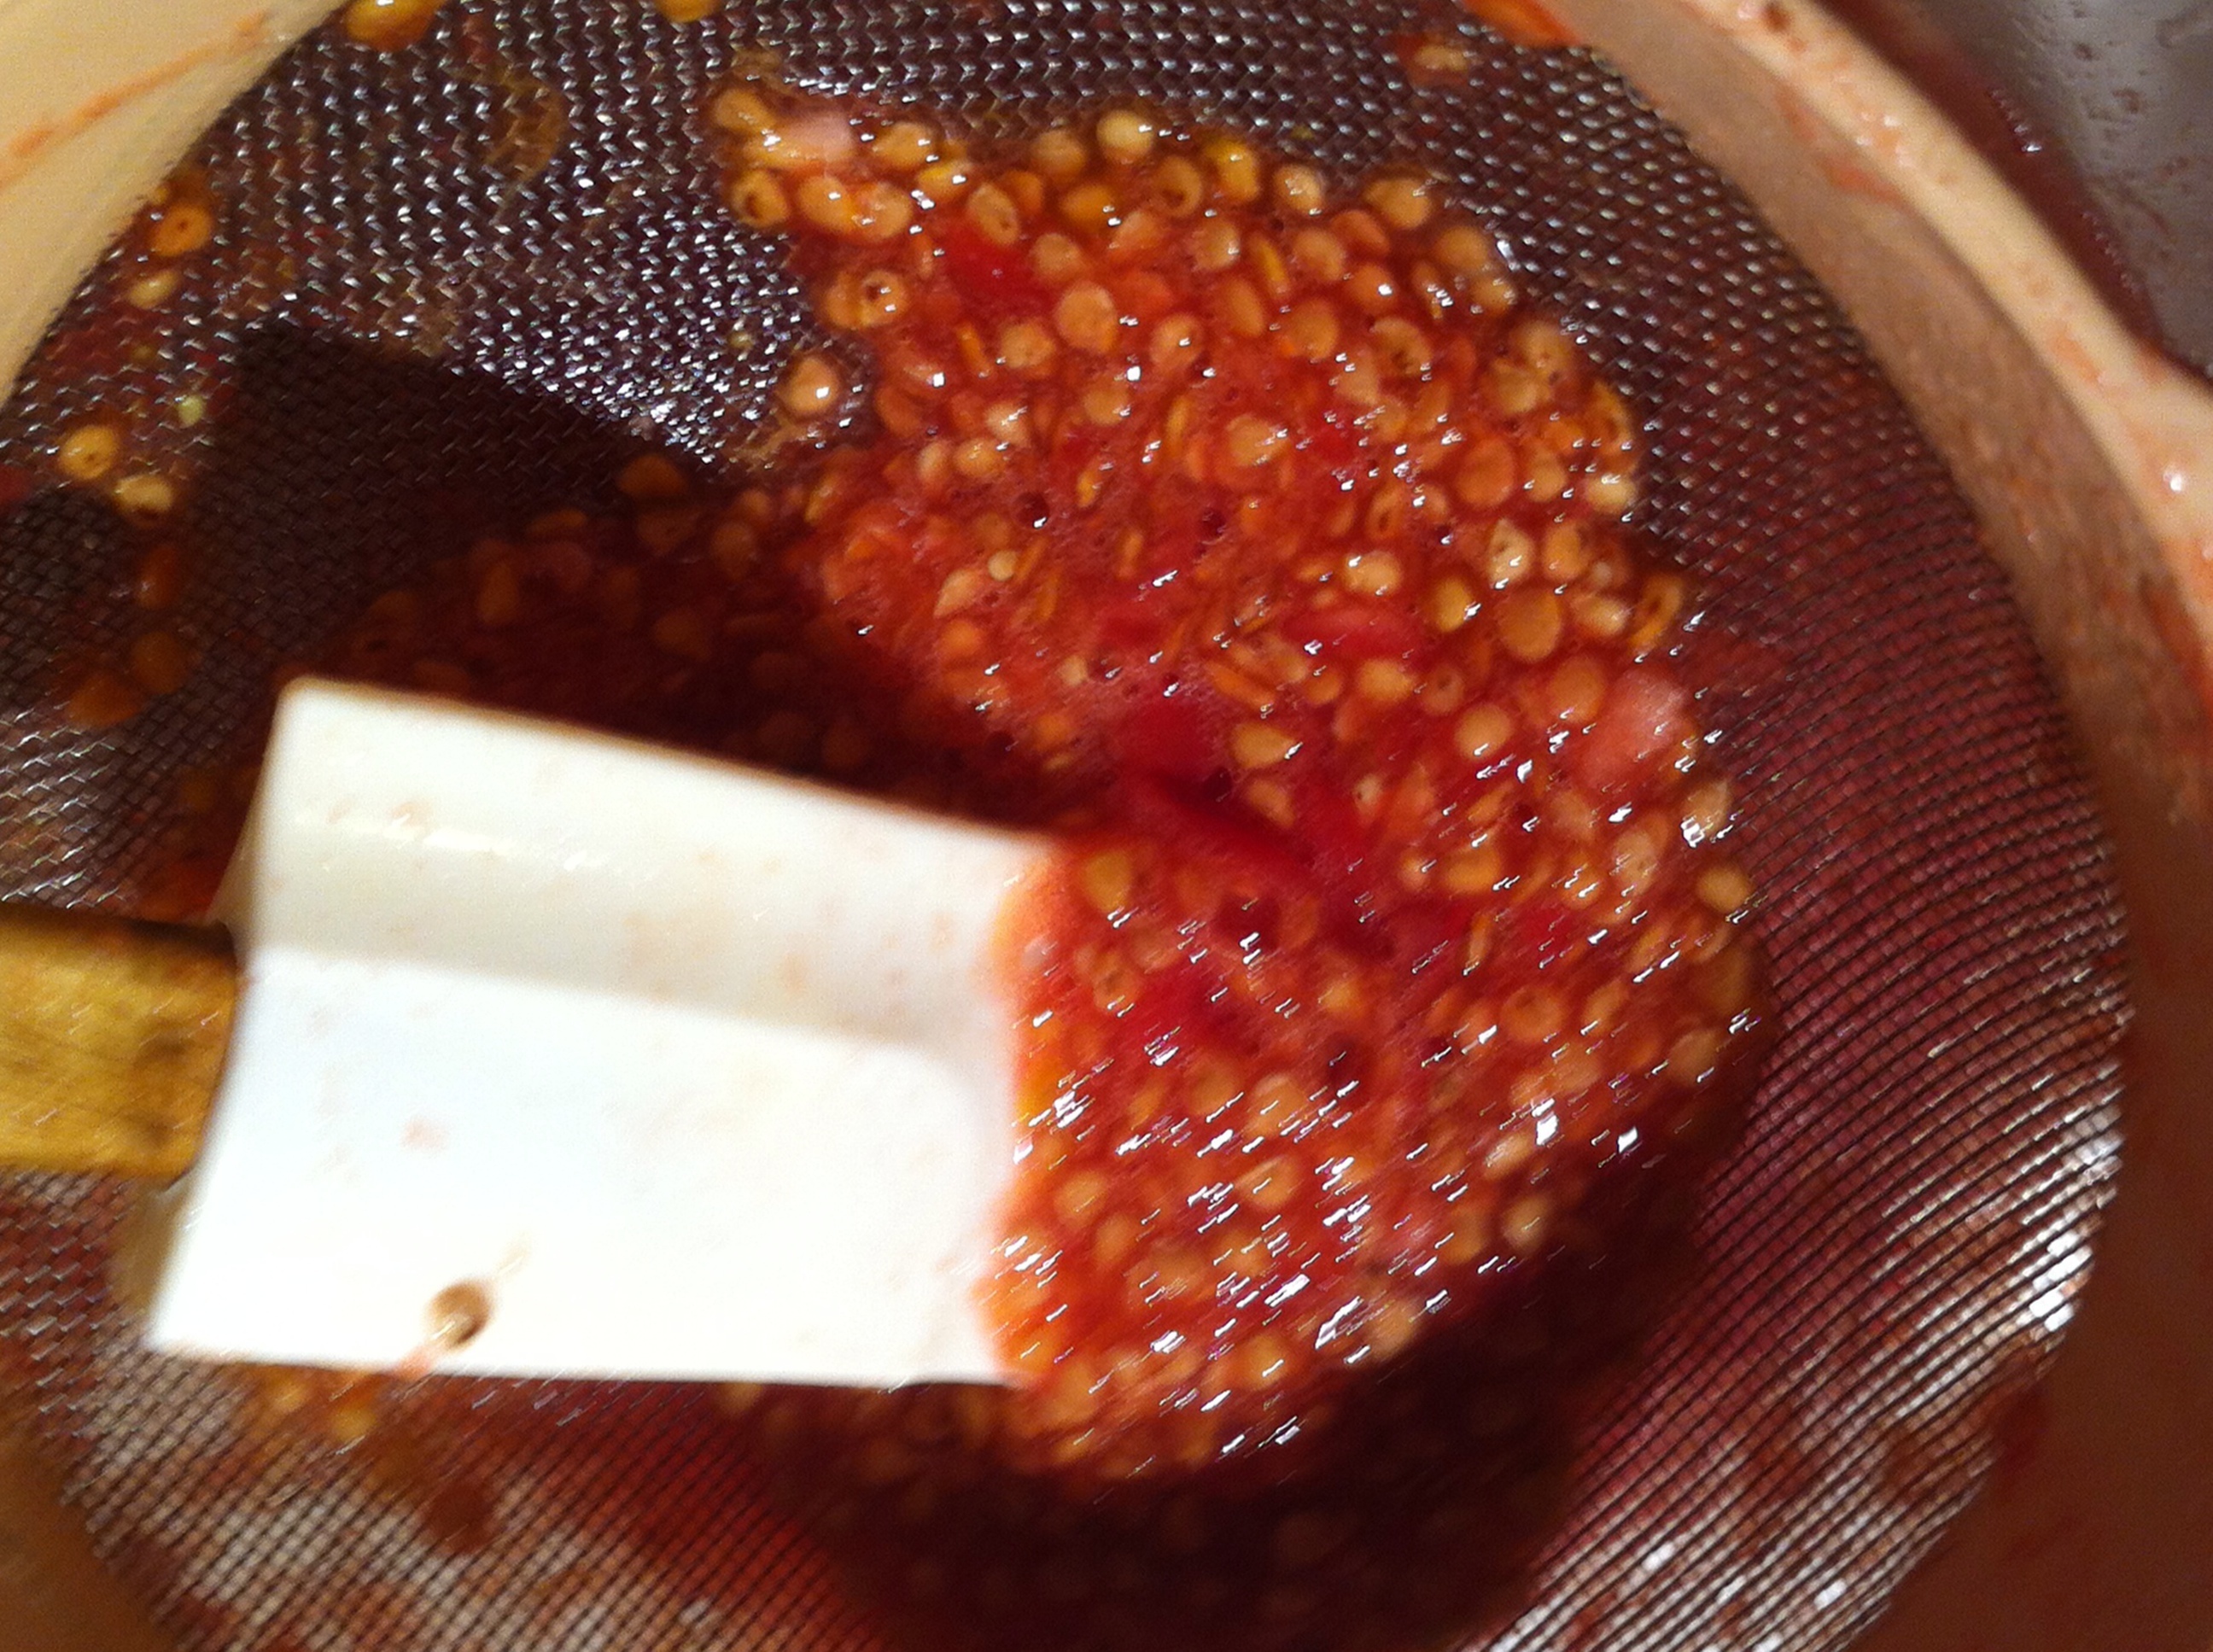
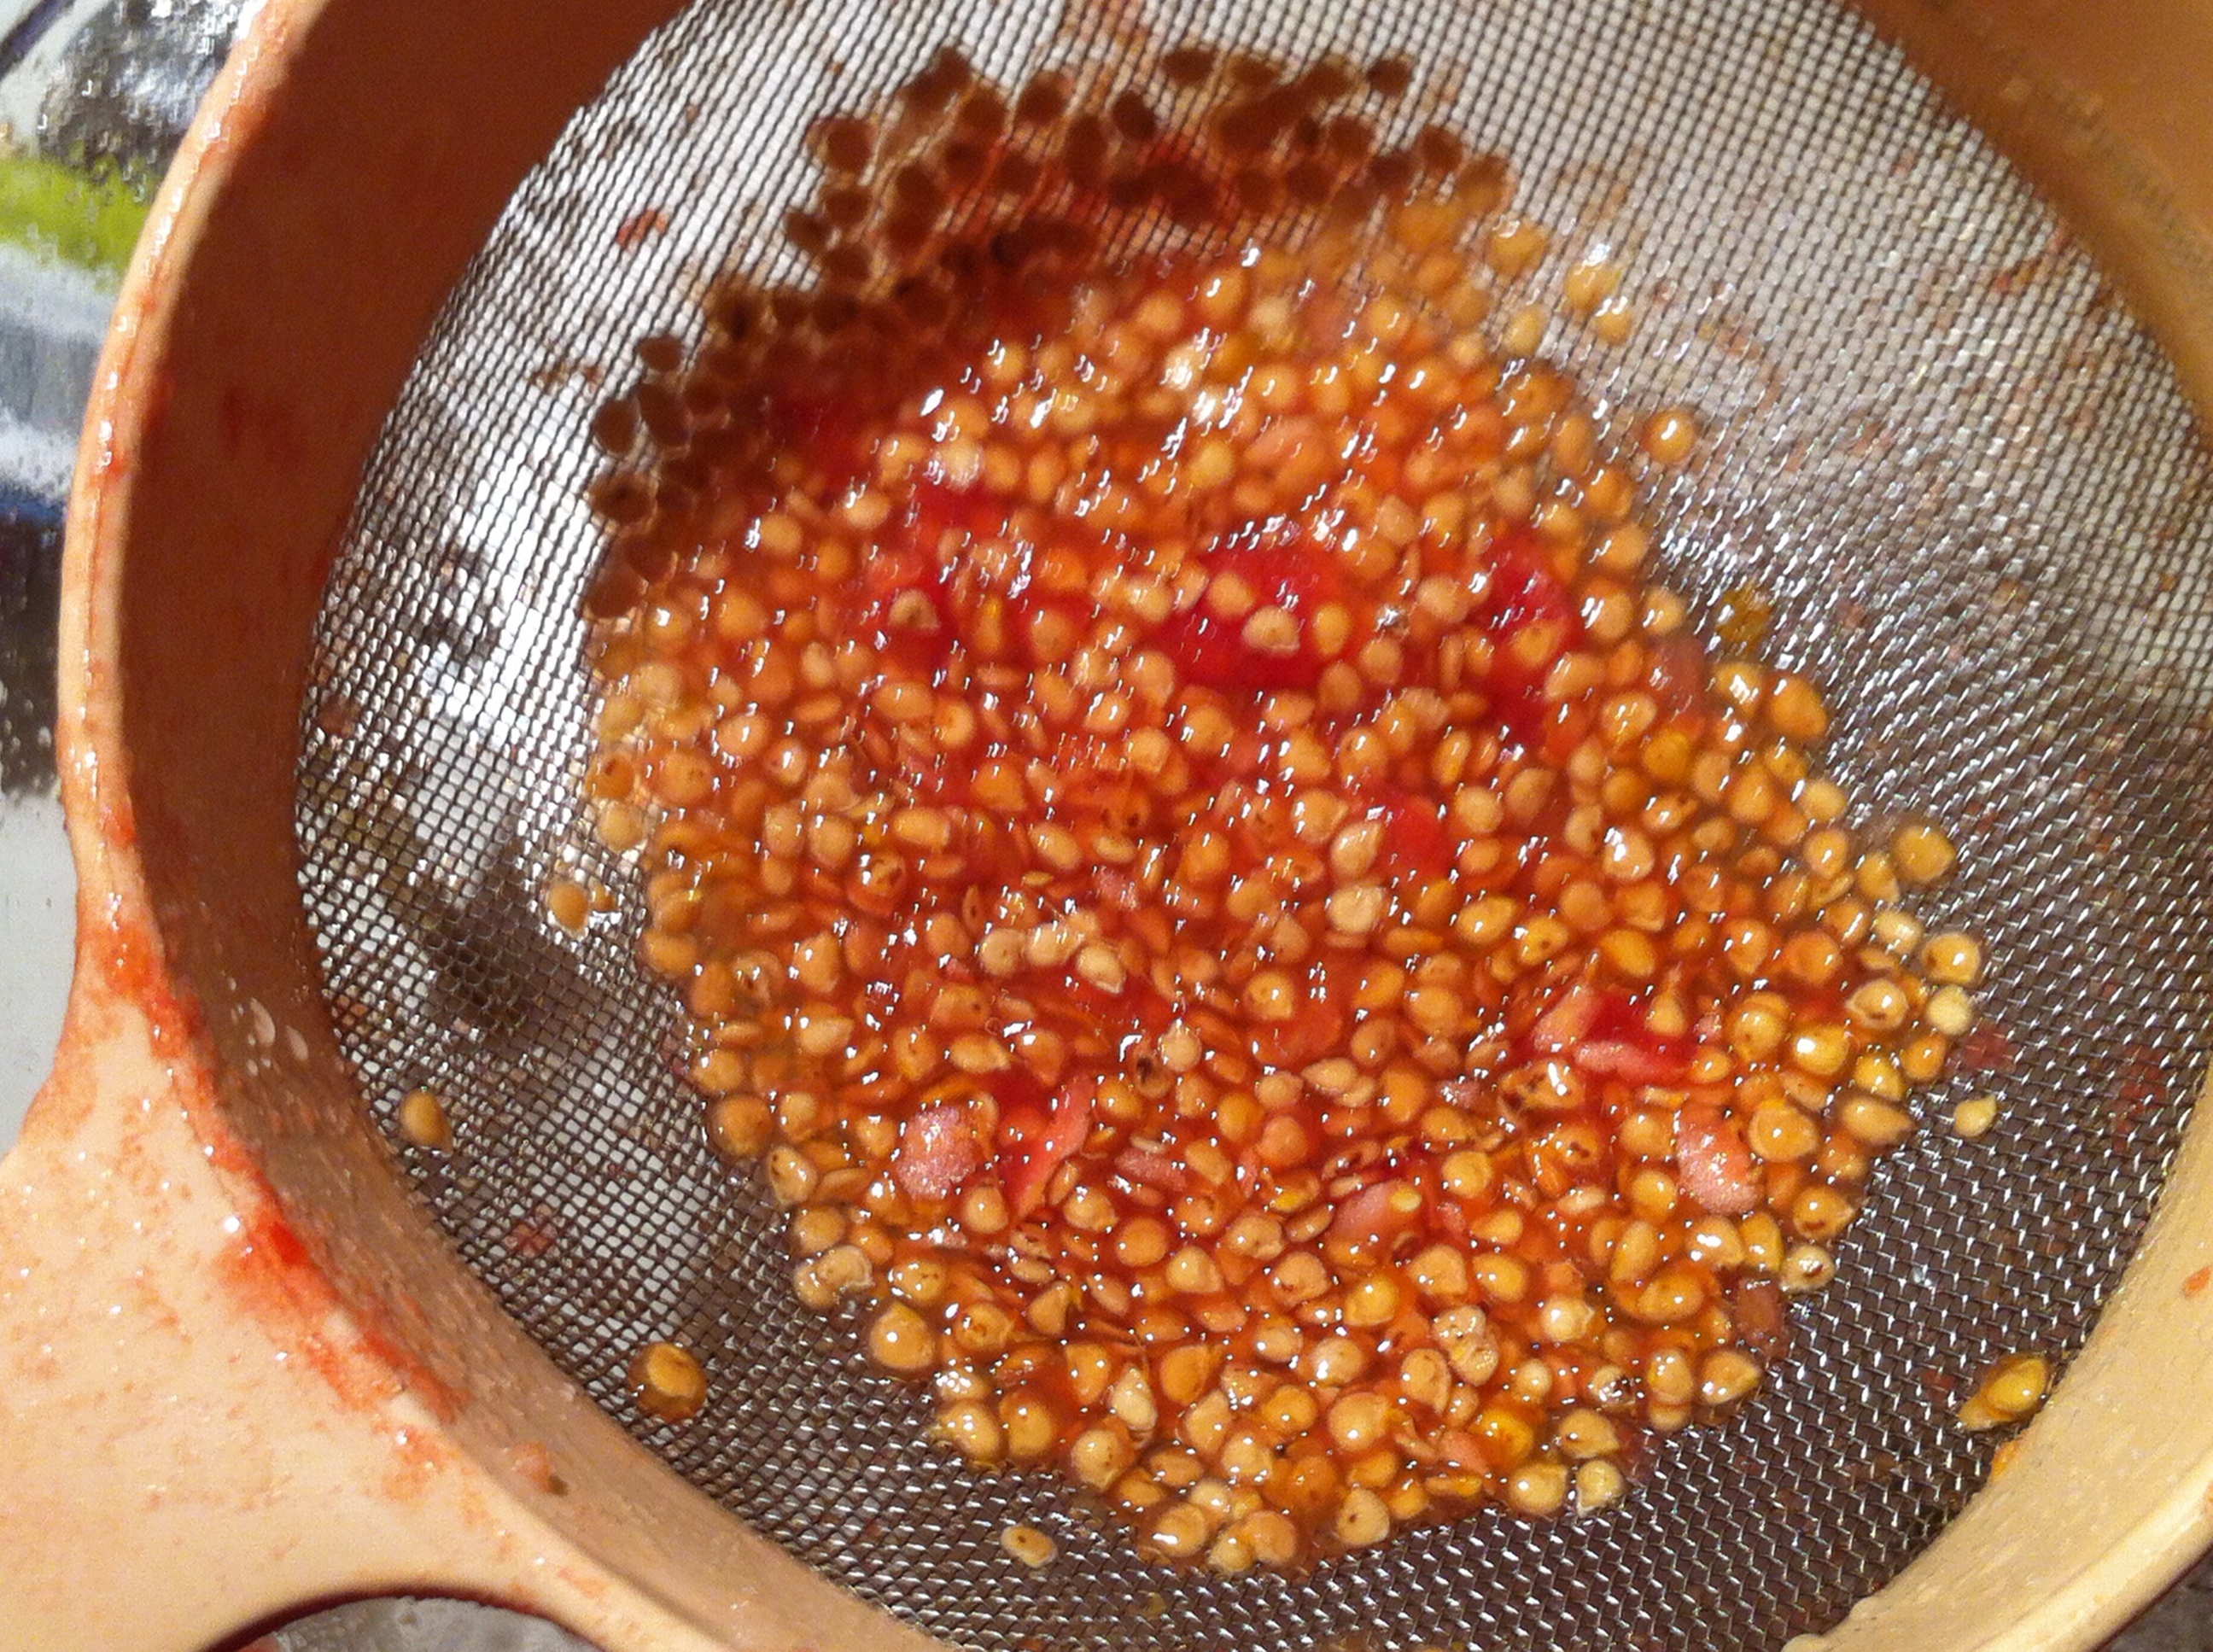
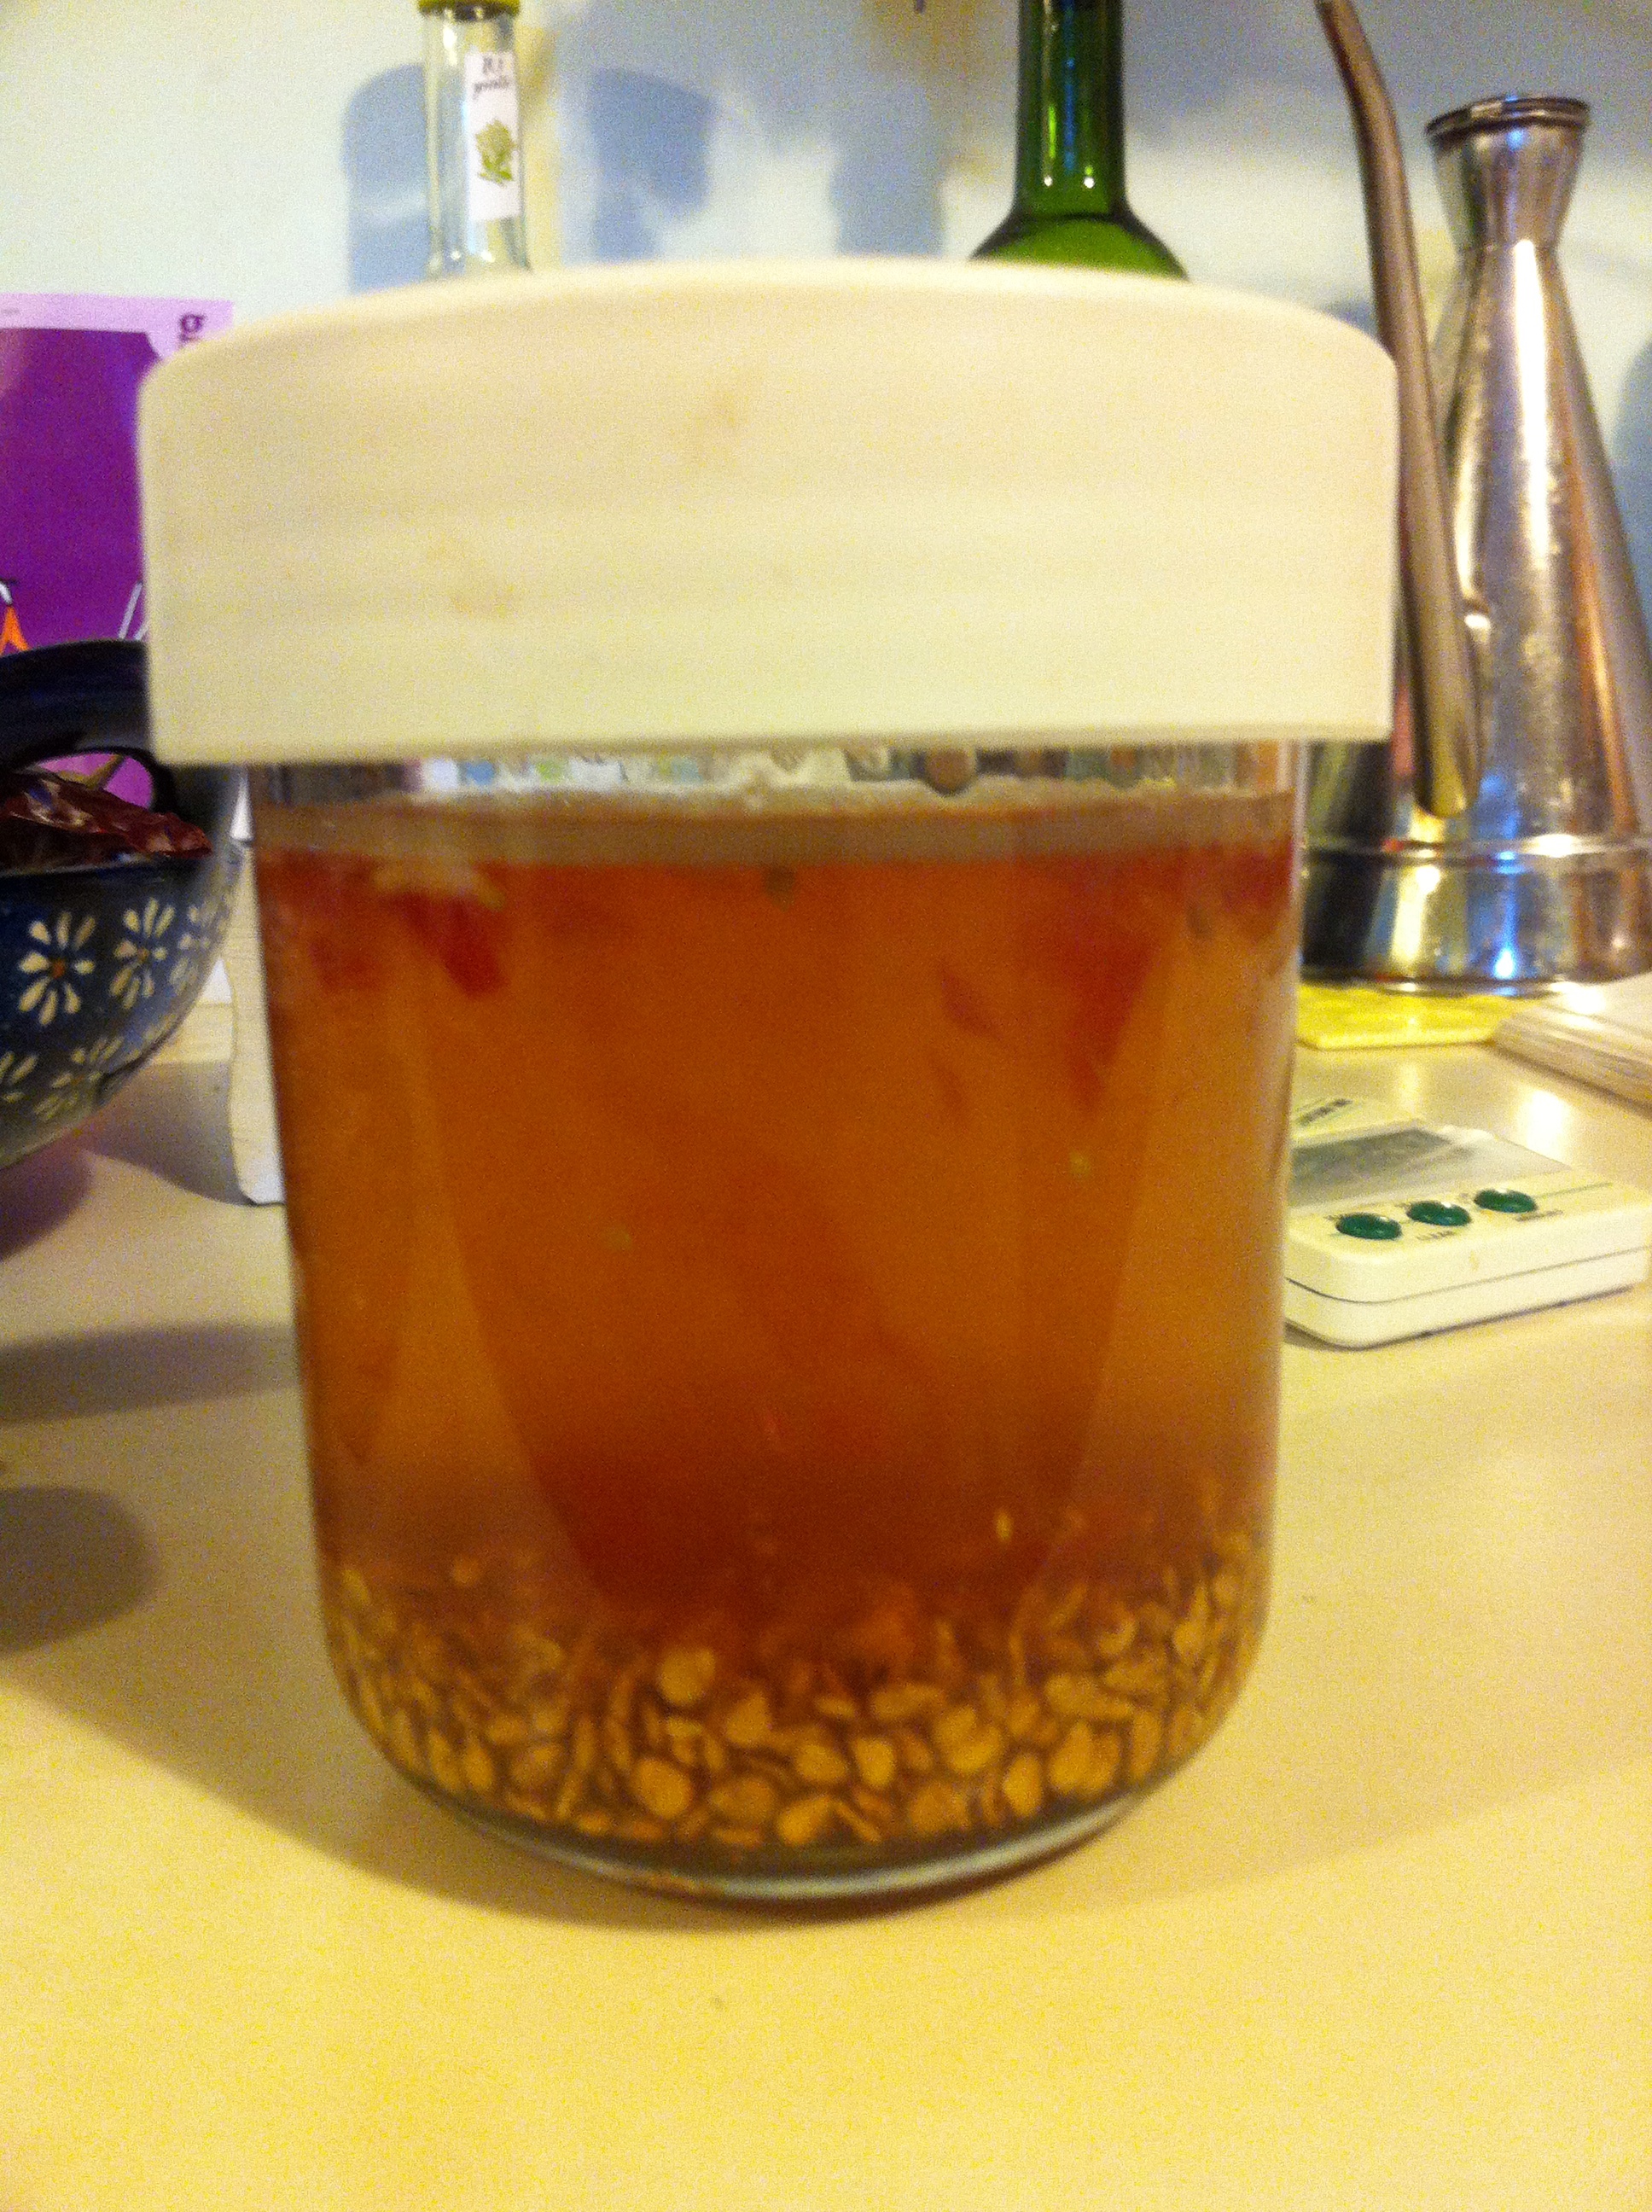
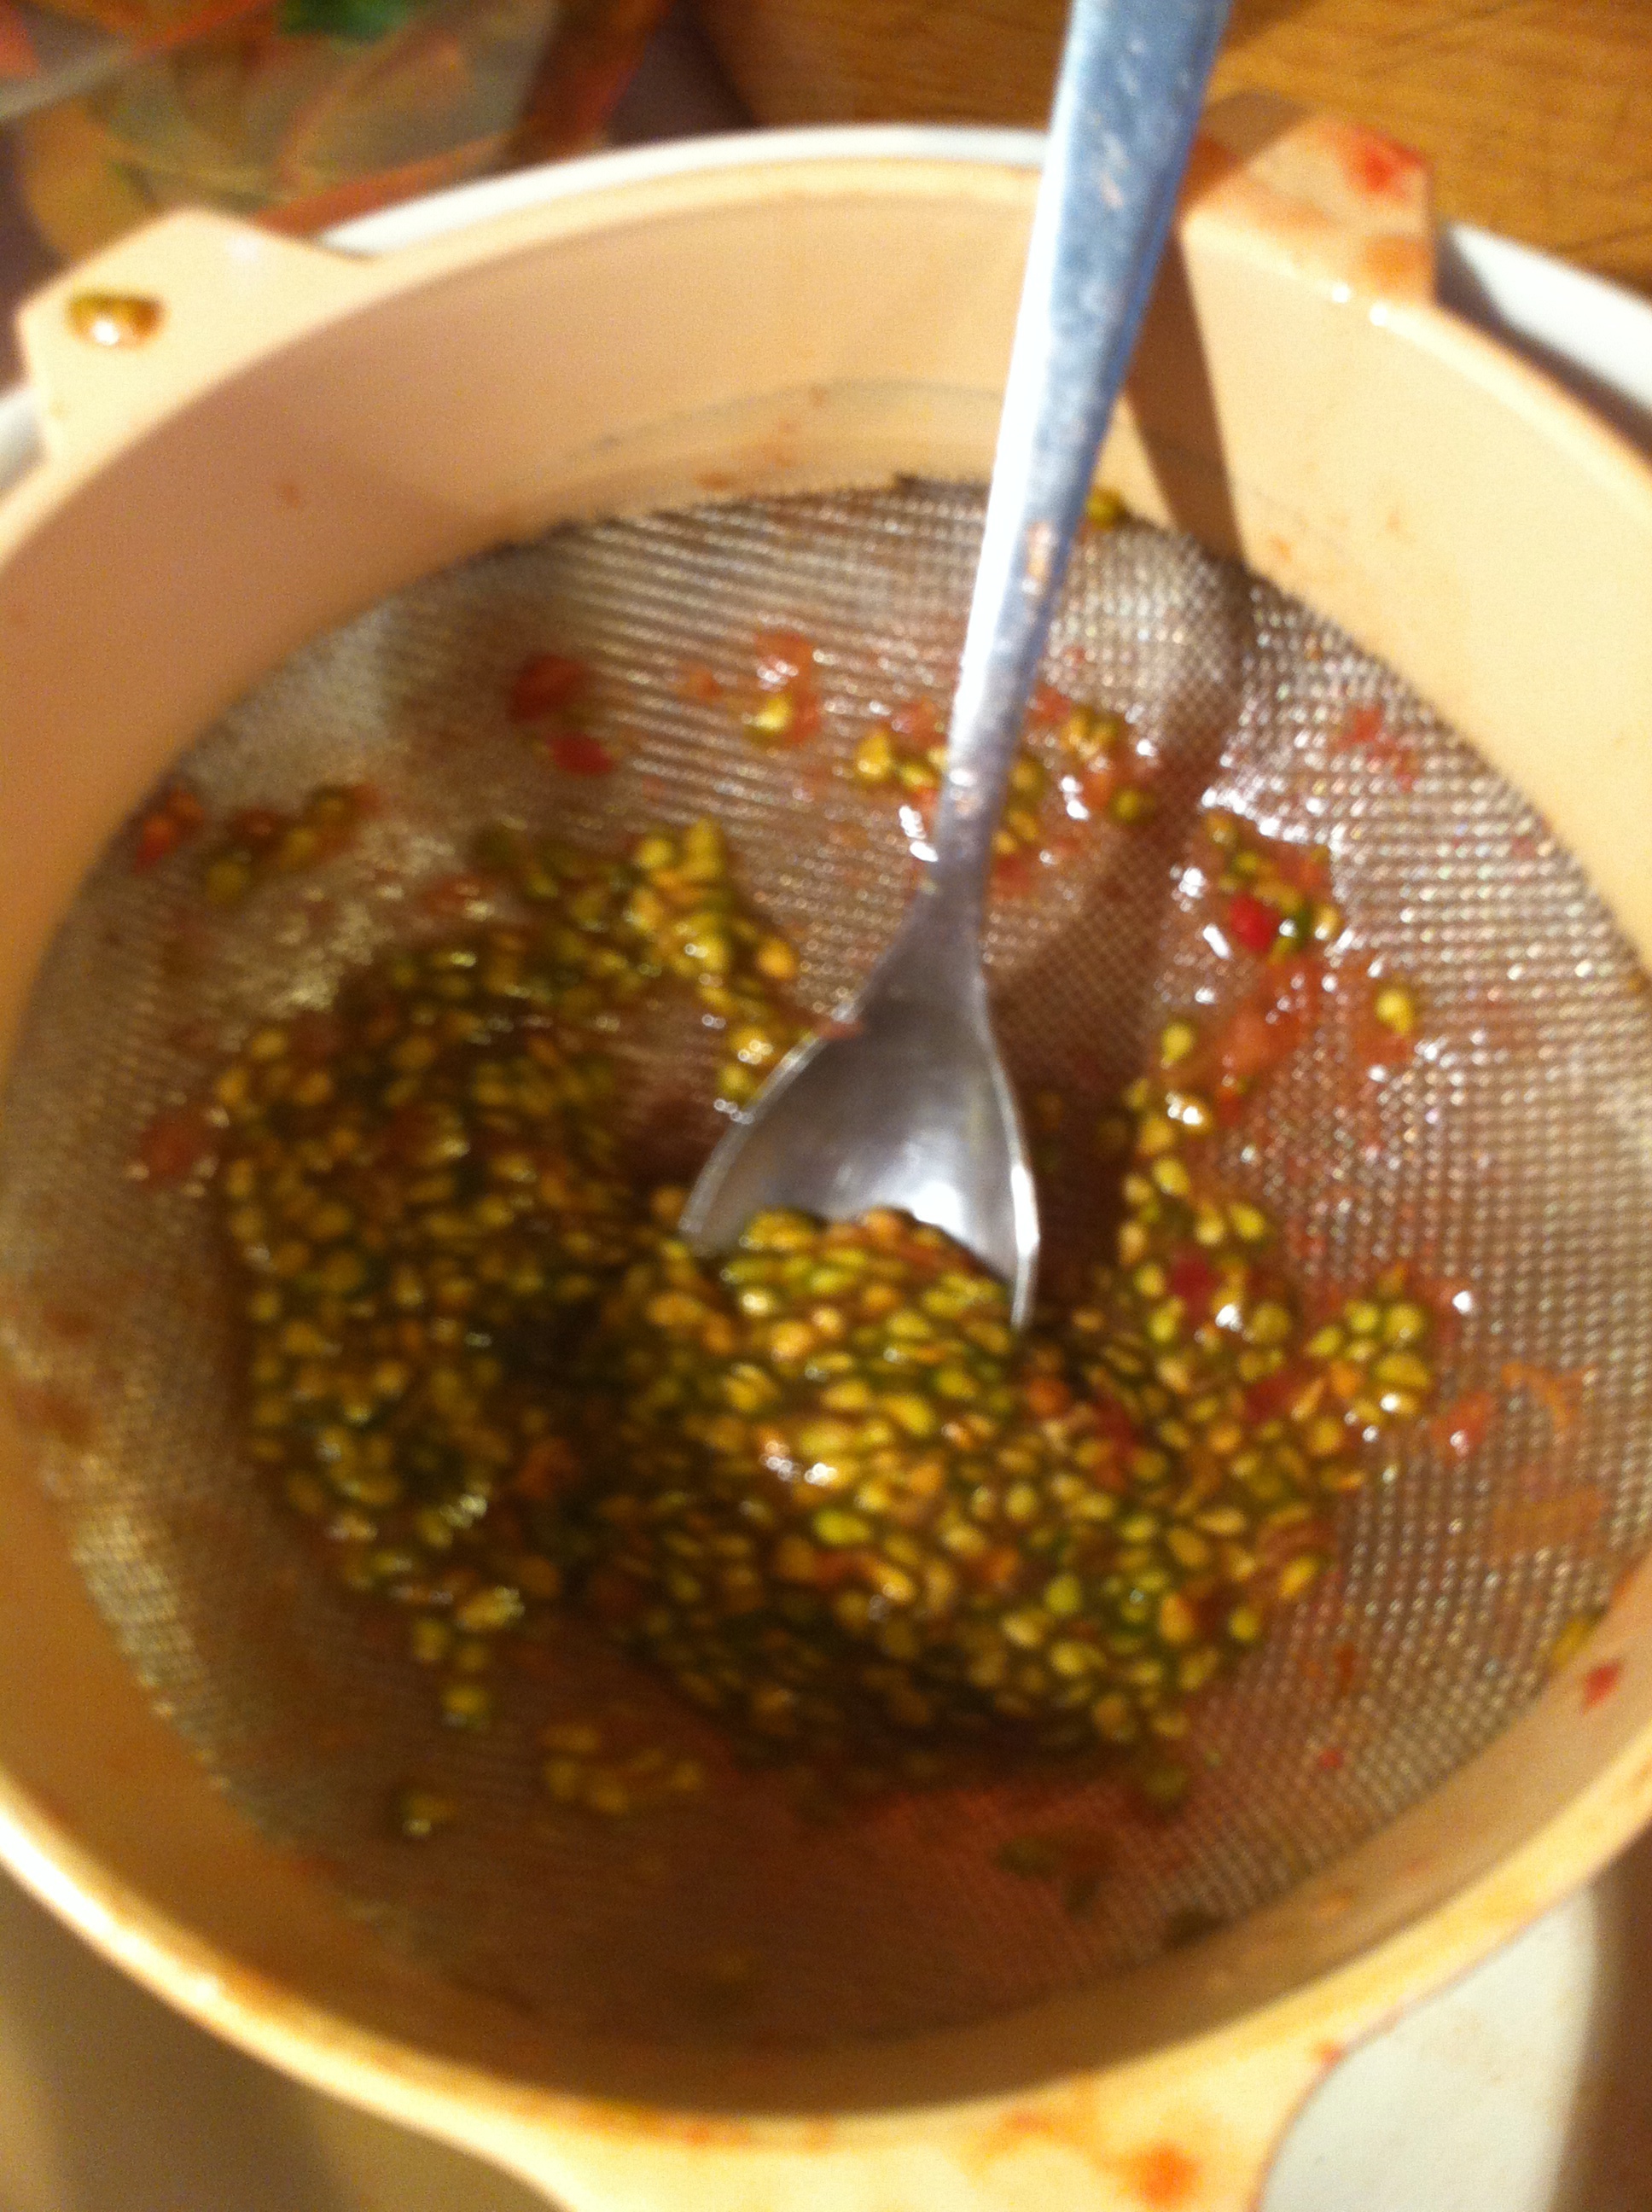
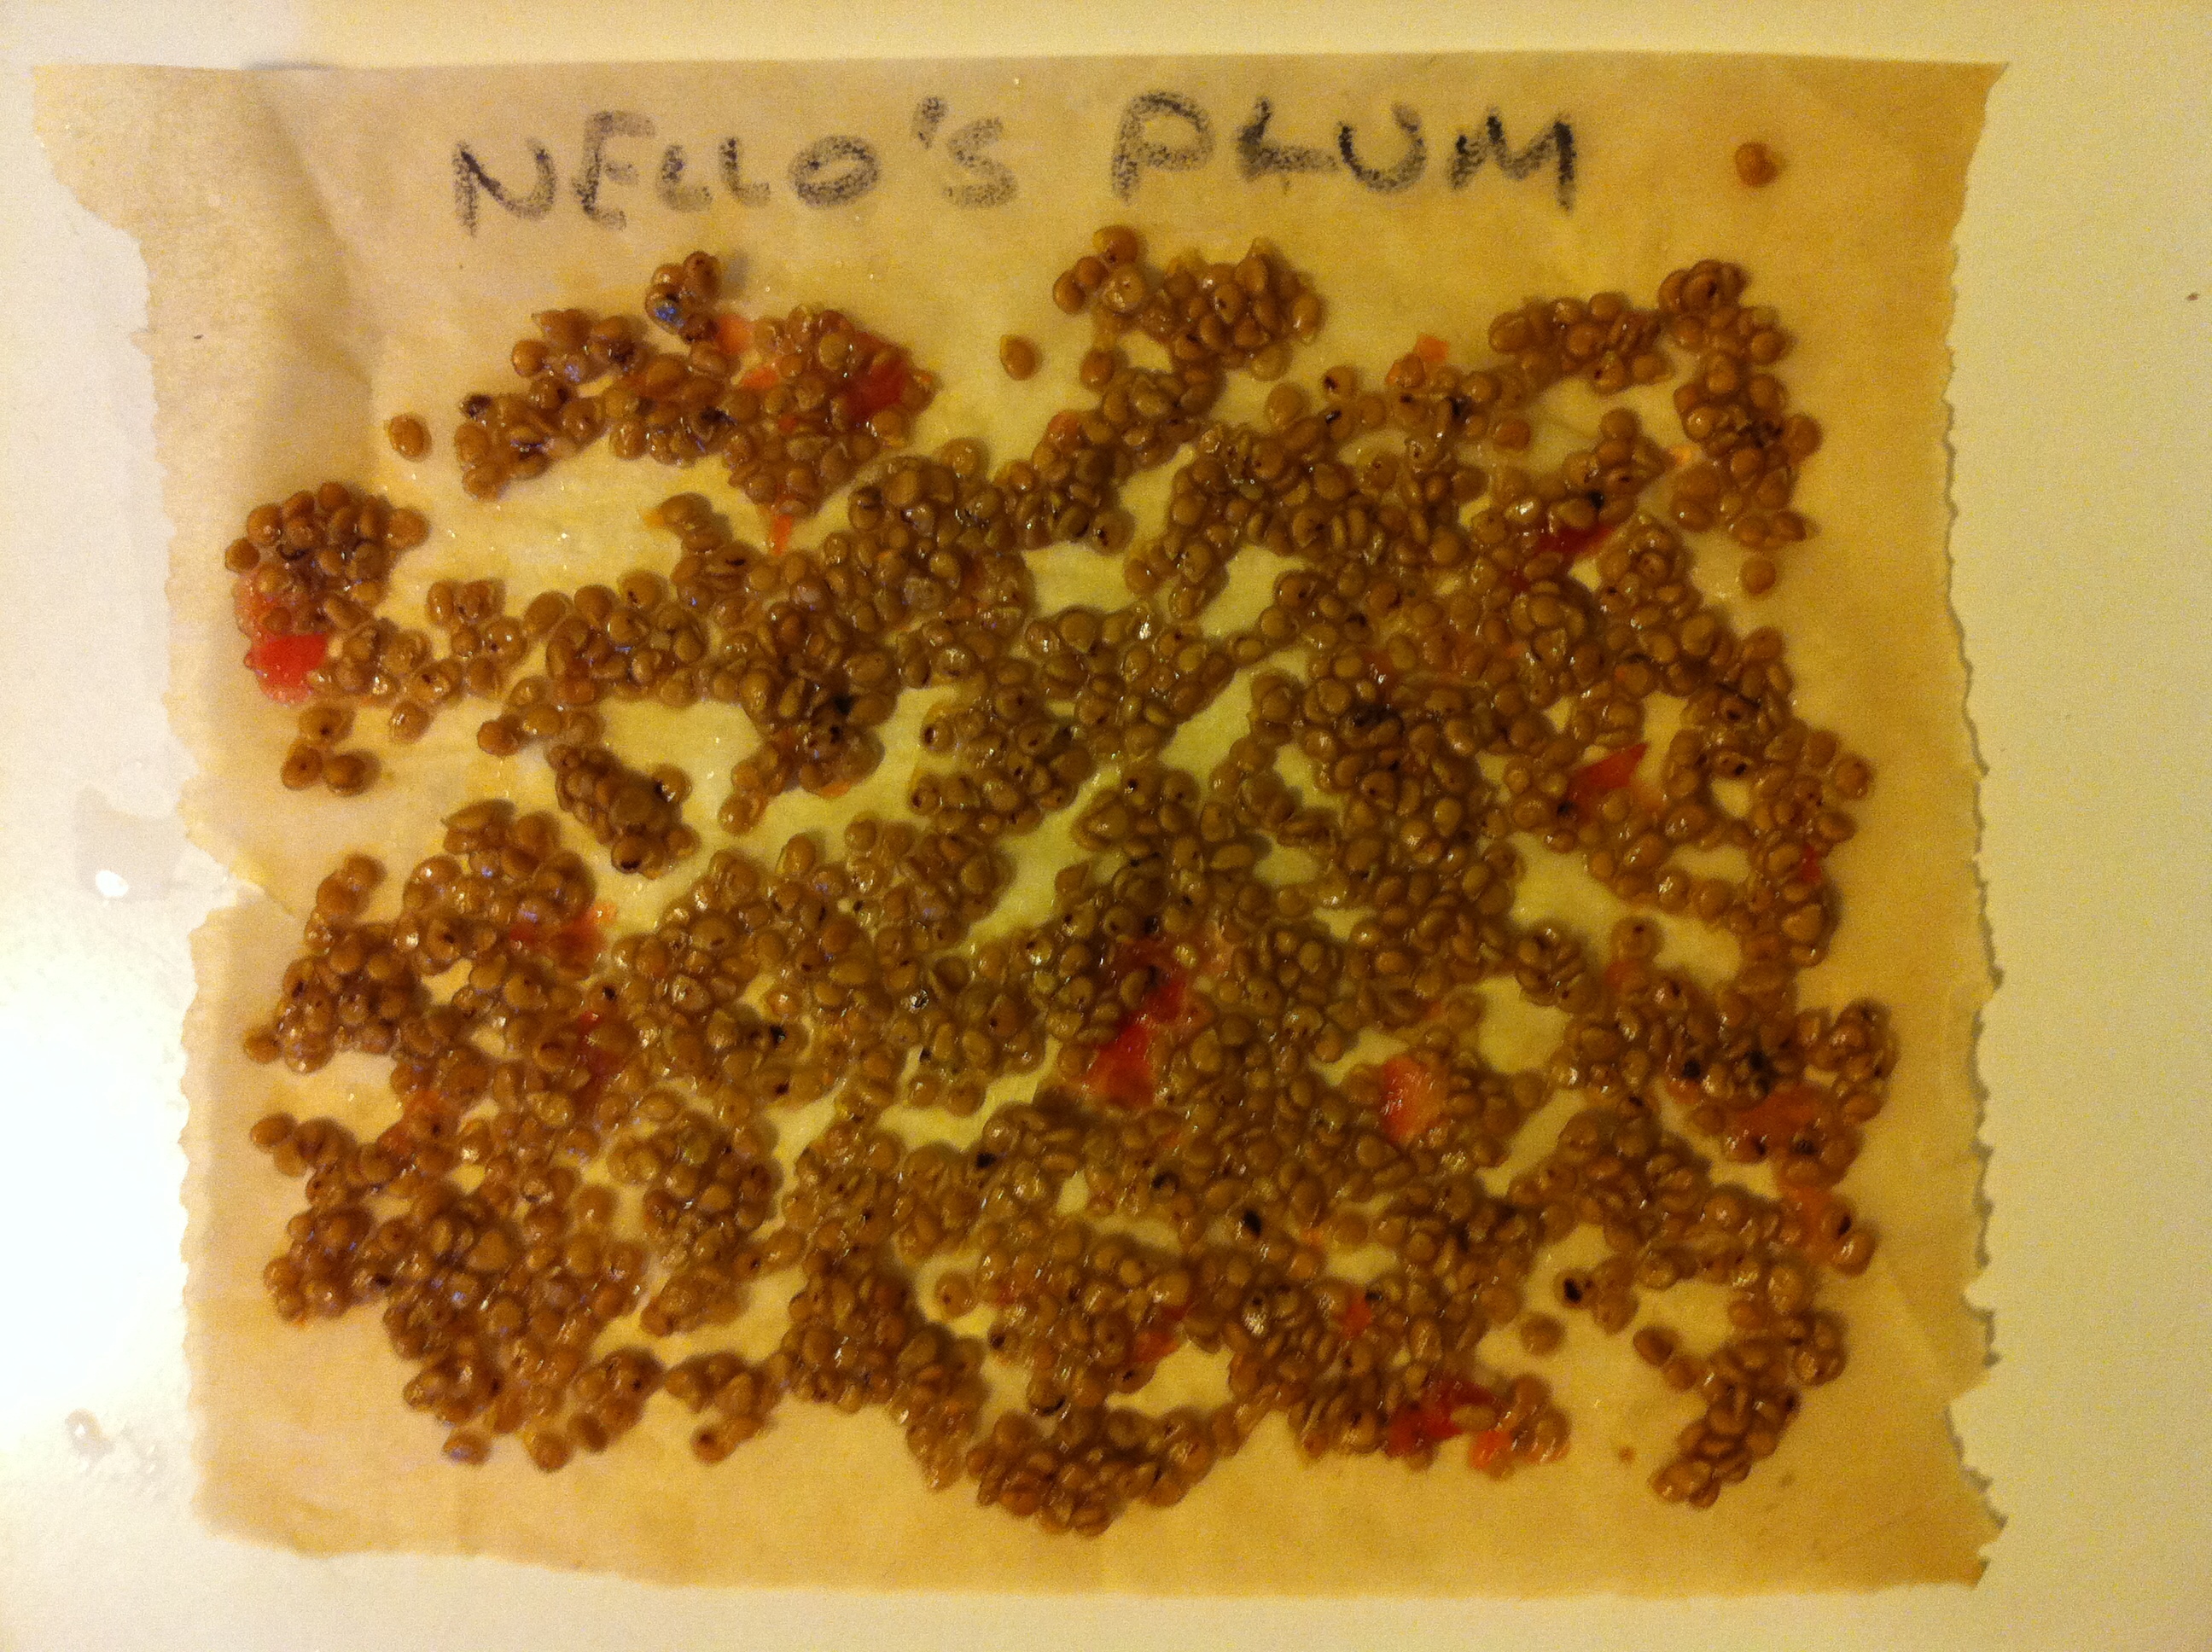
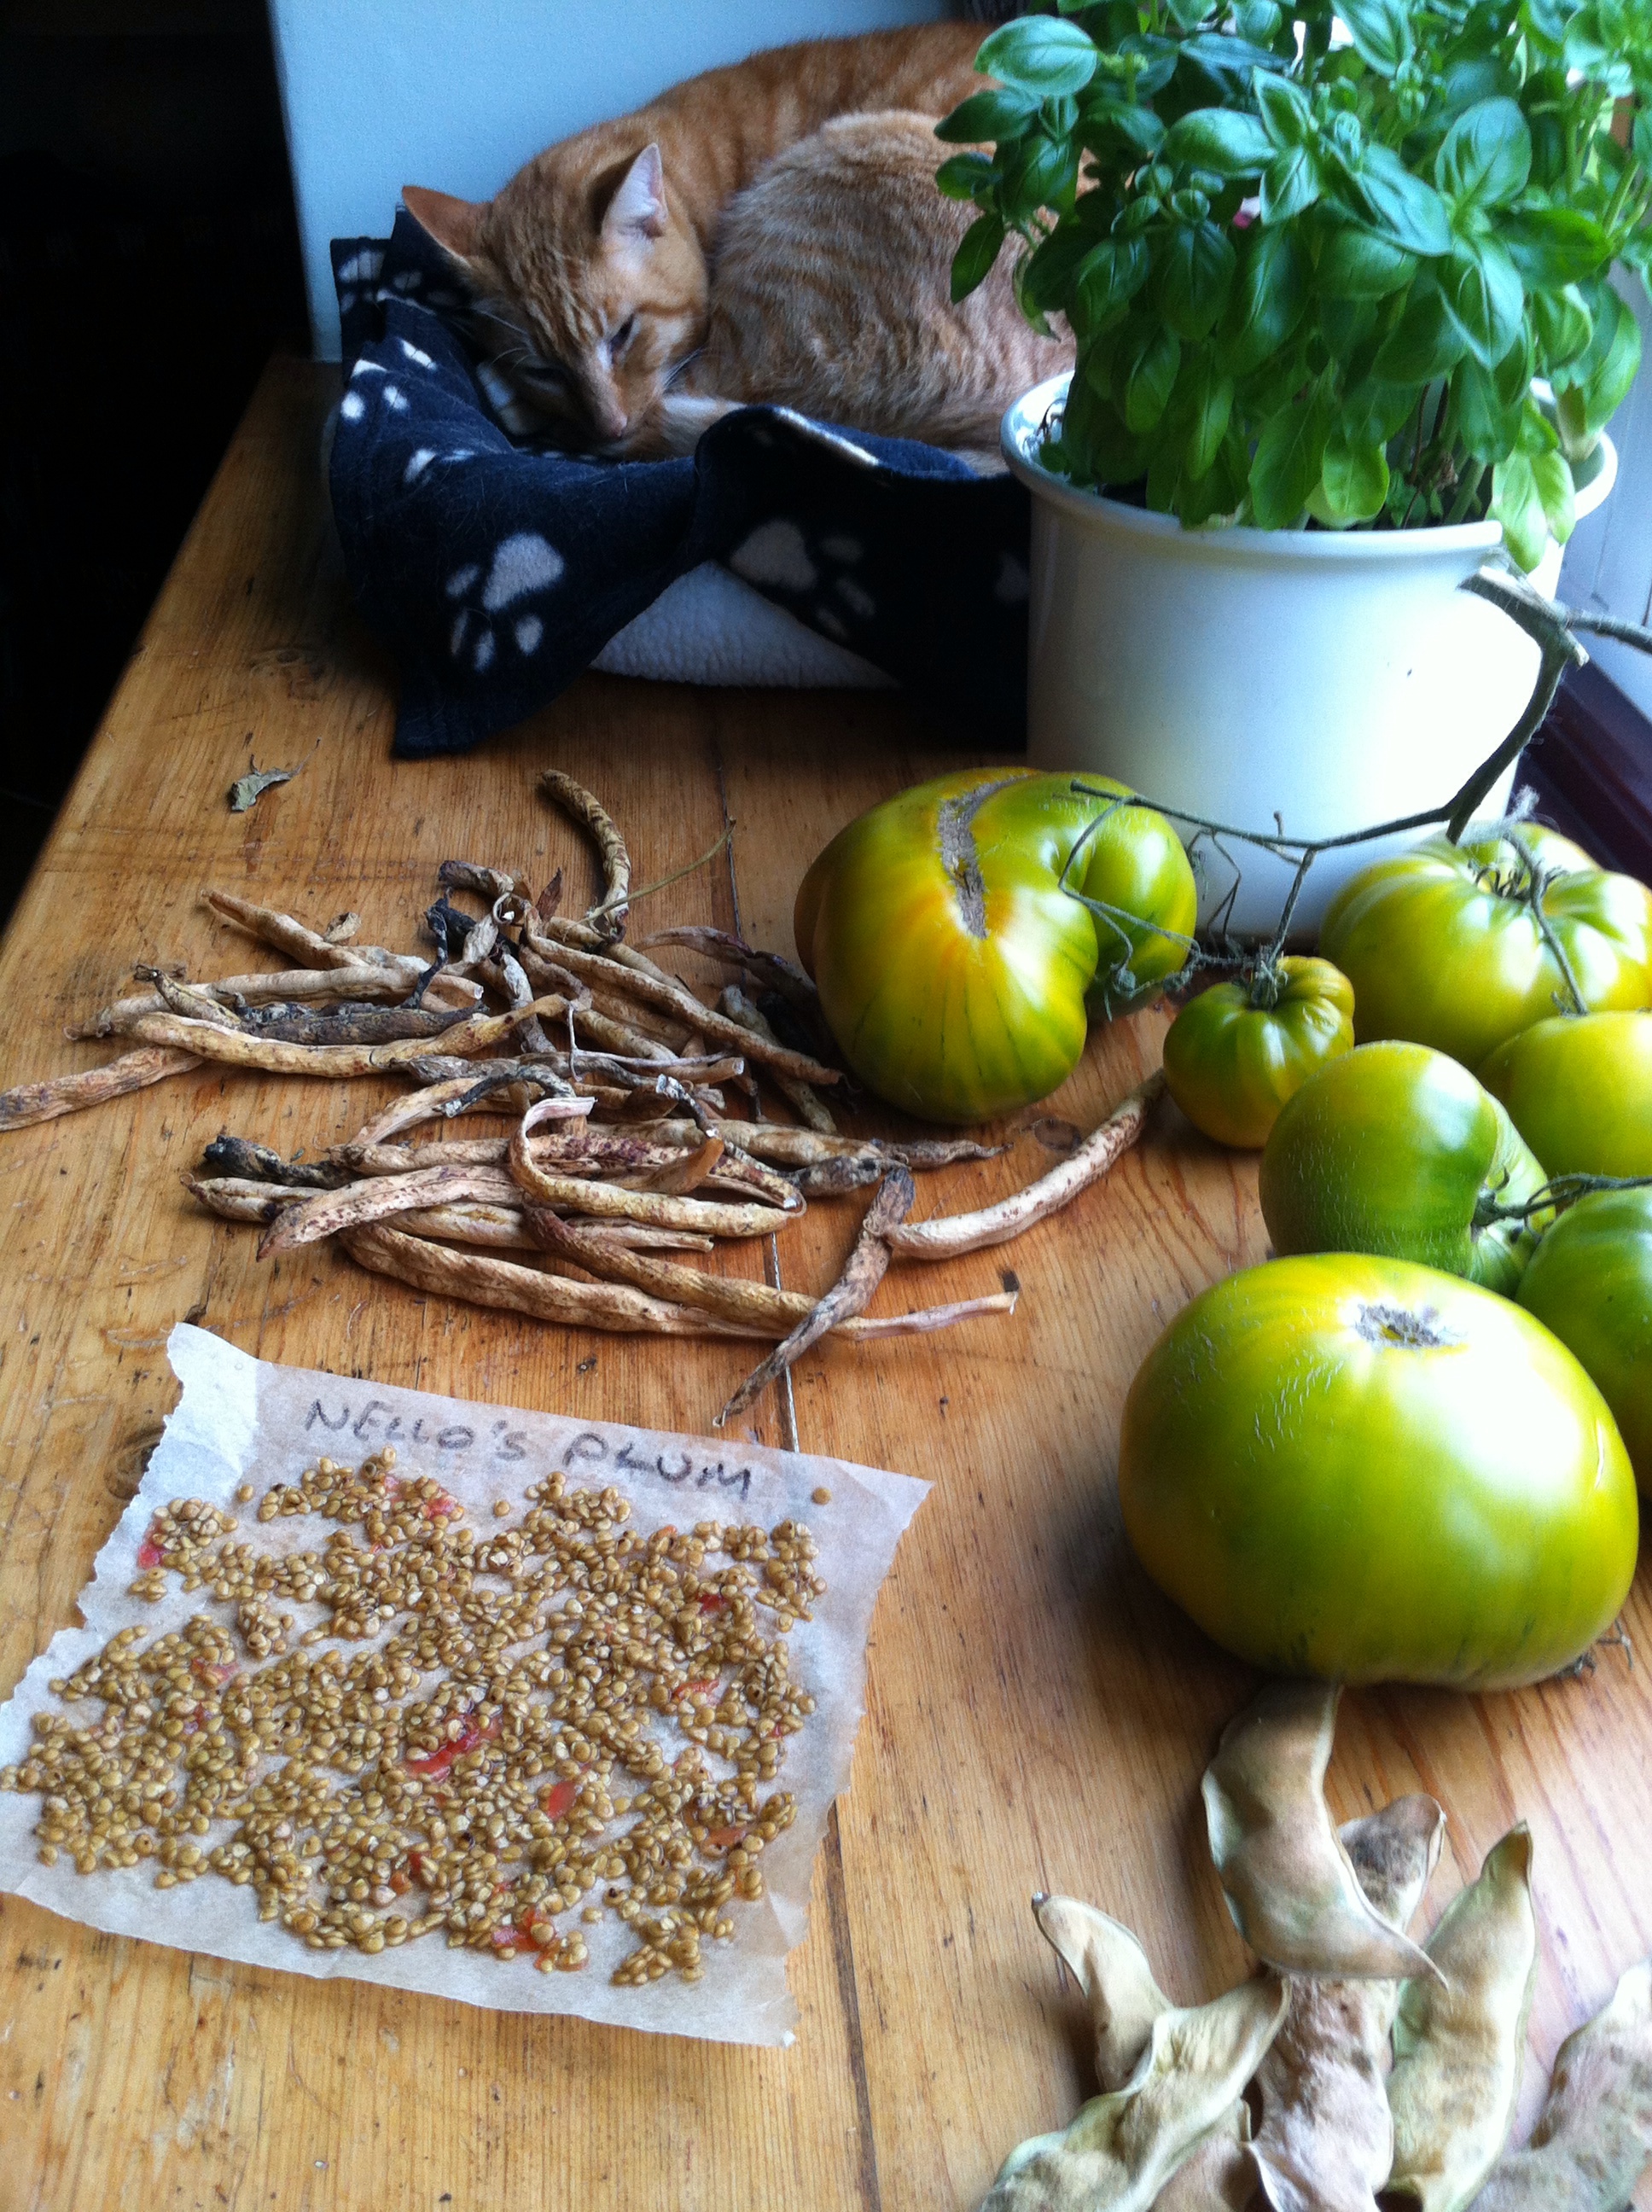
The other day I met a lovely local horticulturist who is growing and selling vegetables just outside Abergavenny. Claudia was keen to save some of her Italian heirloom tomatoes – her dad is Italian – and although I explain how to save tomato seed on the website I thought it might help to go through the process briefly with some illustrations. First harvest your ripe tomatoes and then let them ripen a little more somewhere warm and sunny. I then blanche large fruit and skin them before cutting them in half and scooping out the pulp with the seed in it. Using a spatula press as much of the pulp as you can through a fine sieve. This pulp and the skinned tomatoes can then be used for cooking or to make passata. When your seeds looks a bit like this put them into a jar filled with cold water. It is important to do this as the seeds are covered in a membrane which inhibits germination. Leaving the seeds in water for two or three days causes the membrane to ferment and break down so that when you empty the contents into a sieve and rinse thoroughly you have nice clean seeds to dry. Now spread your seeds out thinly onto grease-proof paper – not tissue paper – and put somewhere warm and dry like a window sill but not in direct sunlight. The seeds must not need to be warmed up! They will dry perfectly well at room temperature. After a day scrape the seeds around a bit to turn them over and leave to dry for at least a week.Scrape the seeds off the grease-proof paper, rub them between your fingers to separate them and when they feel completely dry put them in an airtight jar or container and keep somewhere cool – ideally a fridge – until you are ready to sow them. To get your seeds really dry so they will keep for years it is worth putting them in a container with some silica gel which changes colour when it has taken up moisture. You can also use dry rice as a means to further dry your seeds but, again, it helps to includes some silica gel as an indicator.


 Considerd by the RHS at the end of the nineteenth century as one of the top ten peas in the world, Champion of England is another stately and yummy variety. But you have to grow this one yourself if you want to savour its special qualities.
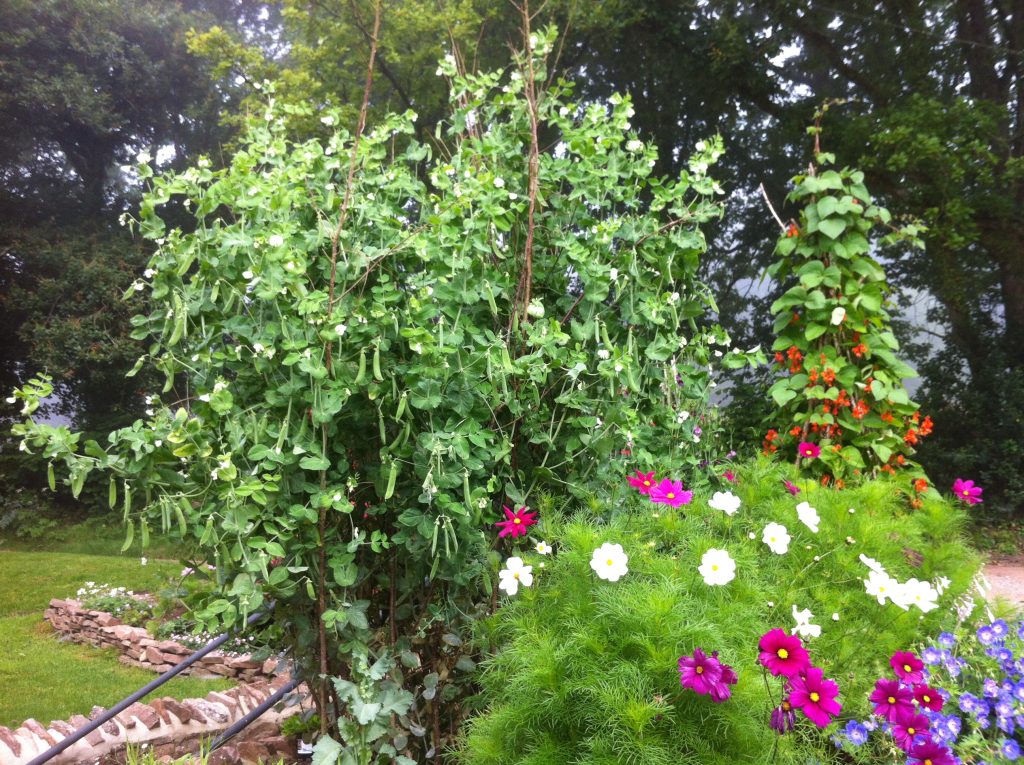


 I save seed of Latuccino and it does have a habit of self-seeding!